Webhook
Webhook Connectors Tutorial: from Webhook creation to start sending Events.
Webhooks (also called a web callback or HTTP push API) are the best way to notify third-party tools with real-time information from HrFlow.ai. The HrFlow.ai Webhooks define a callback URL where Events are delivered as they happen in HrFlow.ai.
Prerequisites
- Having an HrFlow.ai account. To signup, please visit https://hrflow.ai/signup
Step 1: Go to the Connectors Marketplace
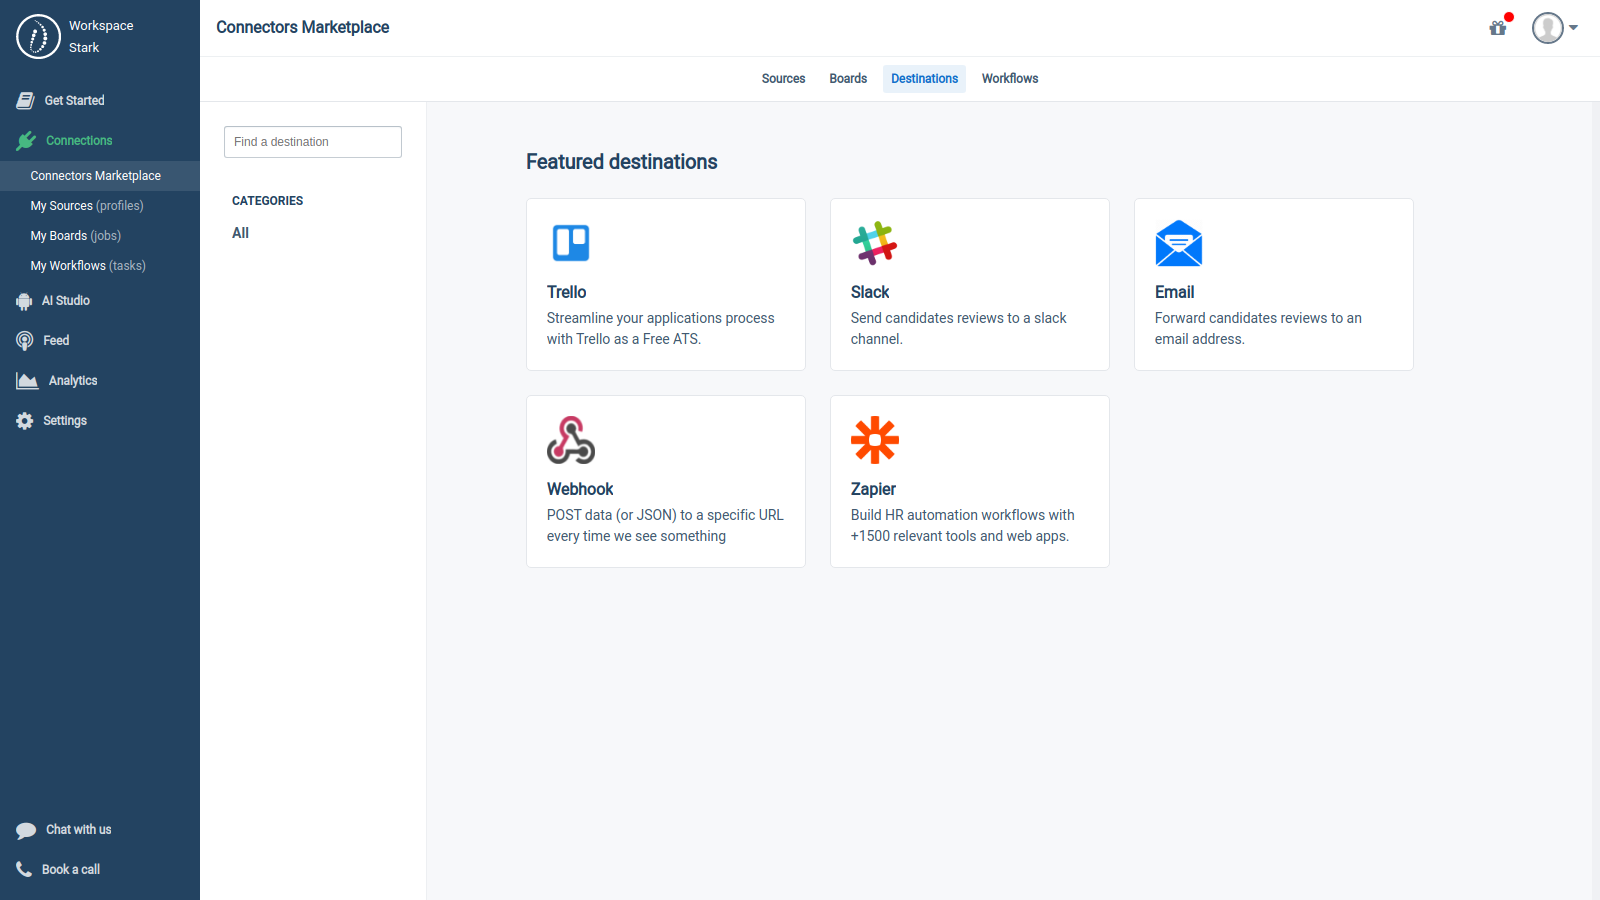
Left Sidebar > Connections > Connectors Marketplace > Destinations
Step 2: Choose Webhook
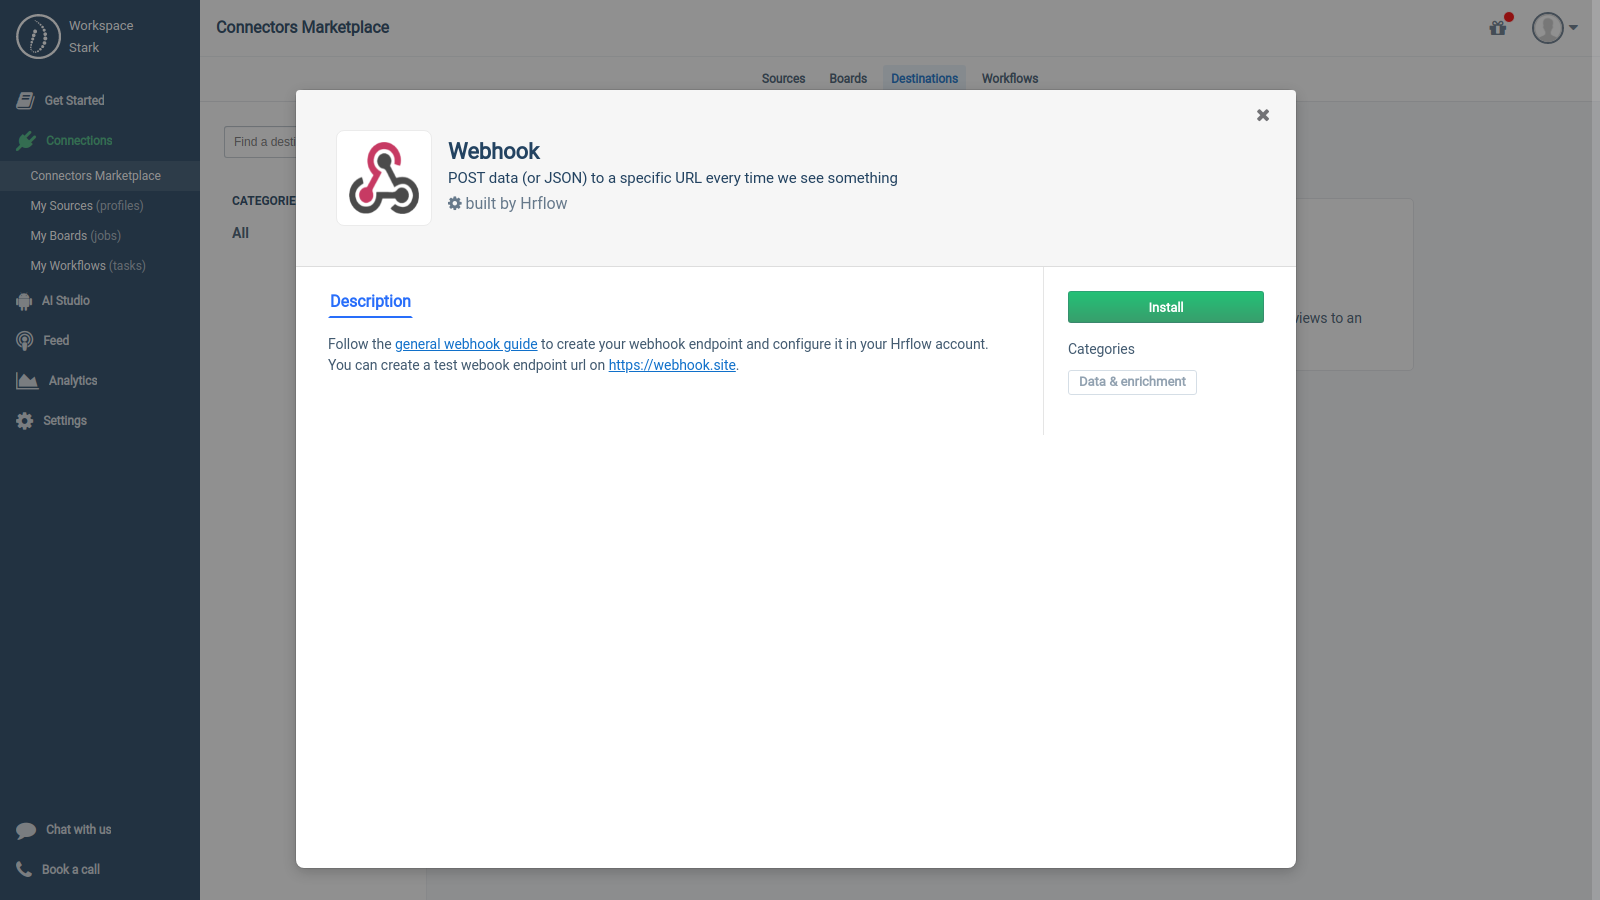
Left Sidebar > Connections > Connectors Marketplace > Destinations > Webhook
After opening the modal, click on the button «Install».
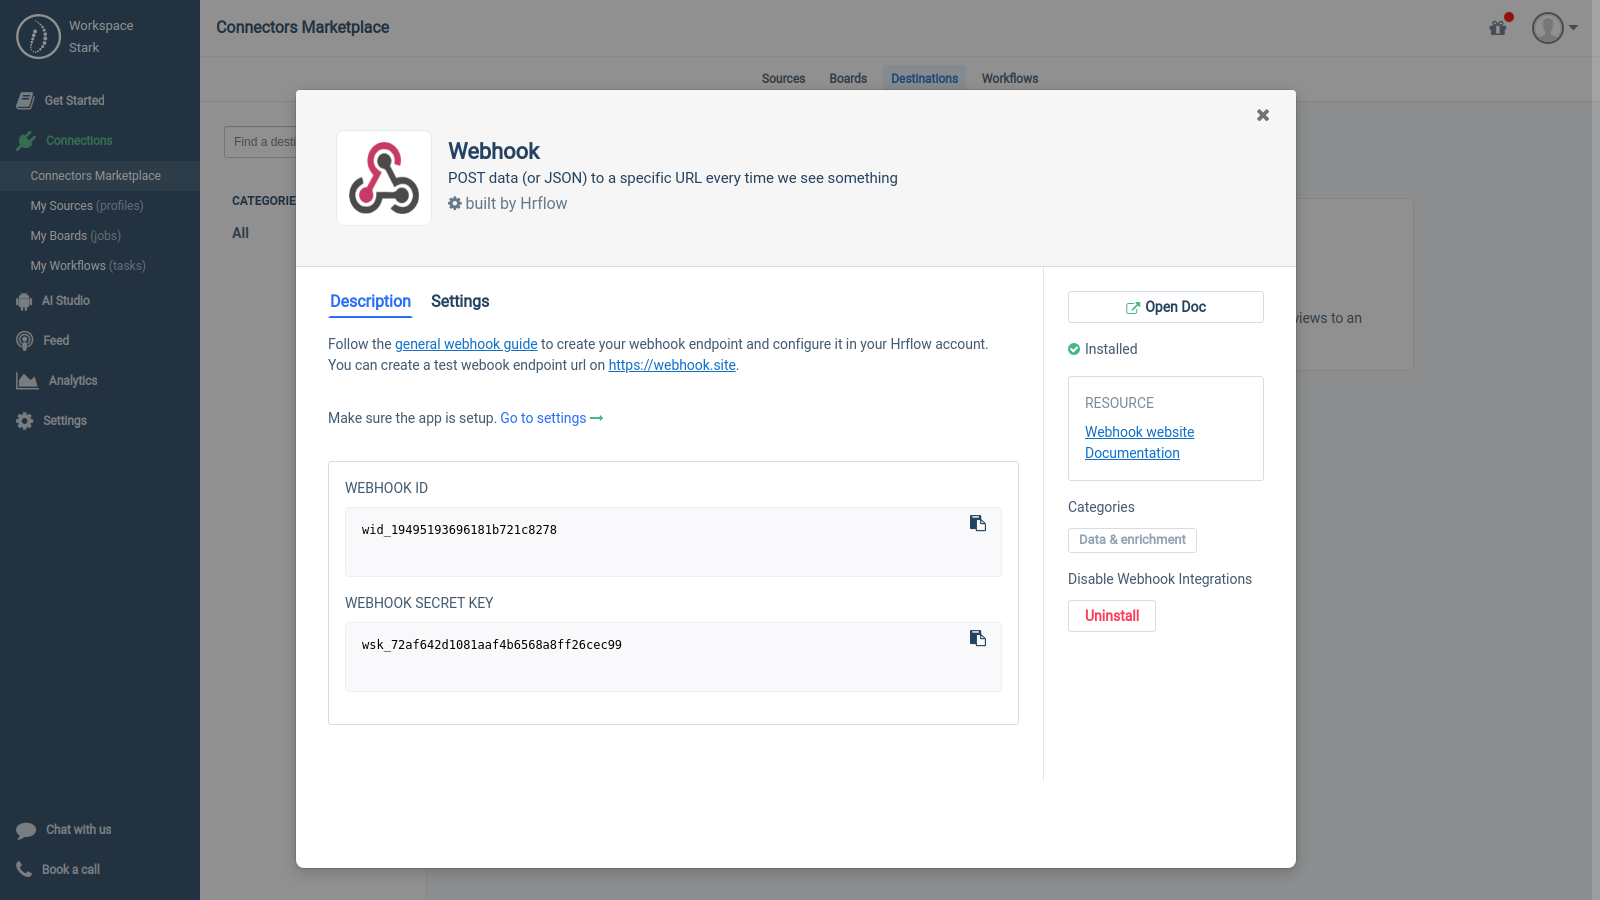
Step 3: Choose an Event Type
Webhook FormatThe webhook posts data to the URL you provided in the configuration. The body is encoded in JSON, which is indicated by the application/json content-type, with UTF-8 encoding (as stated in RFC 4627 (http://www.ietf.org/rfc/rfc4627.txt).
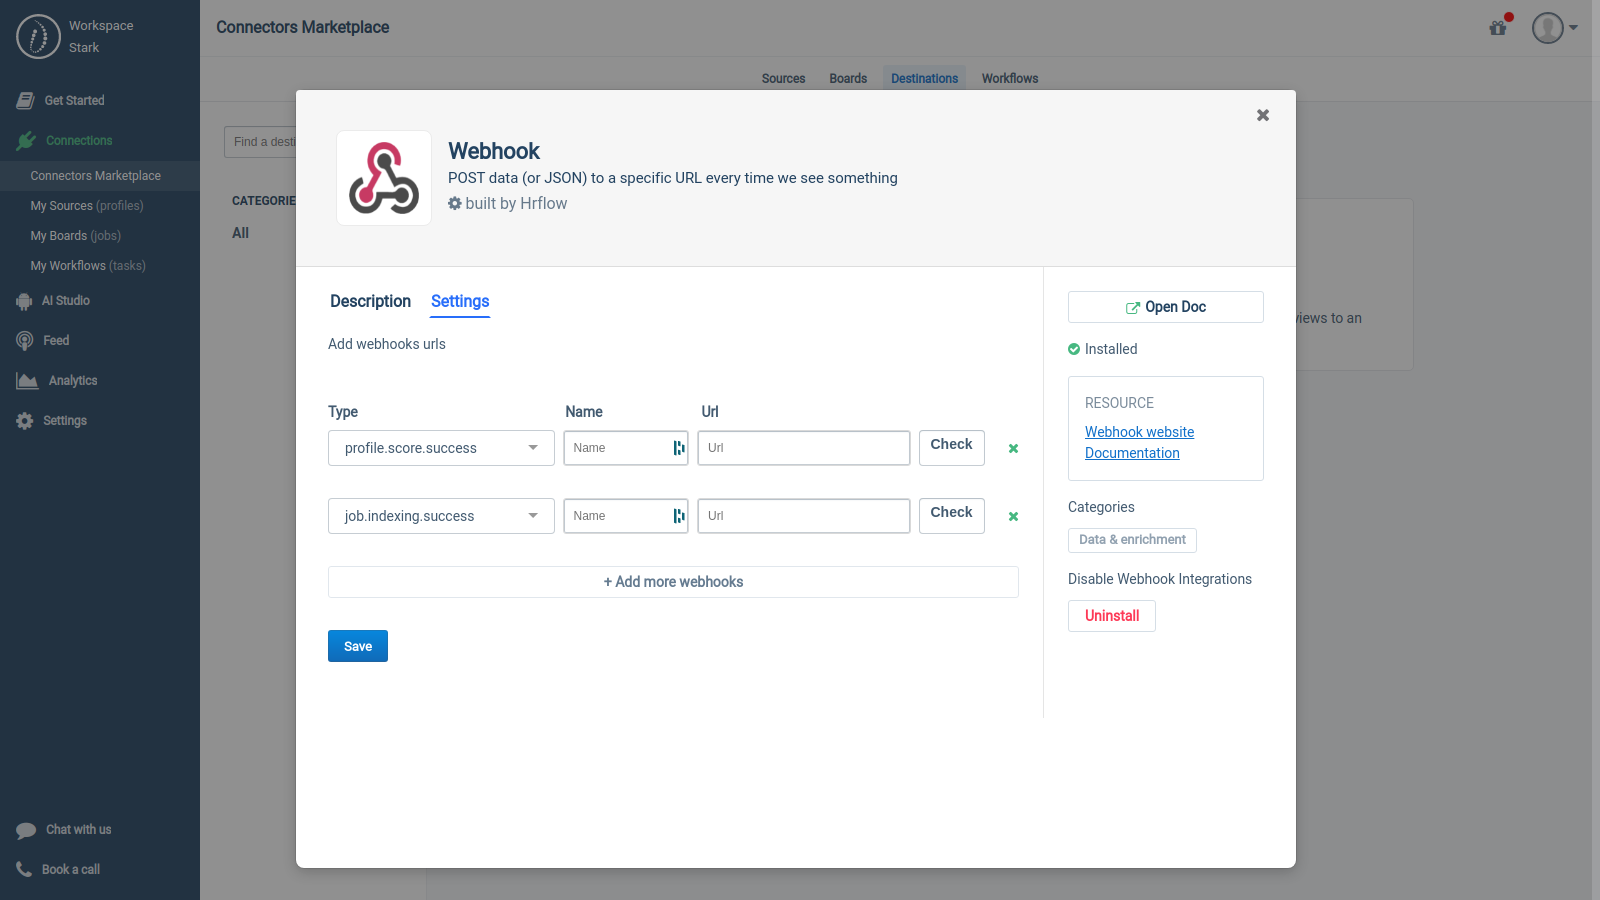
Left Sidebar > Connections > Connectors Marketplace > Destinations > Webhook > Settings
1. Profile's Events
1.1 Profile's Event Types
Event Type | Description | Volume |
|---|---|---|
profile.parsing.success | Sent when a Profile is parsed successfully for the 1st time. | High volume |
profile.parsing.update | Sent when an existing Profile is parsed again successfully. | Medium volume |
profile.parsing.error | Sent when parsing a Profile has failed and should be retried. The Profile Parsing cannot be retrieved. | Low volume |
profile.storing.success | Sent when a Profile is saved successfully for the 1st time. | High volume |
profile.storing.update | Sent when an existing Profile is updated successfully. | Medium volume |
profile.storing.error | Sent when saving a Profile has failed and should be retried. The Profile cannot be retrieved. | Low volume |
profile.searching.success | Sent when a Profile is saved successfully in the Searching API Index for the 1st time and is ready to be queried. | High volume |
profile.searching.update | Sent when an existing Profile is updated successfully in the Searching API Index and is ready to be queried. | Medium volume |
profile.searching.error | Sent when saving a Profile in the Searching API Index has failed and should be retried. The Profile cannot be queried. | Low volume |
profile.scoring.success | Sent when a Profile is saved successfully in the Scoring API Index for the 1st time and is ready to be scored. | High volume |
profile.scoring.update | Sent when an existing Profile is updated successfully in the Scoring API Index and is ready to be scored. | Medium volume |
profile.scoring.error | Sent when saving a Profile in the Scoring API Index has failed and should be retried. The Profile cannot be scored. | Low volume |
1.2 Profile's Event Payloads
{status} = success, update or error
# Headers
content-type=application/x-www-form-urlencoded

# Form values
type:profile.parsing.success
origin=api
message=profile parsing succeed
profile={"key": "d821393853fc32b08c93b8d38590817c72048ec4", "source": {"key": "d900ec70c67d43c71027f9bc63ec3b5b3e16c1d8"}}

# Raw content
type=profile.parsing.success&origin=api&message=profile+parsing+succeed&profile=%7B%22key%22%3A+%22d821393853fc32b08c93b8d38590817c72048ec4%22%2C+%22source%22%3A+%7B%22key%22%3A+%22d900ec70c67d43c71027f9bc63ec3b5b3e16c1d8%22%7D%7D
# Headers
content-type=application/x-www-form-urlencoded
# Form values
type:profile.storing.success
origin=api
message=profile storing succeed
profile={"key": "d821393853fc32b08c93b8d38590817c72048ec4", "source": {"key": "d900ec70c67d43c71027f9bc63ec3b5b3e16c1d8"}}
# Raw content
type=profile.storing.success&origin=api&message=profile+storing+succeed&profile=%7B%22key%22%3A+%22d821393853fc32b08c93b8d38590817c72048ec4%22%2C+%22source%22%3A+%7B%22key%22%3A+%22d900ec70c67d43c71027f9bc63ec3b5b3e16c1d8%22%7D%7D# Headers
content-type=application/x-www-form-urlencoded
# Form values
type:profile.searching.success
origin=api
message=profile searching succeed
profile={"key": "d821393853fc32b08c93b8d38590817c72048ec4", "source": {"key": "d900ec70c67d43c71027f9bc63ec3b5b3e16c1d8"}}
# Raw content
type=profile.searching.success&origin=api&message=profile+searching+succeed&profile=%7B%22key%22%3A+%22d821393853fc32b08c93b8d38590817c72048ec4%22%2C+%22source%22%3A+%7B%22key%22%3A+%22d900ec70c67d43c71027f9bc63ec3b5b3e16c1d8%22%7D%7D# Headers
content-type=application/x-www-form-urlencoded
# Form values
type:profile.scoring.success
origin=api
message=profile scoring succeed
profile={"key": "d821393853fc32b08c93b8d38590817c72048ec4", "source": {"key": "d900ec70c67d43c71027f9bc63ec3b5b3e16c1d8"}}
# Raw content
type=profile.scoring.success&origin=api&message=profile+scoring+succeed&profile=%7B%22key%22%3A+%22d821393853fc32b08c93b8d38590817c72048ec4%22%2C+%22source%22%3A+%7B%22key%22%3A+%22d900ec70c67d43c71027f9bc63ec3b5b3e16c1d8%22%7D%7D2.1 Job's Event Types
Event Type | Description | Volume |
|---|---|---|
job.storing.success | Sent when a Job is saved successfully for the 1st time. | High volume |
job.storing.update | Sent when an existing Job is updated successfully. | High volume |
job.storing.error | Sent when saving a Job has failed and should be retried. The Job cannot be retrieved. | Low volume |
job.searching.success | Sent when a Job is saved successfully in the Searching API Index for the 1st time and is ready to be queried. | High volume |
job.searching.update | Sent when an existing Job is updated successfully in the Searching API Index and is ready to be queried. | High volume |
job.searching.error | Sent when saving a Job in the Searching API Index has failed and should be retried. The Job cannot be queried. | Low volume |
job.scoring.success | Sent when a Job is saved successfully in the Scoring API Index for the 1st time and is ready to be scored. | High volume |
job.scoring.update | Sent when an existing Job is updated successfully in the Scoring API Index and is ready to be scored. | High volume |
job.scoring.error | Sent when saving a Job in the Scoring API Index has failed and should be retried. The Job cannot be scored. | Low volume |
2.2 Job's Event Payloads
{status} = success, update or error
# Headers
content-type=application/x-www-form-urlencoded

# Form values
type:job.parsing.success
origin=api
message=job parsing succeed
job={"key": "d821393853fc32b08c93b8d38590817c72048ec4", "board": {"key": "d900ec70c67d43c71027f9bc63ec3b5b3e16c1d8"}}

# Raw content
type=job.parsing.success&origin=api&message=job+parsing+succeed&job=%7B%22key%22%3A+%22d821393853fc32b08c93b8d38590817c72048ec4%22%2C+%22source%22%3A+%7B%22key%22%3A+%22d900ec70c67d43c71027f9bc63ec3b5b3e16c1d8%22%7D%7D
# Headers
content-type=application/x-www-form-urlencoded
# Form values
type:job.storing.success
origin=api
message=job storing succeed
job={"key": "d821393853fc32b08c93b8d38590817c72048ec4", "board": {"key": "d900ec70c67d43c71027f9bc63ec3b5b3e16c1d8"}}
# Raw content
type=job.storing.success&origin=api&message=job+storing+succeed&job=%7B%22key%22%3A+%22d821393853fc32b08c93b8d38590817c72048ec4%22%2C+%22source%22%3A+%7B%22key%22%3A+%22d900ec70c67d43c71027f9bc63ec3b5b3e16c1d8%22%7D%7D# Headers
content-type=application/x-www-form-urlencoded
# Form values
type:job.searching.success
origin=api
message=job searching succeed
job={"key": "d821393853fc32b08c93b8d38590817c72048ec4", "board": {"key": "d900ec70c67d43c71027f9bc63ec3b5b3e16c1d8"}}
# Raw content
type=job.searching.success&origin=api&message=job+searching+succeed&job=%7B%22key%22%3A+%22d821393853fc32b08c93b8d38590817c72048ec4%22%2C+%22source%22%3A+%7B%22key%22%3A+%22d900ec70c67d43c71027f9bc63ec3b5b3e16c1d8%22%7D%7D# Headers
content-type=application/x-www-form-urlencoded
# Form values
type:job.scoring.success
origin=api
message=job scoring succeed
job={"key": "d821393853fc32b08c93b8d38590817c72048ec4", "board": {"key": "d900ec70c67d43c71027f9bc63ec3b5b3e16c1d8"}}
# Raw content
type=job.scoring.success&origin=api&message=job+scoring+succeed&job=%7B%22key%22%3A+%22d821393853fc32b08c93b8d38590817c72048ec4%22%2C+%22source%22%3A+%7B%22key%22%3A+%22d900ec70c67d43c71027f9bc63ec3b5b3e16c1d8%22%7D%7Dsucceed
Step 3: Specify an Callback URL
For this tutorial, let's create a fake Webhook URL on an online website (such as RequestCatcher or Webhook dot site) and then send an Event of the type profile.parsing.success.
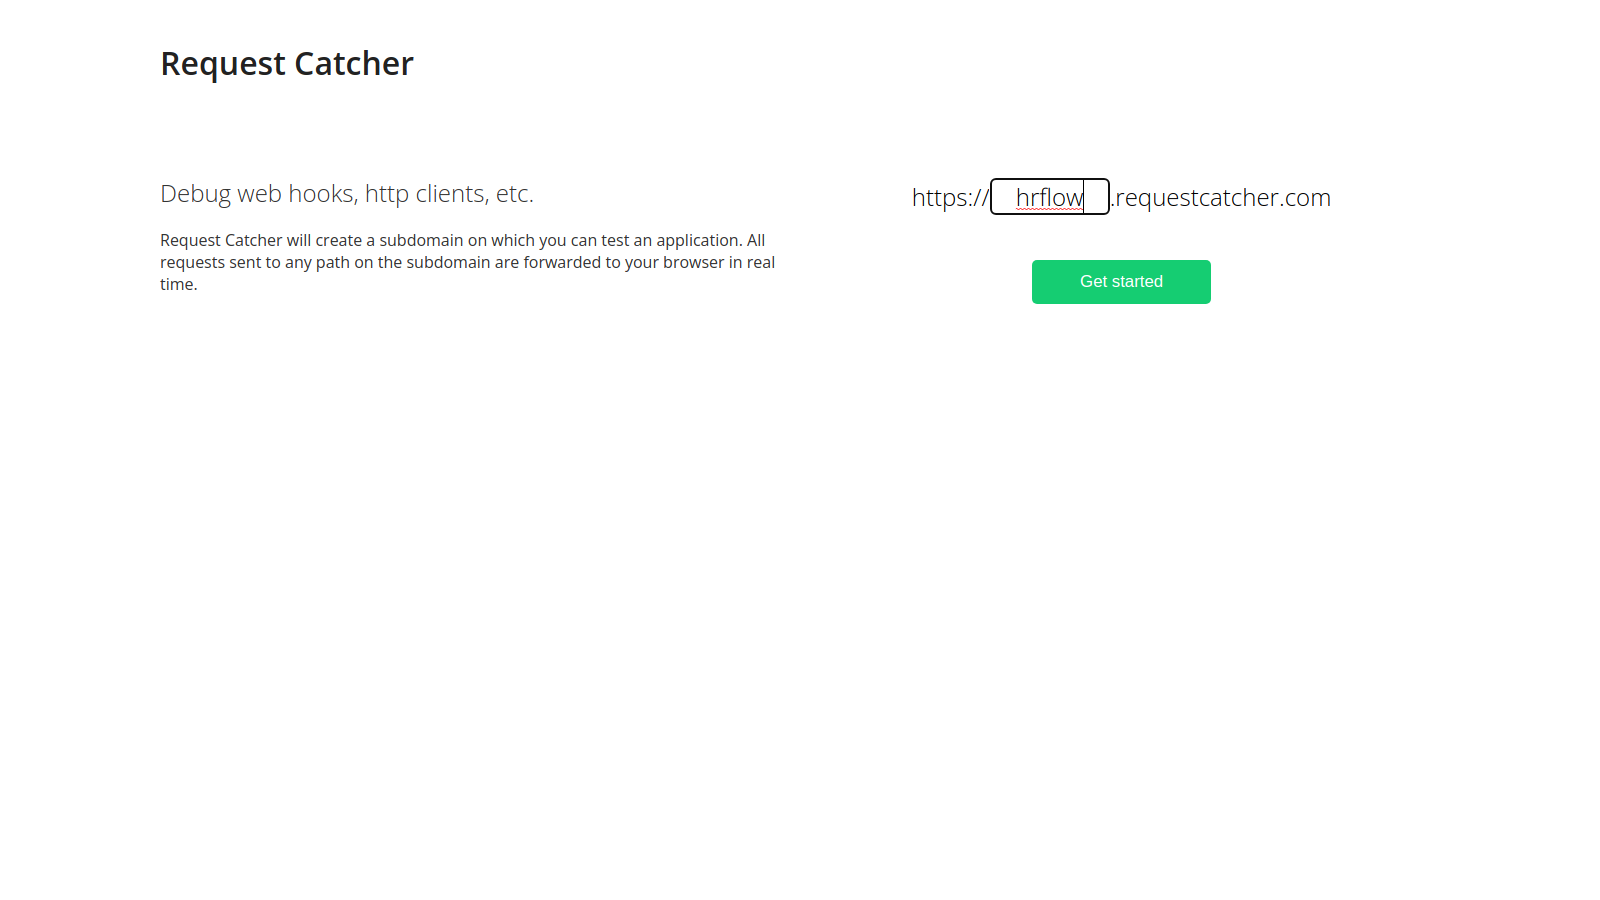
Go to the website RequestCatcher dot com and create a fake Webhook URL
The Webhook URL is ready to receive requests.
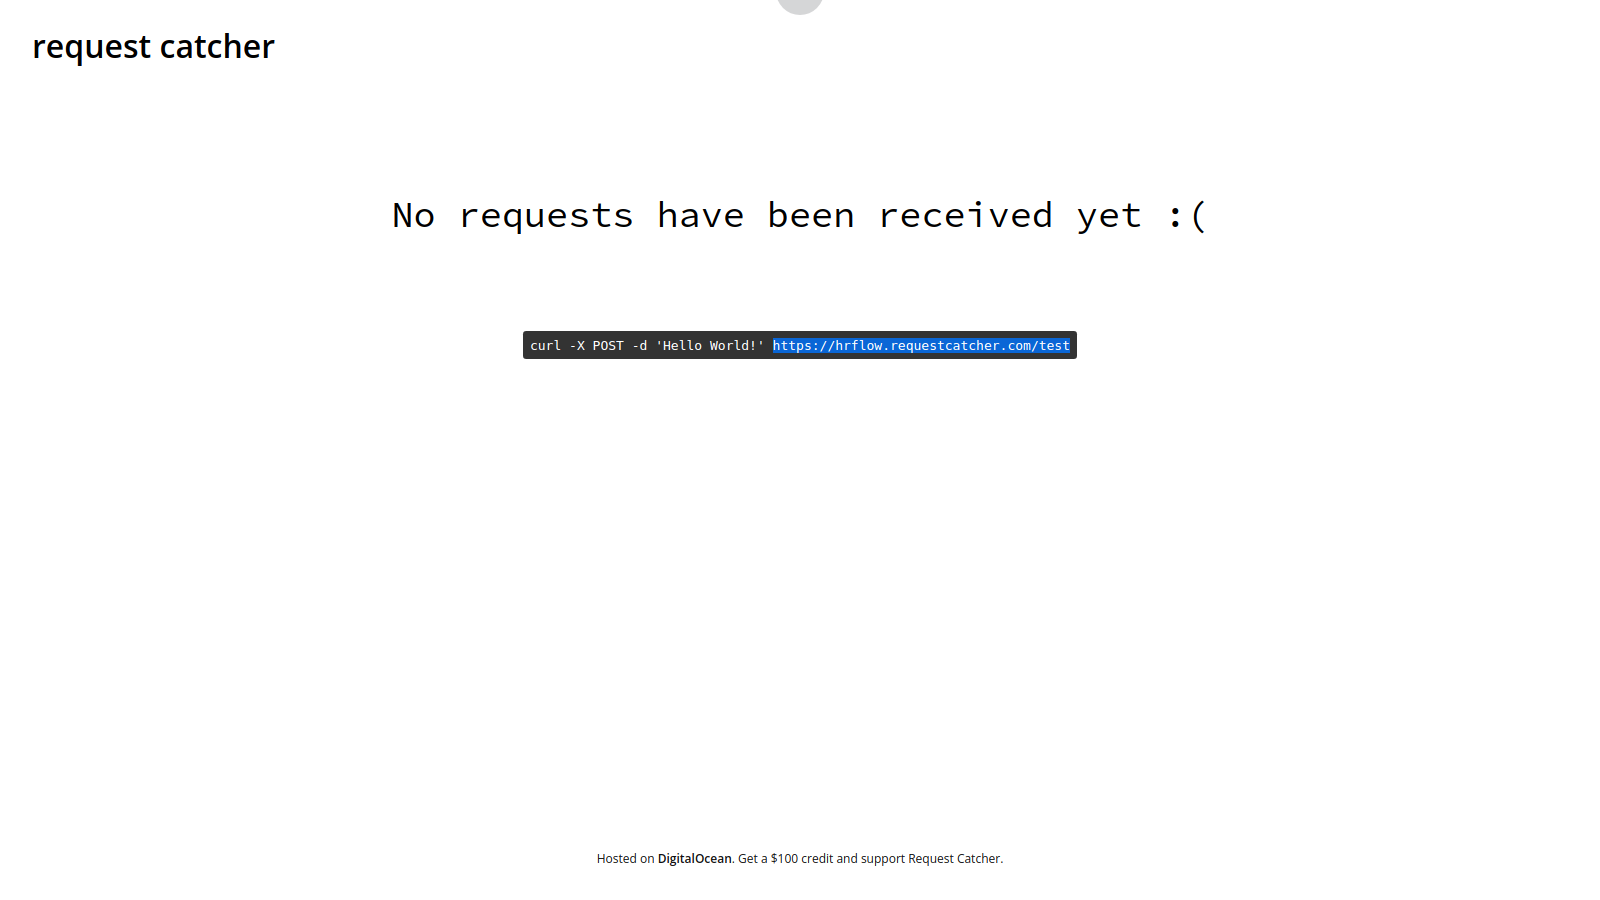
Webhook URL
Now let us:
- Pick the Event of the type
profile.parsing.successfrom the Dropdown (don't hesitate to try others) - Choose a recognizable Webhook name that you can easily remember, and succeedother users can easily recognize.
- Copy the Webhook URL in the Settings and click on the button «Save».
You can also simulate the webhook request by clicking on the button «Check» before saving.
You can click on the button «Add more webhooks» to send more Events.
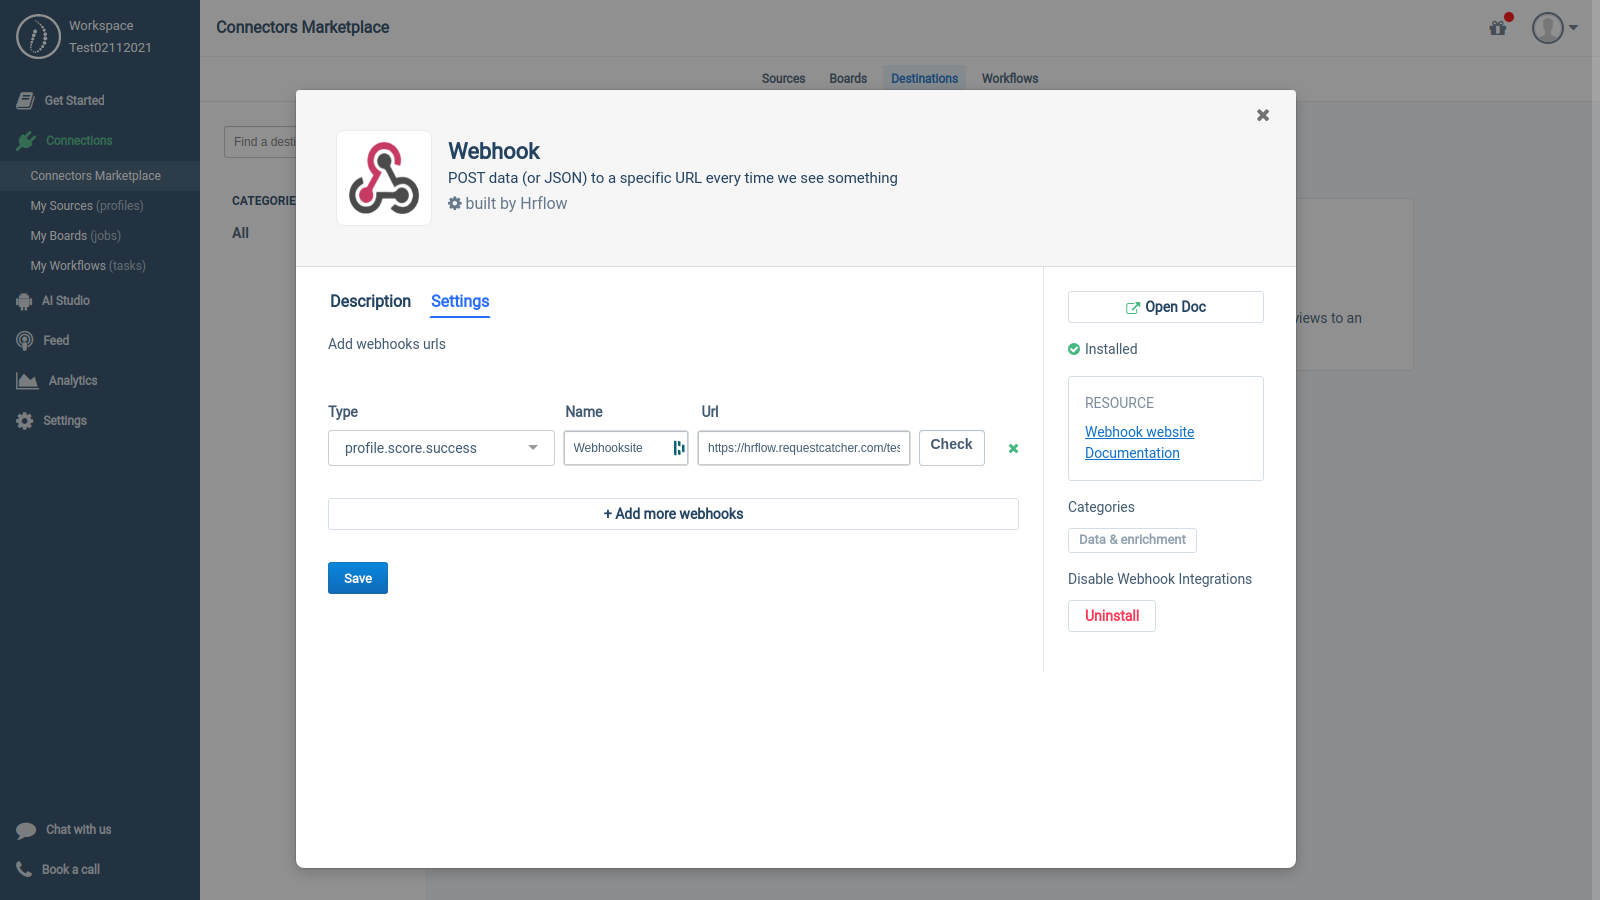
Left Sidebar > Connections > Connectors Marketplace > Destinations > Webhook > Settings
The RequestCatcher website shows you that HrFlow.ai has saved your event has successfully.
From now, Every time you save a profile in HrFlow.ai, a request will be sent to this Webhook URL.
Don't forget to delete unused Webhook Events to let your workspace clean.
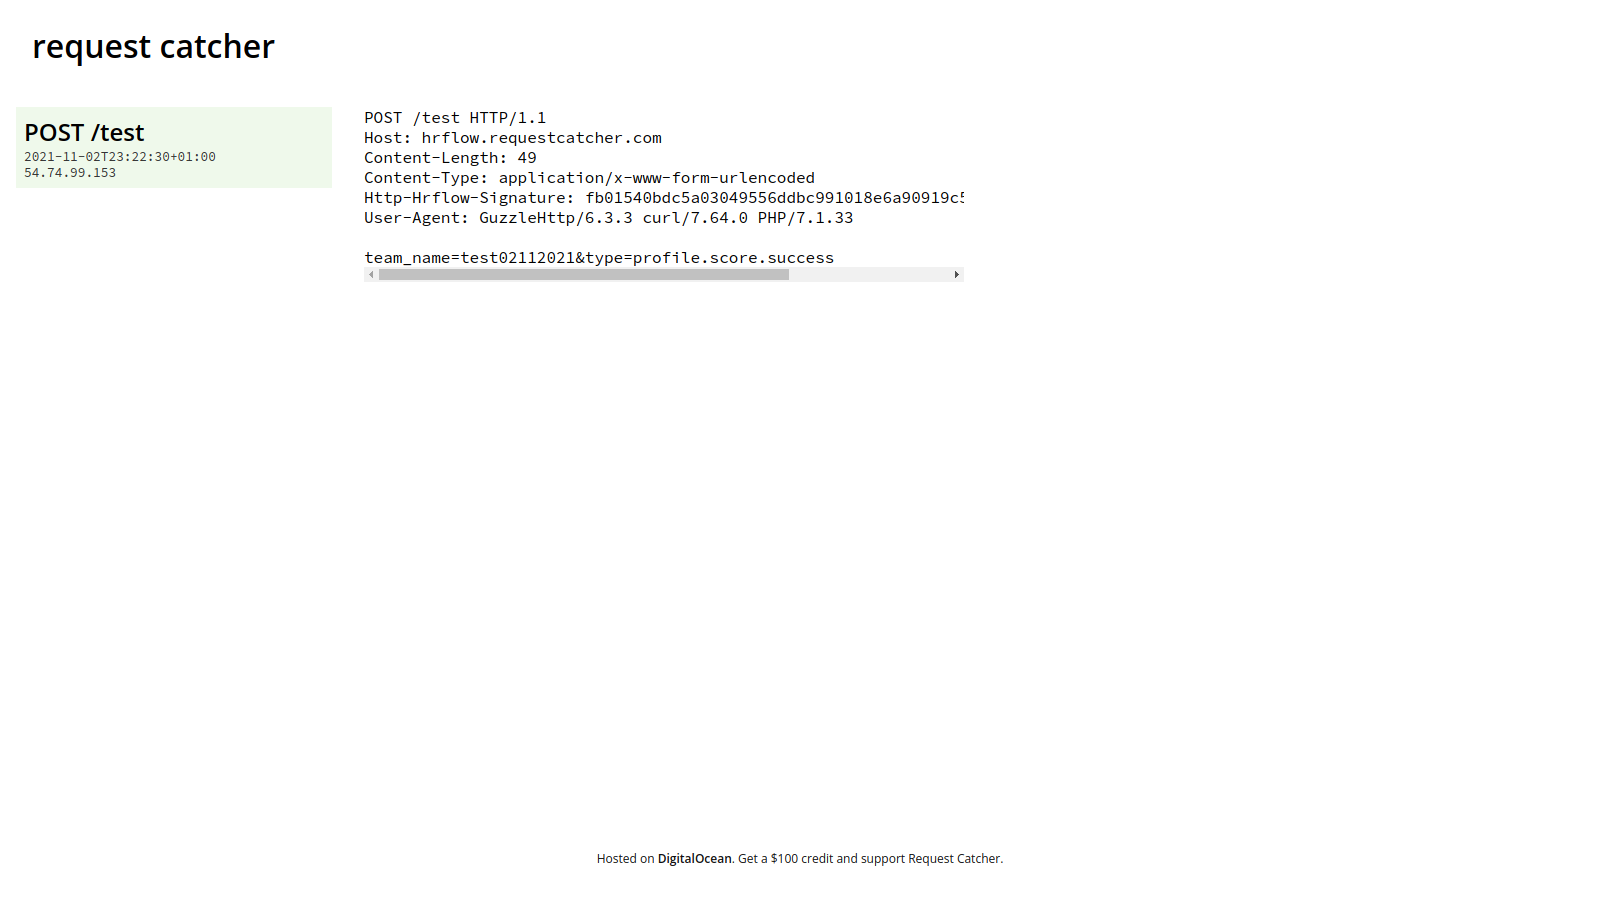
Webhook URL receiving your 1st event
Updated 8 months ago
