⚡ Introduction to Zapier ETL
Zapier is a leading no-code automation platform that connects over 6,000 apps, including Google, Salesforce, and Microsoft. It enables users to create custom workflows without coding, promoting collaboration across departments. With a secure and reliable environment, Zapier streamlines processes, making automation easy and scalable for diverse business needs.
Overview
: Where No-Code Automation Meets Seamless Workflow Integration!](https://files.readme.io/aa18557-2-1.png)
Welcome to Zapier: Where No-Code Automation Meets Seamless Workflow Integration!
Mission
Zapier's mission is to empower individuals and businesses by providing a no-code automation platform that enables seamless integration between various applications. They aim to democratize automation, making it accessible to everyone, and to enhance productivity by simplifying complex workflows.
Key Features
- No-Code Automation: Zapier allows users to create automated workflows without the need for coding skills, making it accessible to a broad audience.
- Extensive App Integration: With support for over 6,000 apps, including major players like Google, Salesforce, and Microsoft, Zapier provides a vast ecosystem for connecting and automating tasks.
- Collaboration Across Departments: Zapier facilitates collaboration by allowing users to create workflows that span across different departments, promoting a cohesive and integrated approach to tasks.
- Scalability: The platform is designed to scale with the growing needs of businesses, providing flexibility and adaptability to handle a diverse range of automation requirements.
- Secure and Reliable: Zapier ensures the security and reliability of automated processes, giving users confidence in the seamless execution of workflows.
- Ease of Use: The user-friendly interface makes it easy for individuals and teams to set up and manage automated workflows, even without extensive technical expertise.
Prerequisites
Before you begin using the Zapier app and connecting to our API, ensure you have the following:
-
API Key: Obtain your API key by following the instructions at API Authentication Documentation.
-
Email Address: Ensure you have a valid email address associated with your account.
These credentials are essential for establishing a secure and effective connection between the Zapier app and our API.
App Functionality
Our Zapier app seamlessly integrates with HrFlow.ai, providing users with a robust set of functionalities through a total of 14 implemented endpoints and a Universal Action. These endpoints cover diverse aspects of Profile, Job, and Text APIs, enabling users to perform a range of actions from indexing profiles and jobs to scoring and searching. Below is an overview of the implemented endpoints:
Universal ActionThe Universal Action empowers users to make custom API calls to our service's API through our Zapier app. Users can specify all request parameters, leveraging the app's connection for flexibility. To ensure security, a fixed base URL is required.
Create vs Search actionsSearch Action:
A Search Action in Zapier is used to find existing data within an app. It retrieves information based on specified criteria, allowing users to locate items that match particular conditions. Search actions are often employed to prevent the creation of duplicate entries or to gather information about an existing item.Create Action:
On the other hand, a Create Action is utilized to generate new entries in an app automatically. It adds fresh data to the system based on the information provided, effectively creating a new item. Create actions are fundamental for automating the addition of various elements such as projects, tasks, contacts, invoices, and more.Key Differences:
- Purpose
- Search: Finds and retrieves existing data.
- Create: Generates and adds new data.
- Functionality
- Search: Returns information based on specified criteria.
- Create: Adds a new entry to the app.
- API Calls:
- Search: Typically uses GET requests to retrieve data.
- Create: Typically uses POST requests to add new entries.
- Output
- Search: Returns an array of objects (multiple results).
- Create: Returns a single object (the newly created item).
In essence, Search Actions are about retrieving and working with existing data, while Create Actions focus on automating the addition of new data to the application. Together, they offer users a powerful and flexible way to connect apps and streamline workflows.
Search ActionsIn this documentation, endpoints classified as Search actions will have their names indicated in italics.
Implemented Endpoints
Profile API
- Profile Indexing – Index a Profile into a Source
- Profile Parsing File – Parse a Resume into a Source
- Profile Scoring – Score Profiles for a Job
- Profile Searching – Search Profiles in Sources
Job API
- Job Indexing – Index a Job into a Board
- Jobs Scoring – Score Jobs for a Profile
- Jobs Searching – Search Jobs in Boards
Text API
- Text Embedding – Vectorize a Text
- Text Geocoding – Geocode a Location
- Text Imaging – Generate a Job Portrait
- Text Linking – Find Synonyms for a Word
- Text OCR – OCR a Text
- Text Parsing – Parse a Raw Text
- Text Tagging – Tag a Text
Data Generation ActionsSome of our Create Actions, although utilizing the POST method traditionally associated with record creation, are specifically designed to generate data rather than creating conventional records.
These endpoints may return arrays, emphasizing their unique functionality in producing and manipulating data dynamically. This approach allows users to leverage the power of data generation within the context of their automated workflows.
Useful Guides
Explore our collection of helpful guides designed to assist you in maximizing the potential of our Zapier app with HrFlow.ai. Whether you're a seasoned user or just getting started, these guides cover a range of topics to enhance your experience. From optimizing workflows to mastering specific features, dive into these resources to make the most out of your automation journey. Let's empower your workflow with insights and practical tips!
- Automation Basics
- How it works
- Create a Zap
- Multi-step Zaps
- Search actions
- Filters
- Built-in apps
- HrFlow.ai x Zapier
Basic Actions
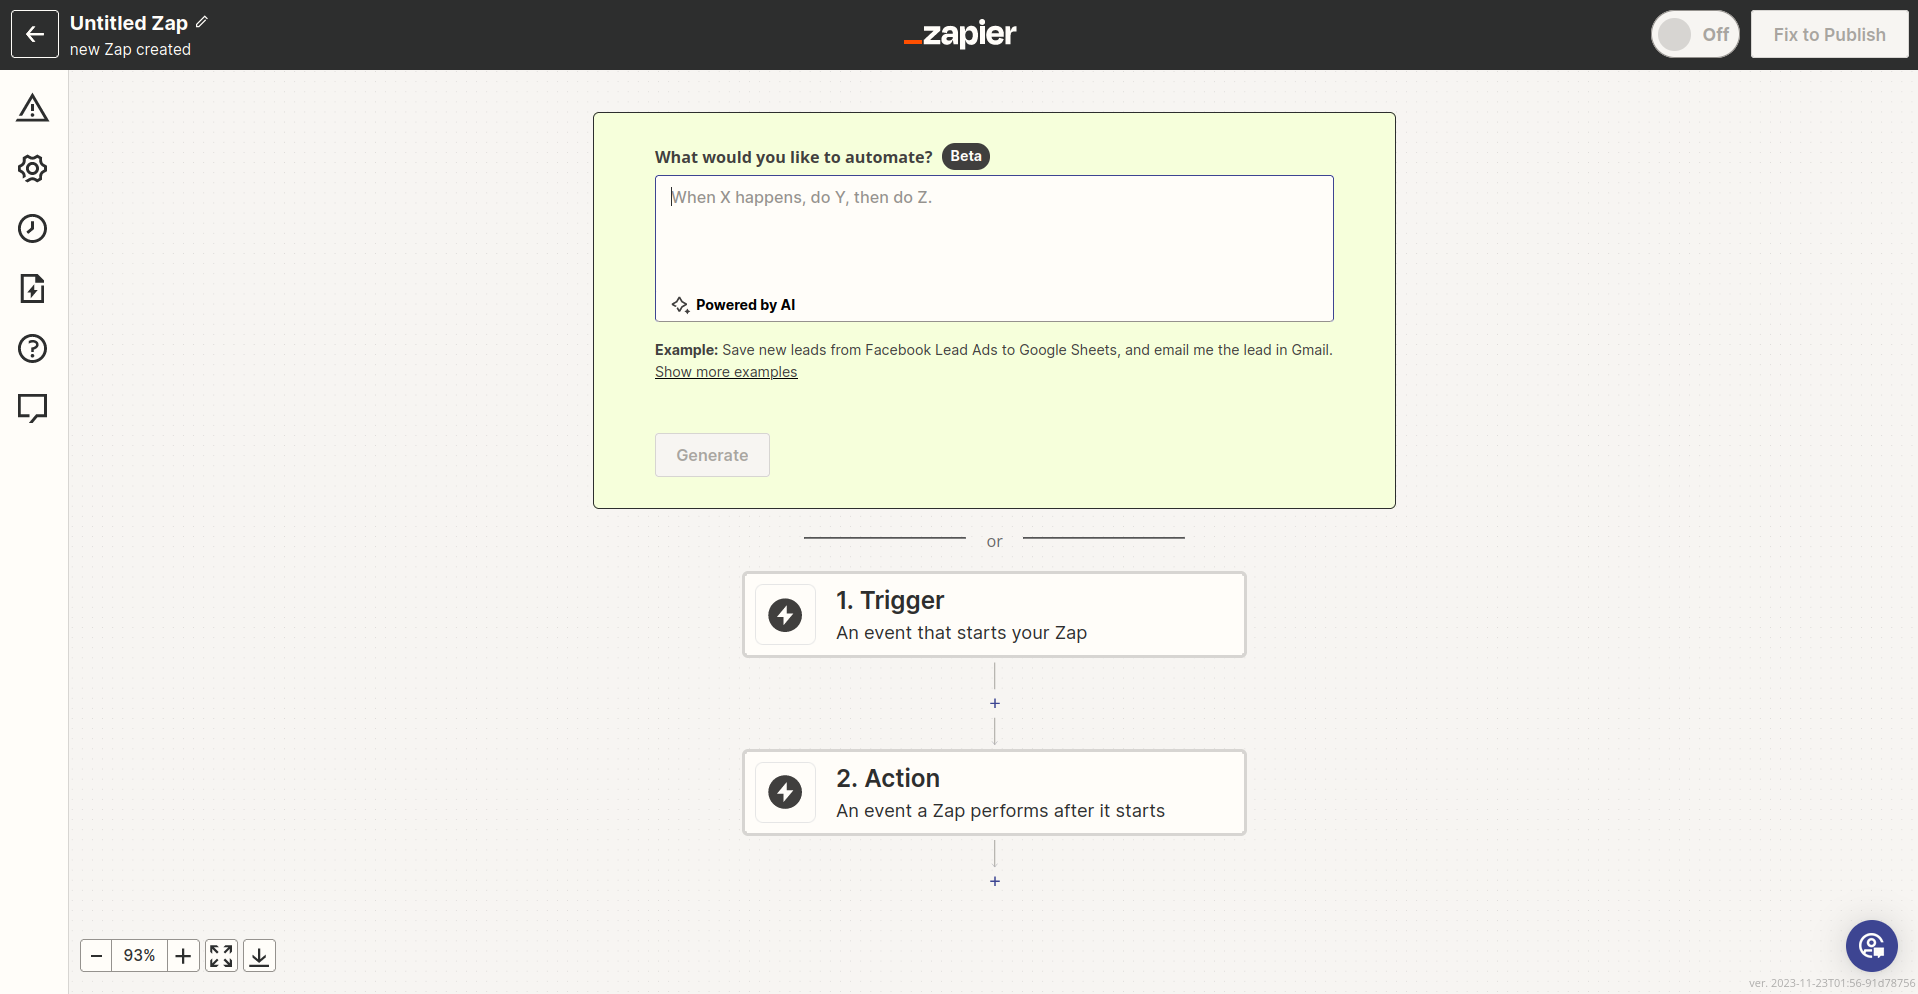
What is a Zap ?In the realm of Zapier, a Zap is more than just a term—it's your pathway to streamlined automation. A Zap represents a scenario, a set of actions triggered by an event. It's the foundation of your automated workflow, allowing you to define precisely how different apps interact in response to specific conditions.
Sensible DataPersonal details and any kind of authentication or identification details are mock.
Landing Page
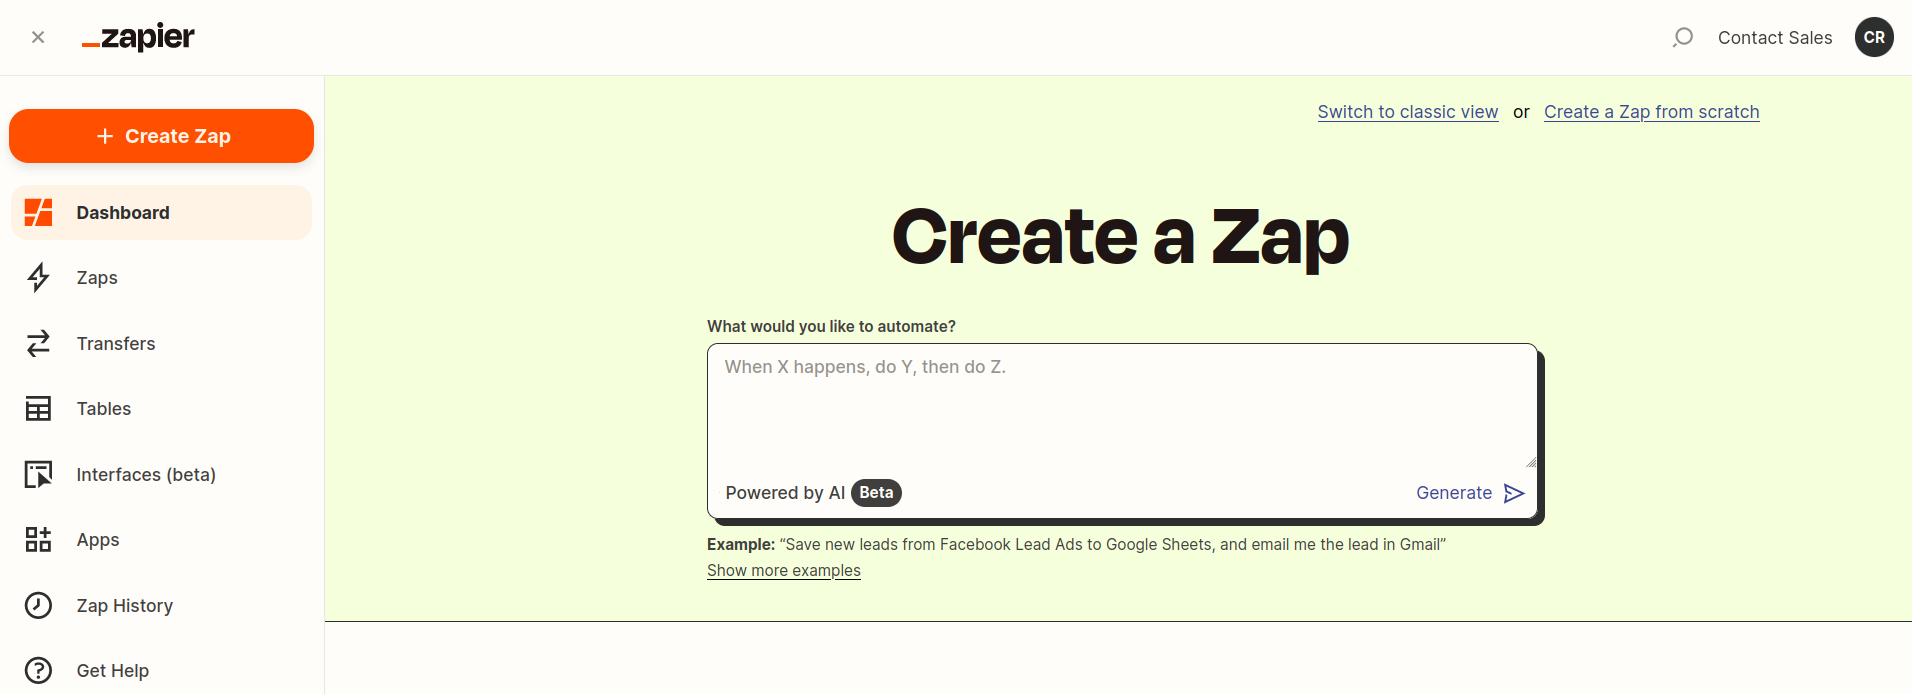
Create a Zap
After clicking on Create Zap button (top left)
What is a Trigger ?In the Zapier ecosystem, a Trigger marks the starting point of your automation journey. It's the event that kicks off your Zap, prompting a sequence of actions to unfold. Think of it as the ignition switch—once triggered, your Zap begins executing the predefined steps you've set up.
More information about different types of Triggers can be found here.
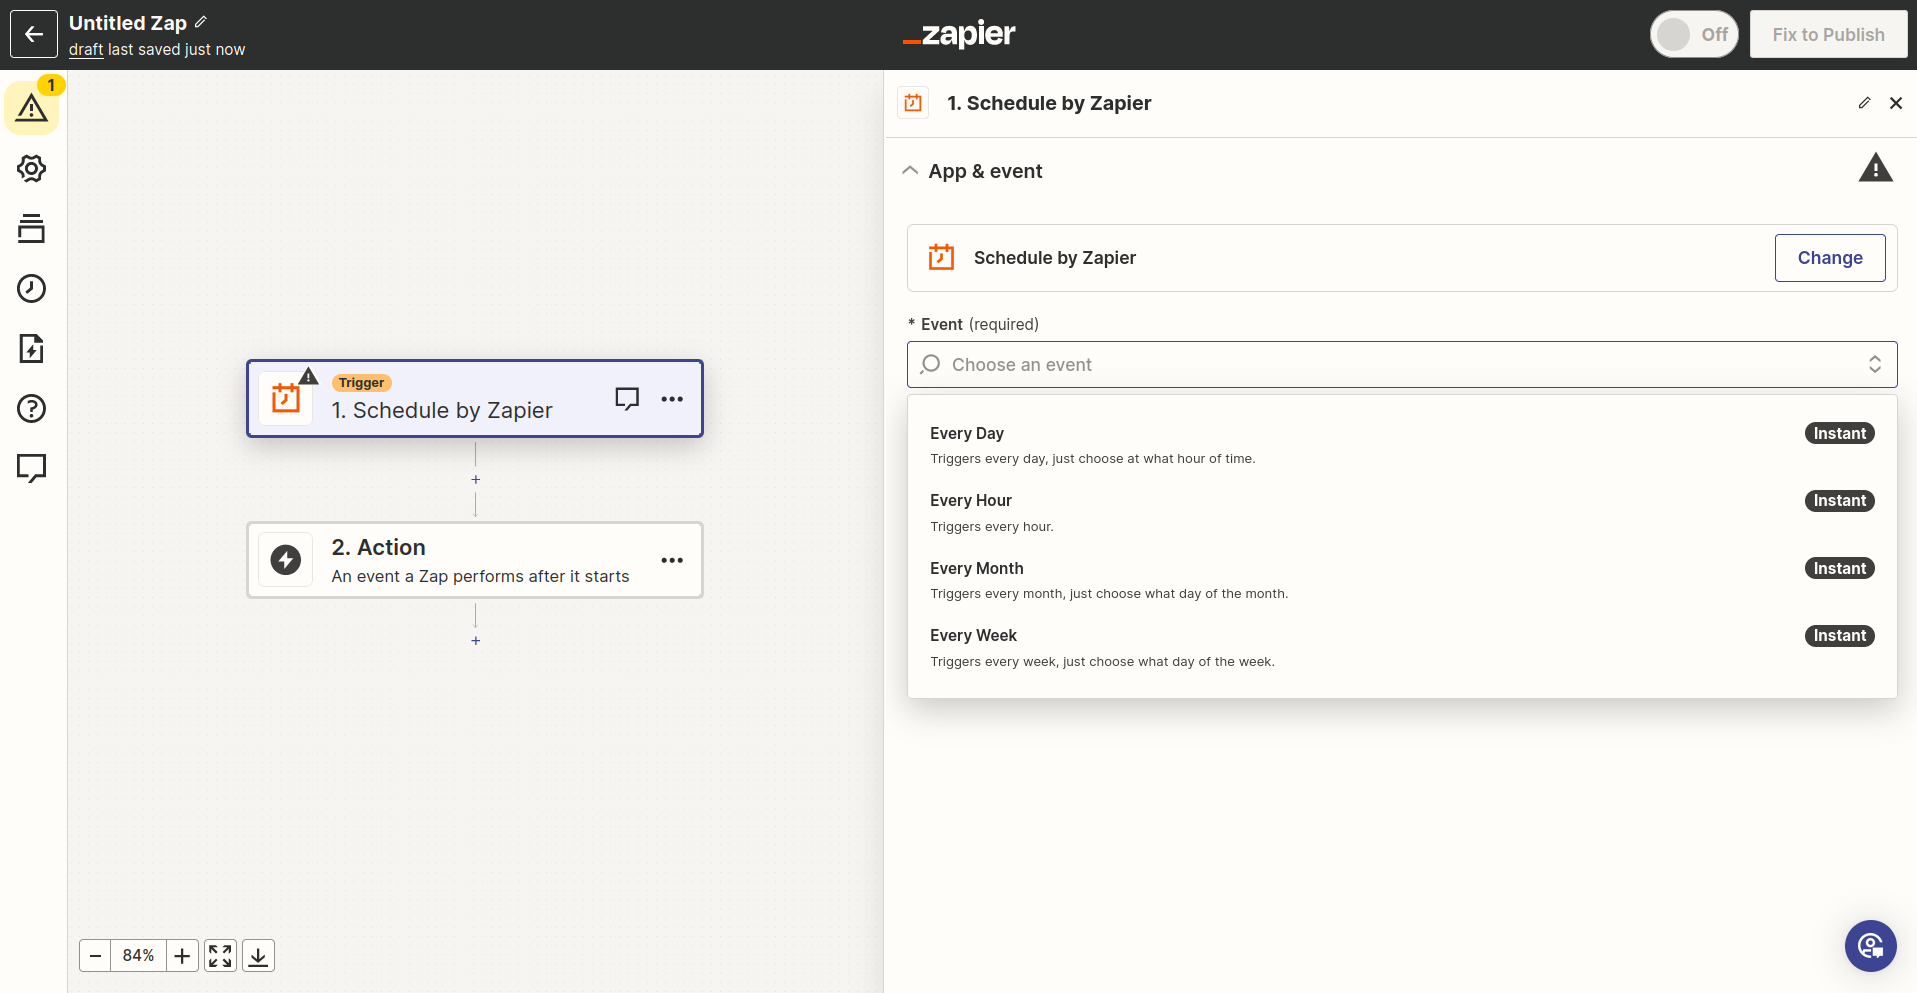
Used TriggerFor the purpose of this tutorial, we will be utilizing the Schedule by Zapier Trigger to illustrate basic actions within our Zapier app for HrFlow.ai. While this trigger is convenient for tutorial scenarios, it's crucial to recognize that Zapier offers a vast array of triggers, each serving distinct automation needs.
Schedule by Zapier allows you to set specific time intervals for Zap execution, making it an ideal choice for scheduled tasks. However, in practical applications, your choice of trigger should align with the specific events or conditions that prompt your desired automation.
Zap on / offIt's essential to highlight a fundamental aspect of Zaps—the ability to be toggled on or off. Every Zap comes equipped with an activation switch, allowing you to control when your automation scenario is live and operational.
Parametrize the Trigger
Test Trigger
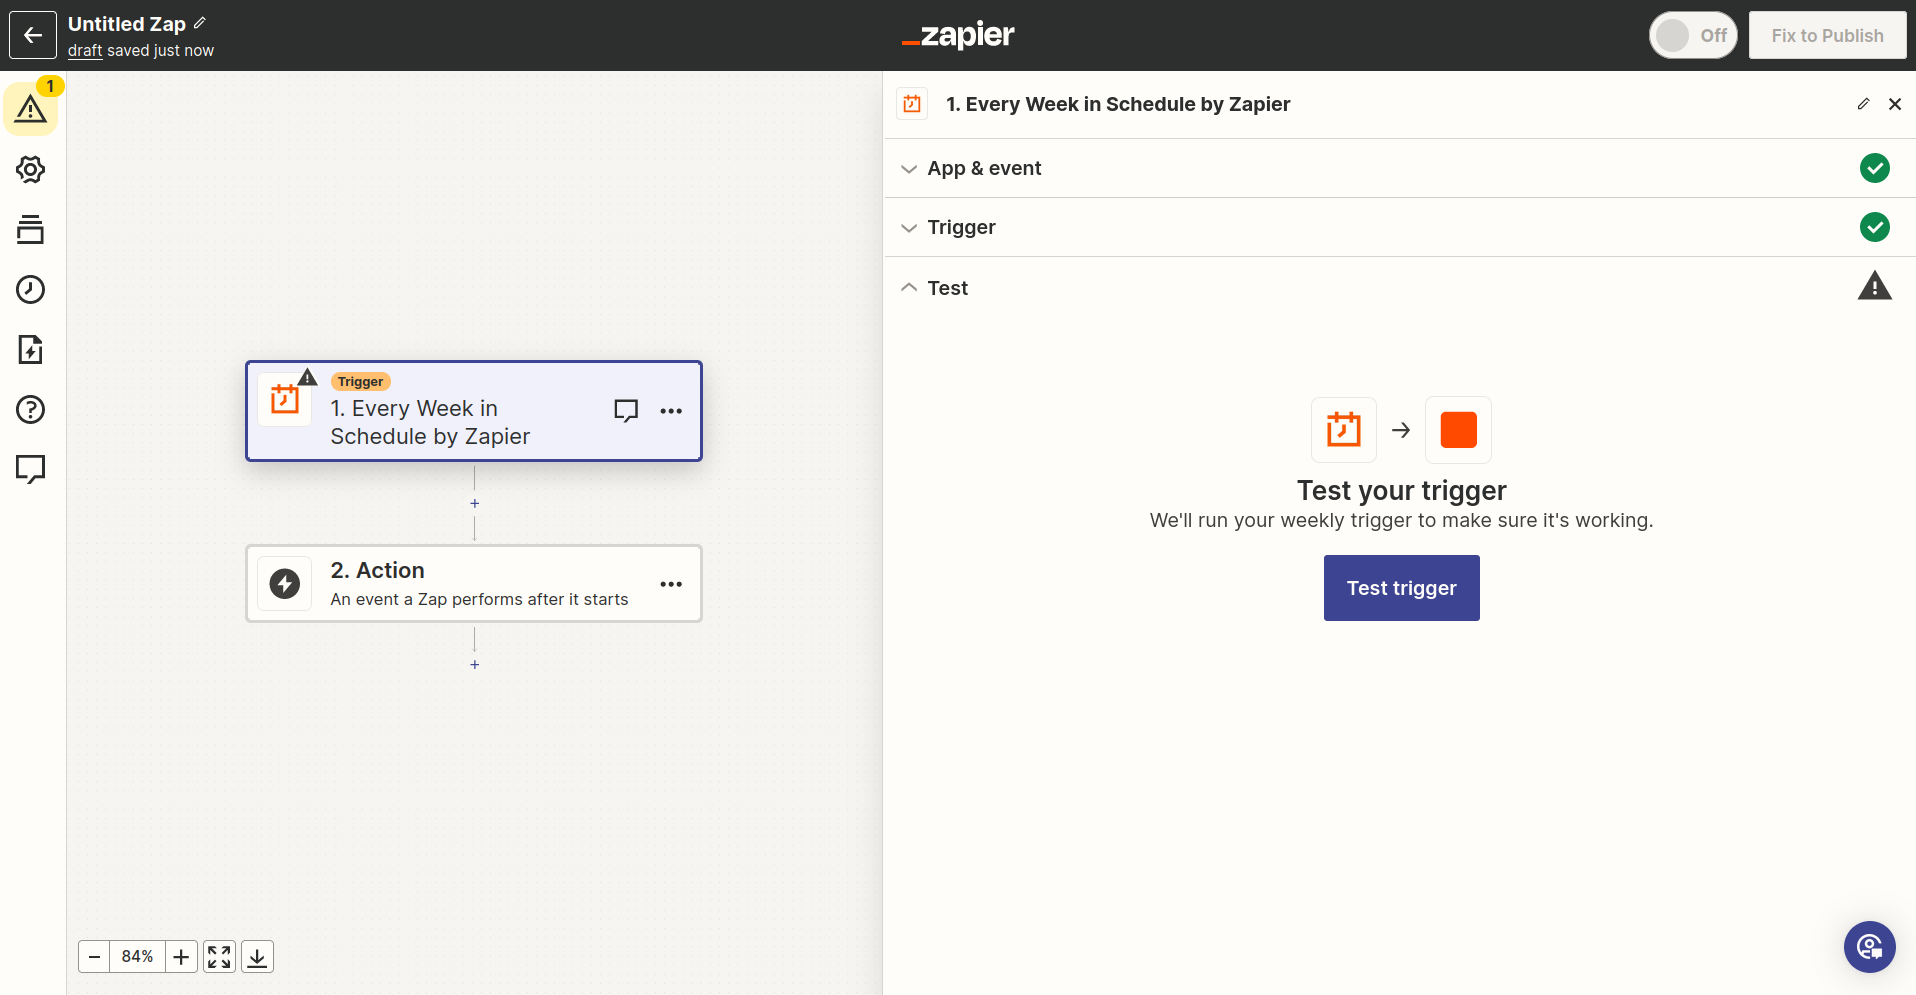
Once parametrized, the Trigger can be tested
Choose Action
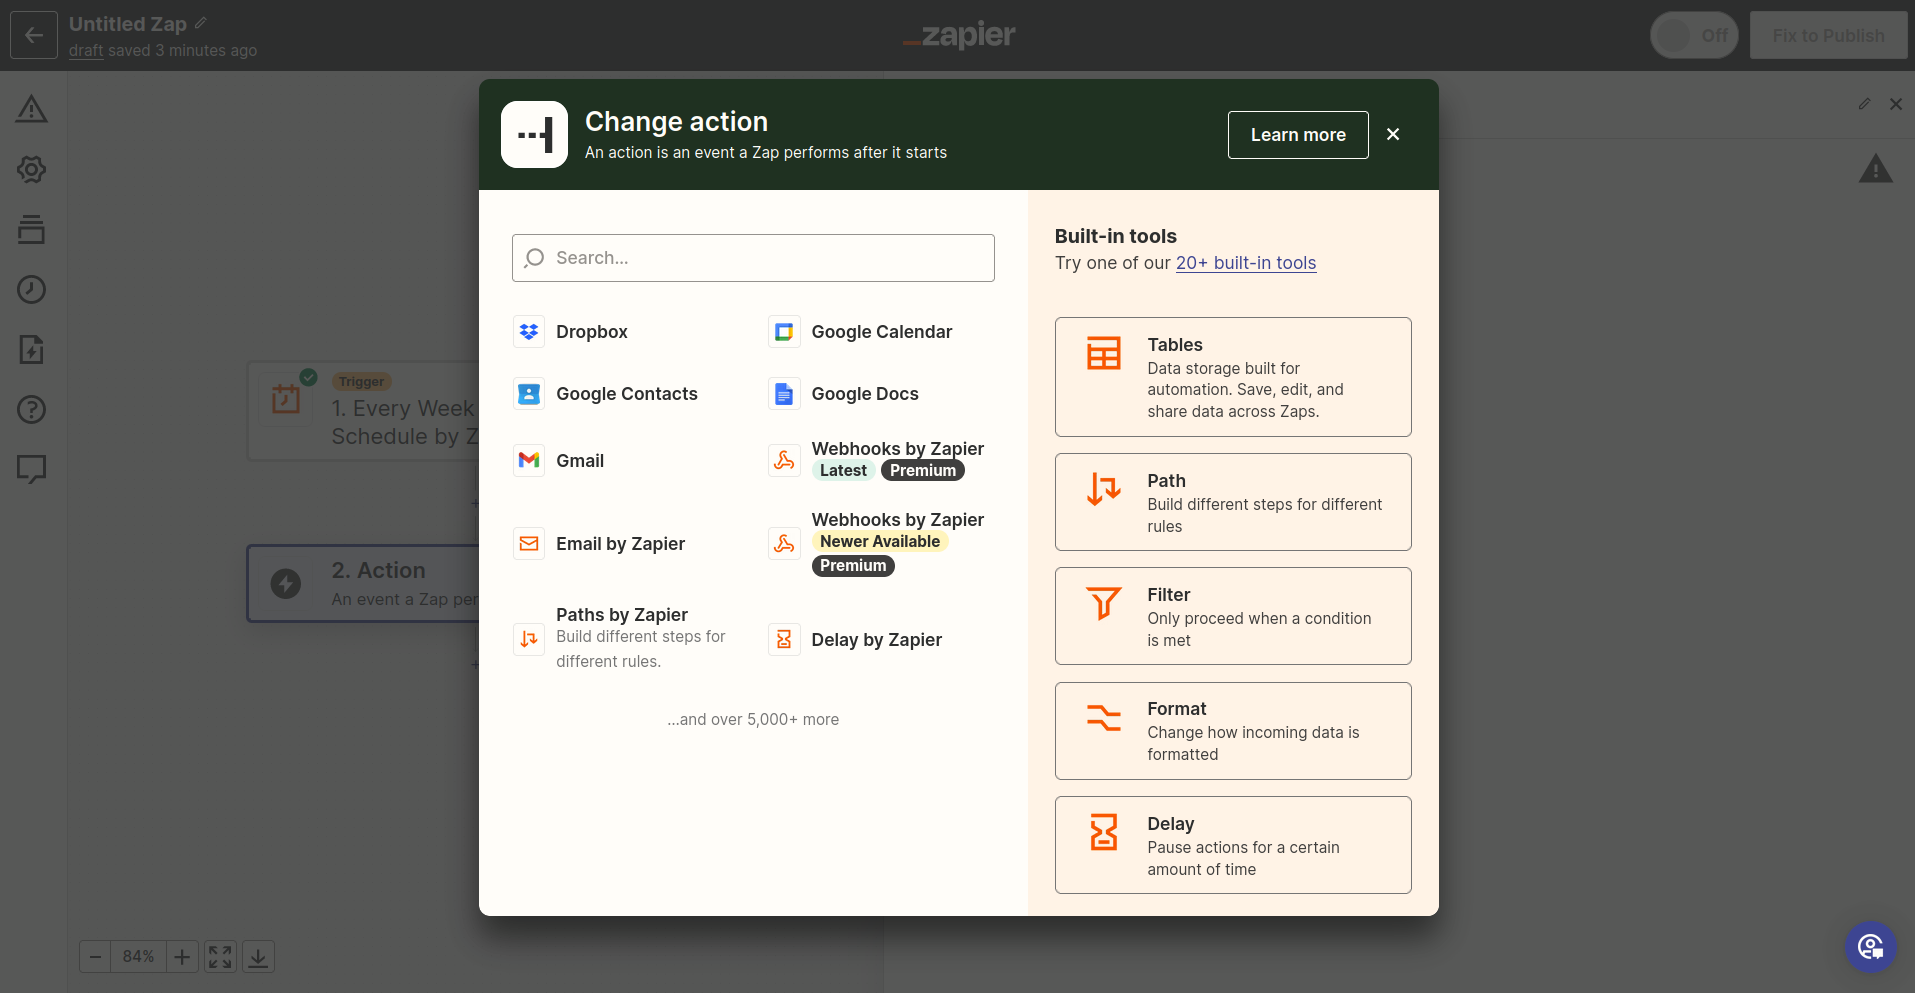
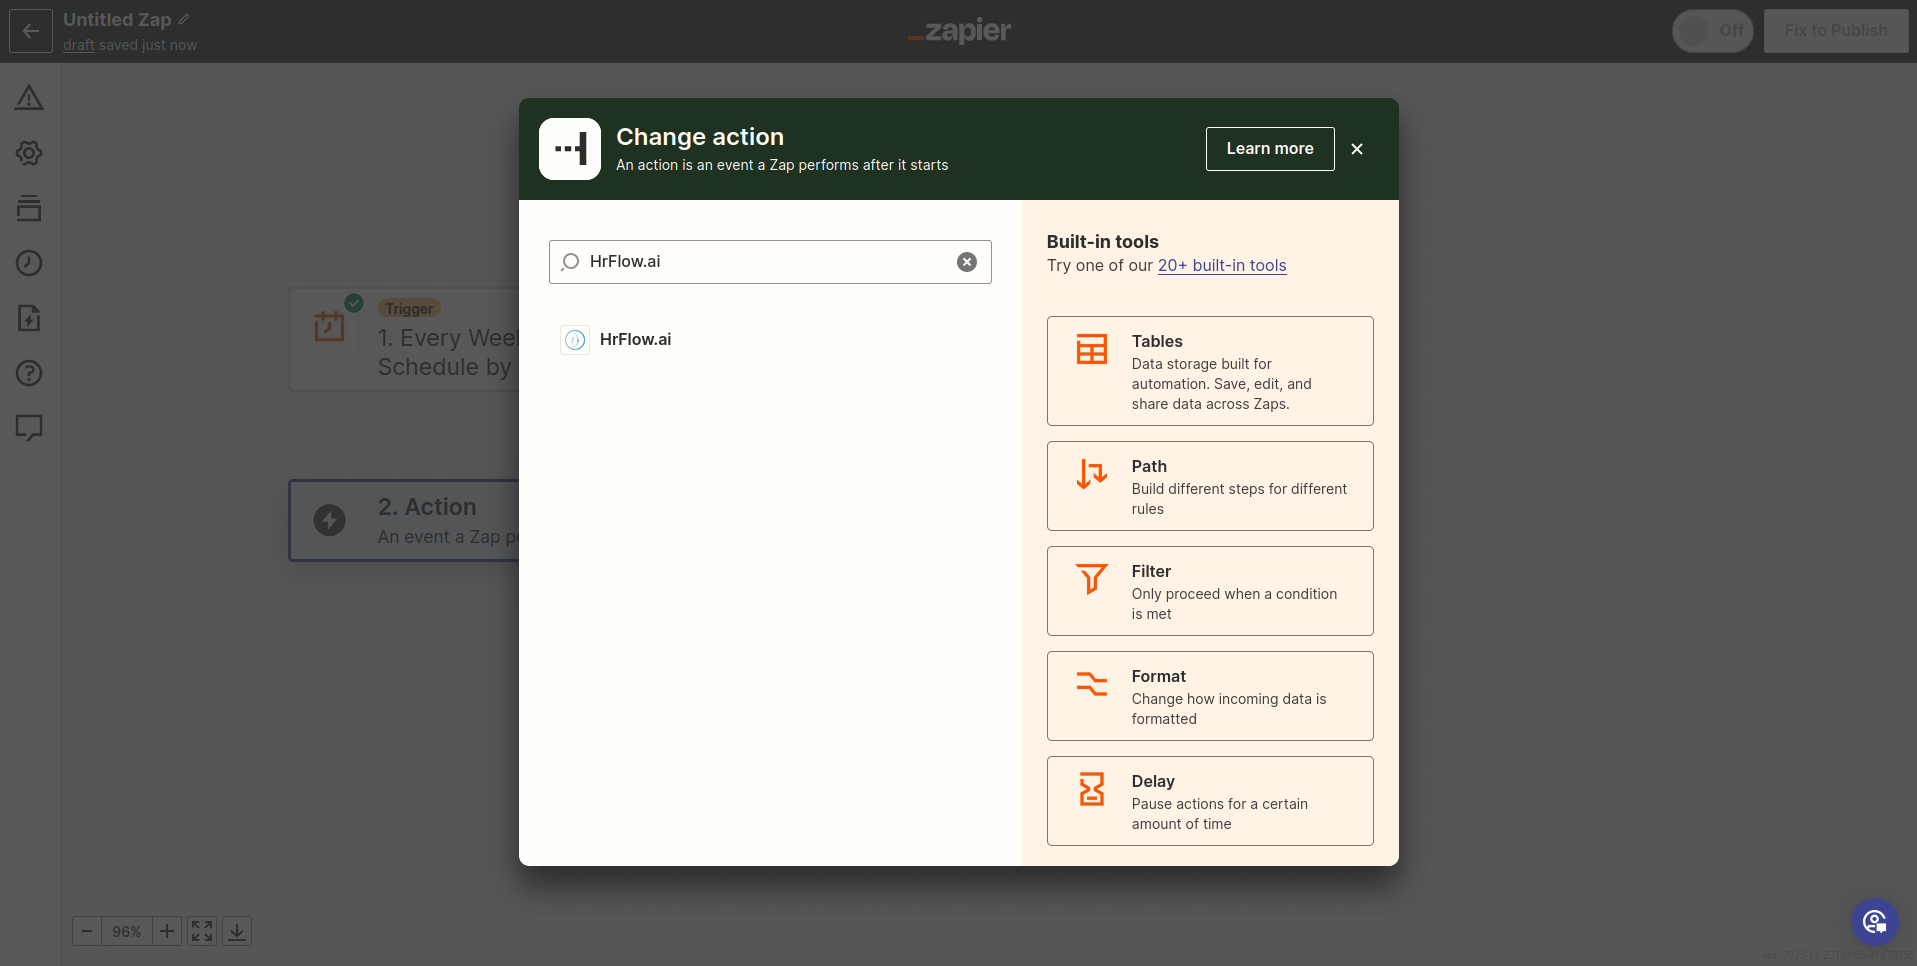
Find the app of HrFlow.ai
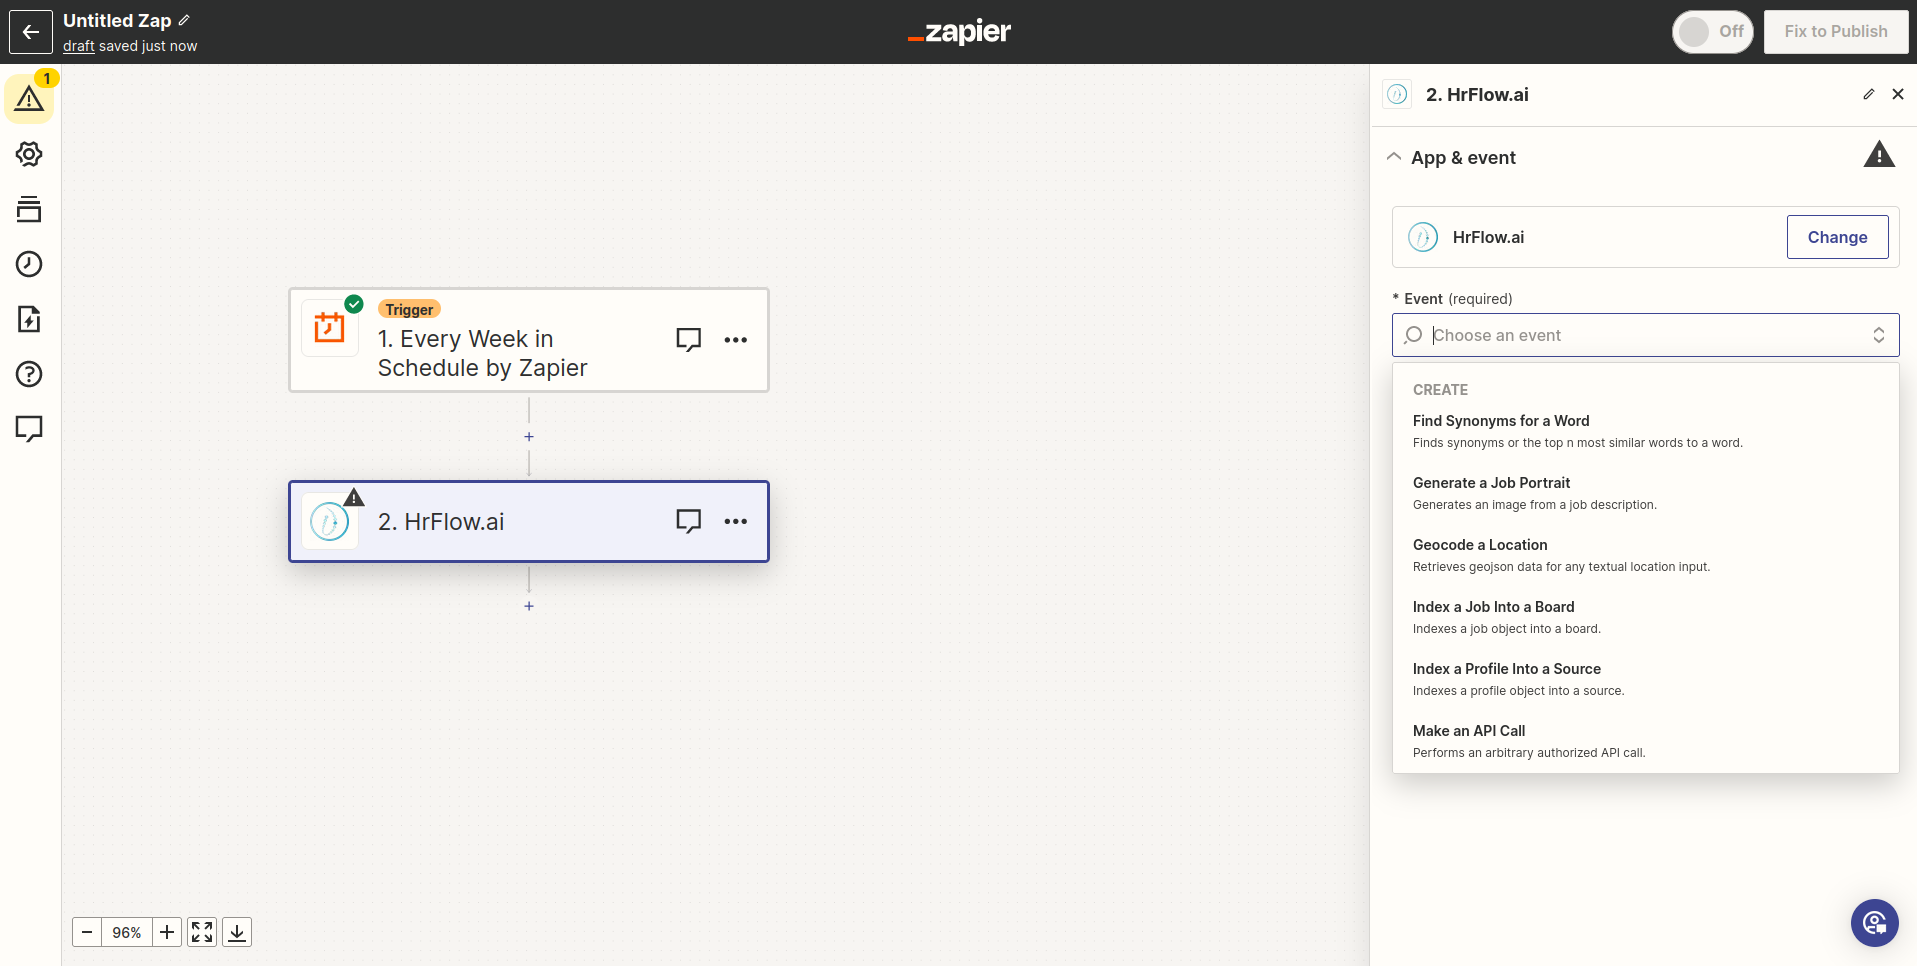
Choose an HrFlow.ai action to use
Create a connection
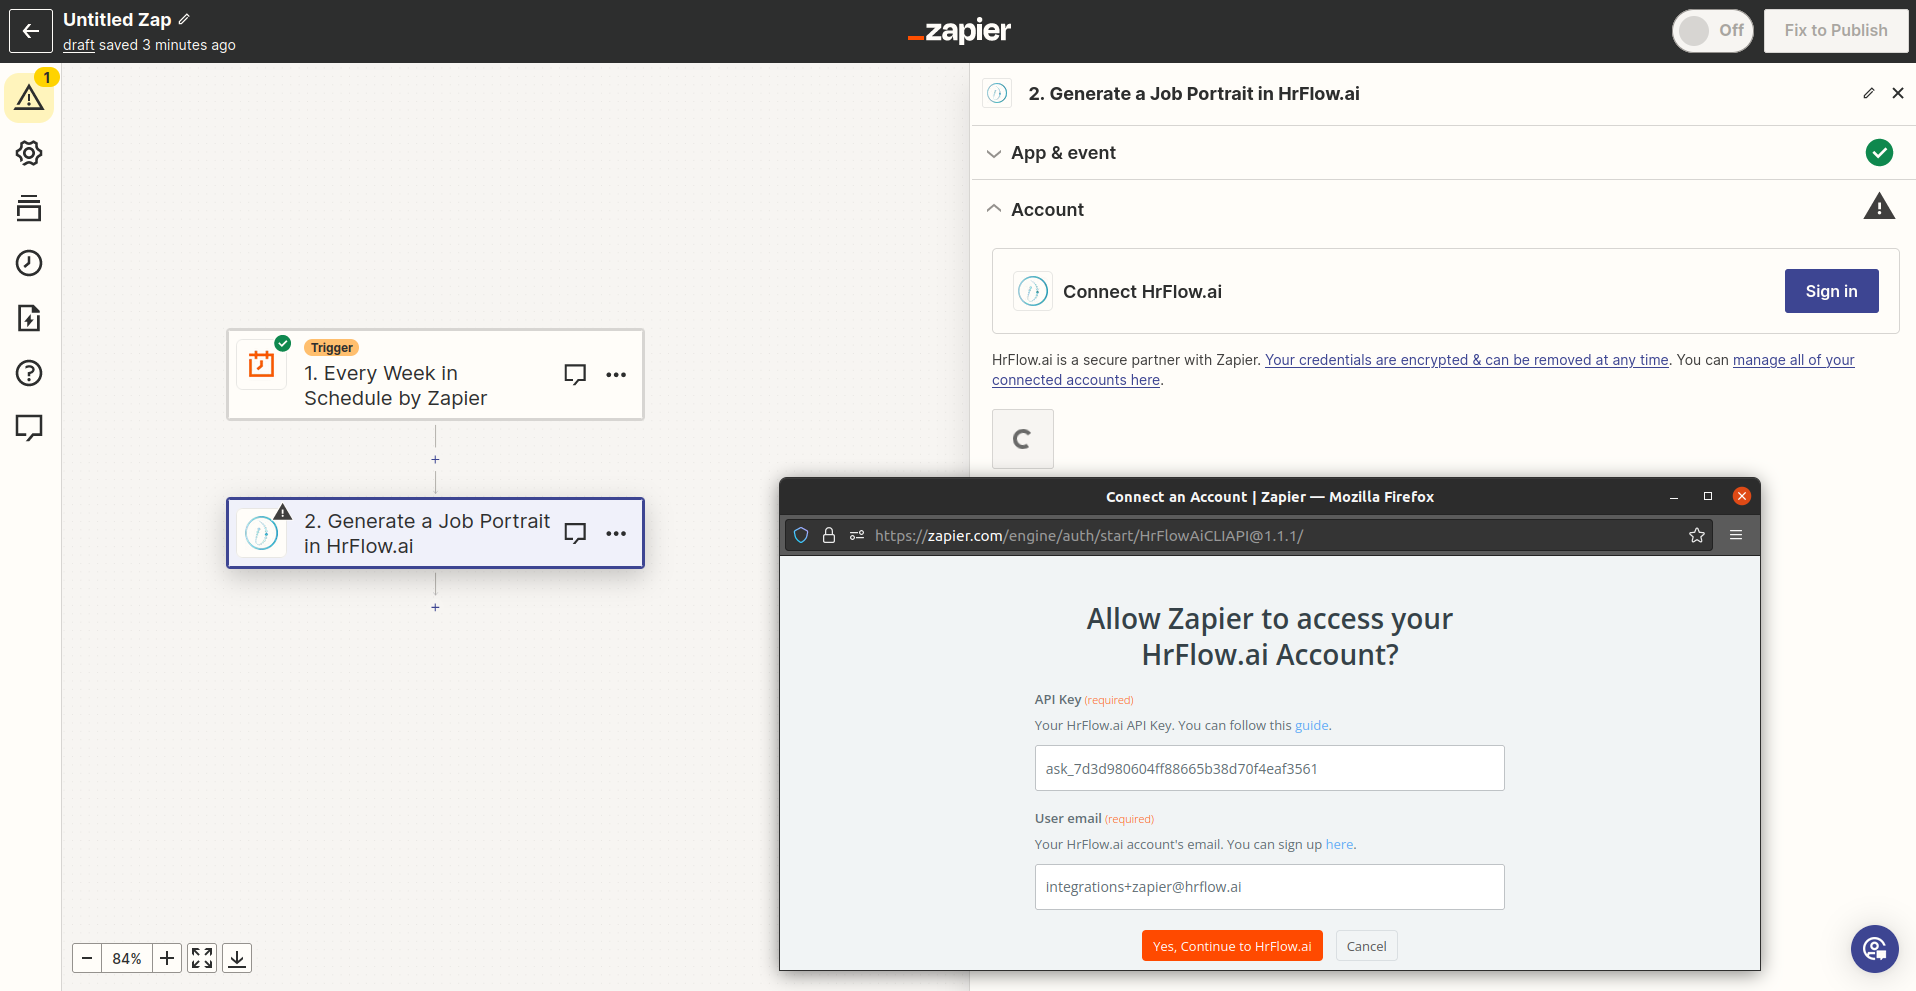
Create a connection to HrFlow.ai
Understand the Connection LabelIn our Zapier app for HrFlow.ai, the connection label plays a crucial role in conveying specific information about your integration. The label follows a structured pattern that provides insights into key aspects of the connection. Let's break down the format:
<email> team:<team> subdomain:<subdomain> permission:<permission>
For example: [email protected] team:zapier subdomain:zapier permission:RW
Permission can be:
- RW – read and write
- R – read only
- W – write only
Successfully ran scenario
](https://files.readme.io/fd20701-2-10.png)
Successful execution of a call to the Text Imaging endpoint
Map a parameter
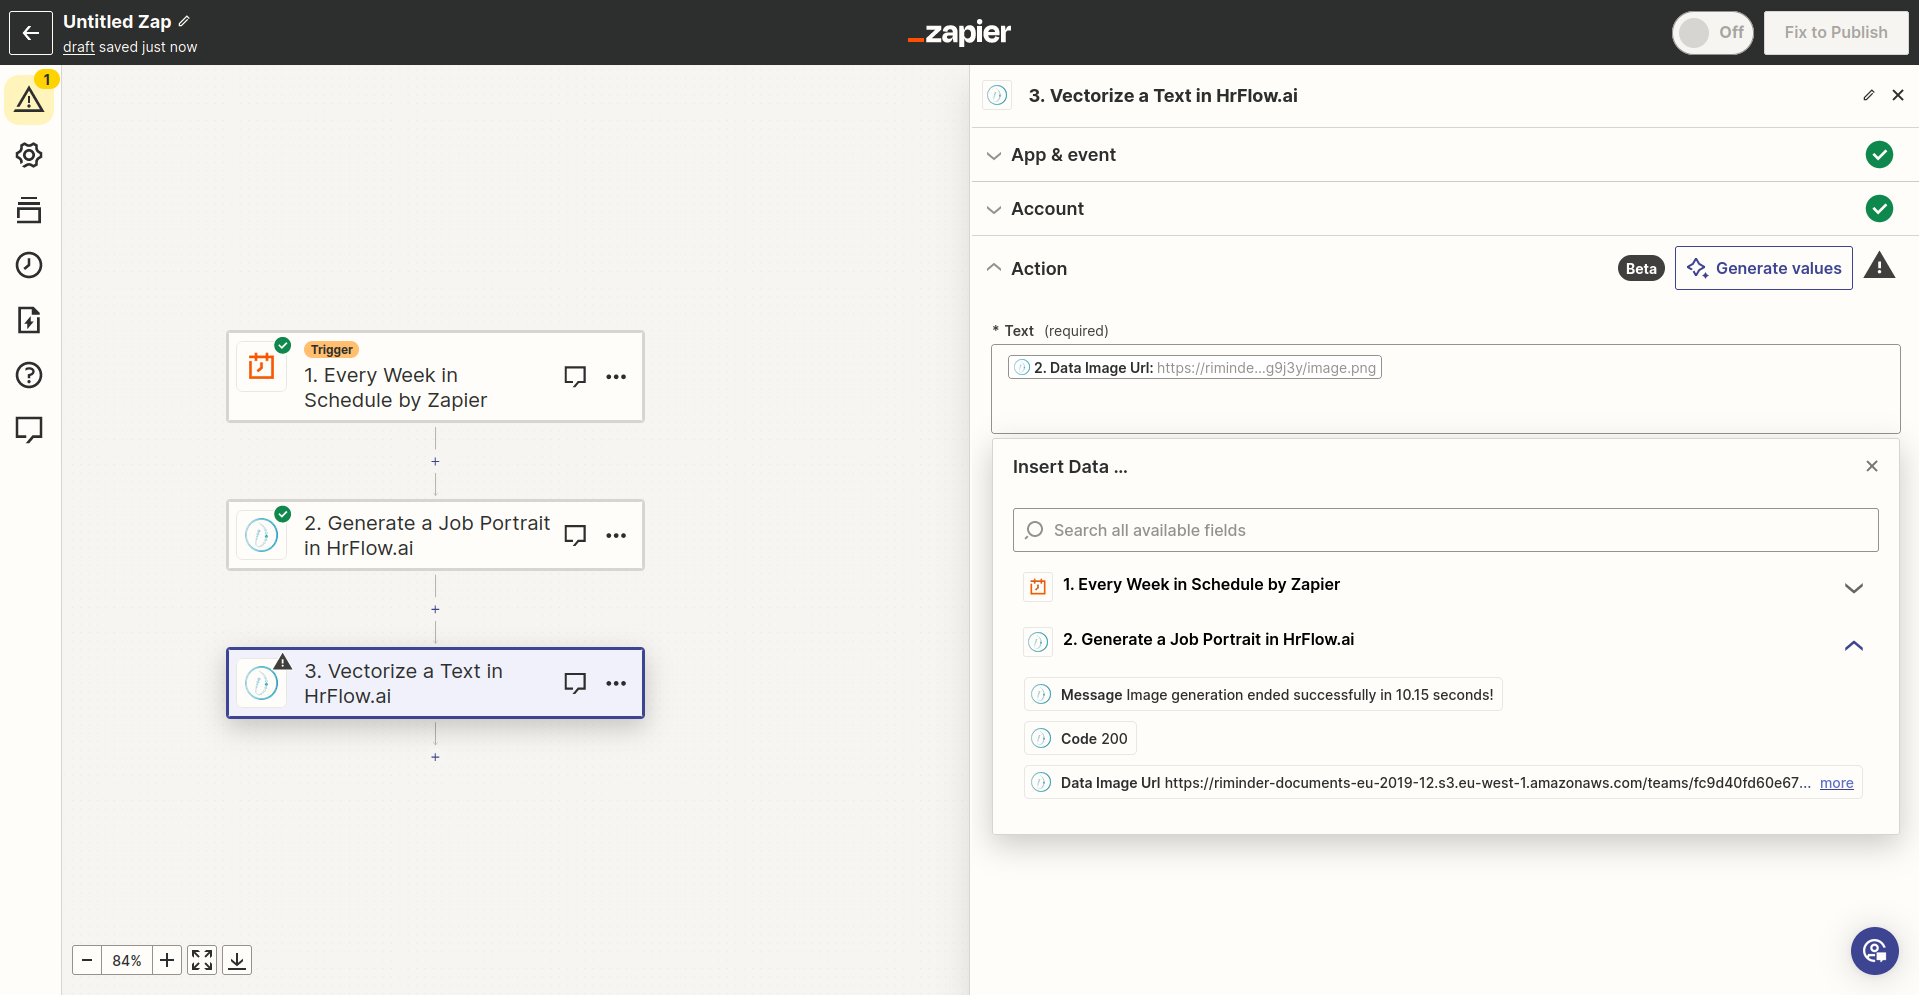
1/ Understanding the mapping of a parameterMapping parameters from previous steps in your Zap is a crucial step for ensuring a smooth flow of data. To do this, click on the input field where you want to map a parameter, triggering a dialog window. In this window, simply choose the parameter from previous steps that you want to map.
This straightforward process allows you to customize data flow between different stages of your automation, creating dynamic workflows tailored to your specific needs
Quick Start examples
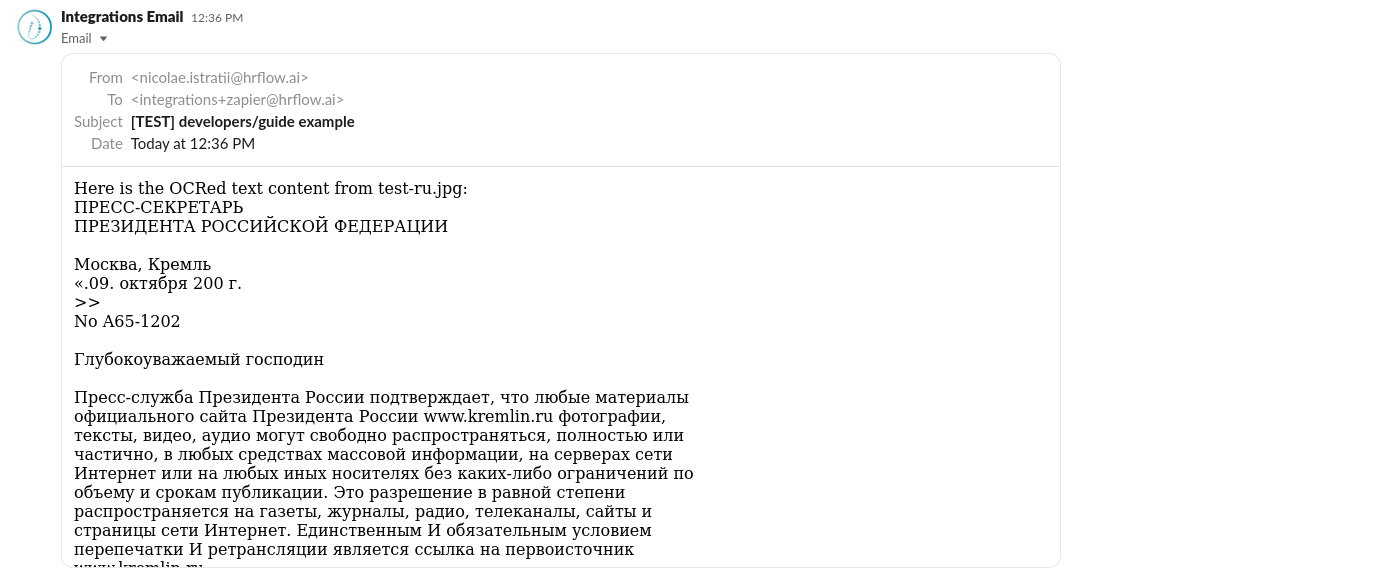
OCR a File from Google Drive and sent its text content by E-mail
Step 1: Define the flow (Google Drive -> HrFlow.ai -> Gmail)

2/ Understanding the mapping of a parameterIt's important to note that in order to map a parameter from a previous step, that step must have been run successfully. The response generated by the previous step becomes available for parameter mapping only after a successful execution. This ensures that the data you intend to map is current and accurate, contributing to the overall reliability and effectiveness of your Zap.
Keep this in mind as you configure your Zaps to ensure the seamless flow of data between different steps in your automation.
Step 2: Enter the name of the File to download from Google Drive
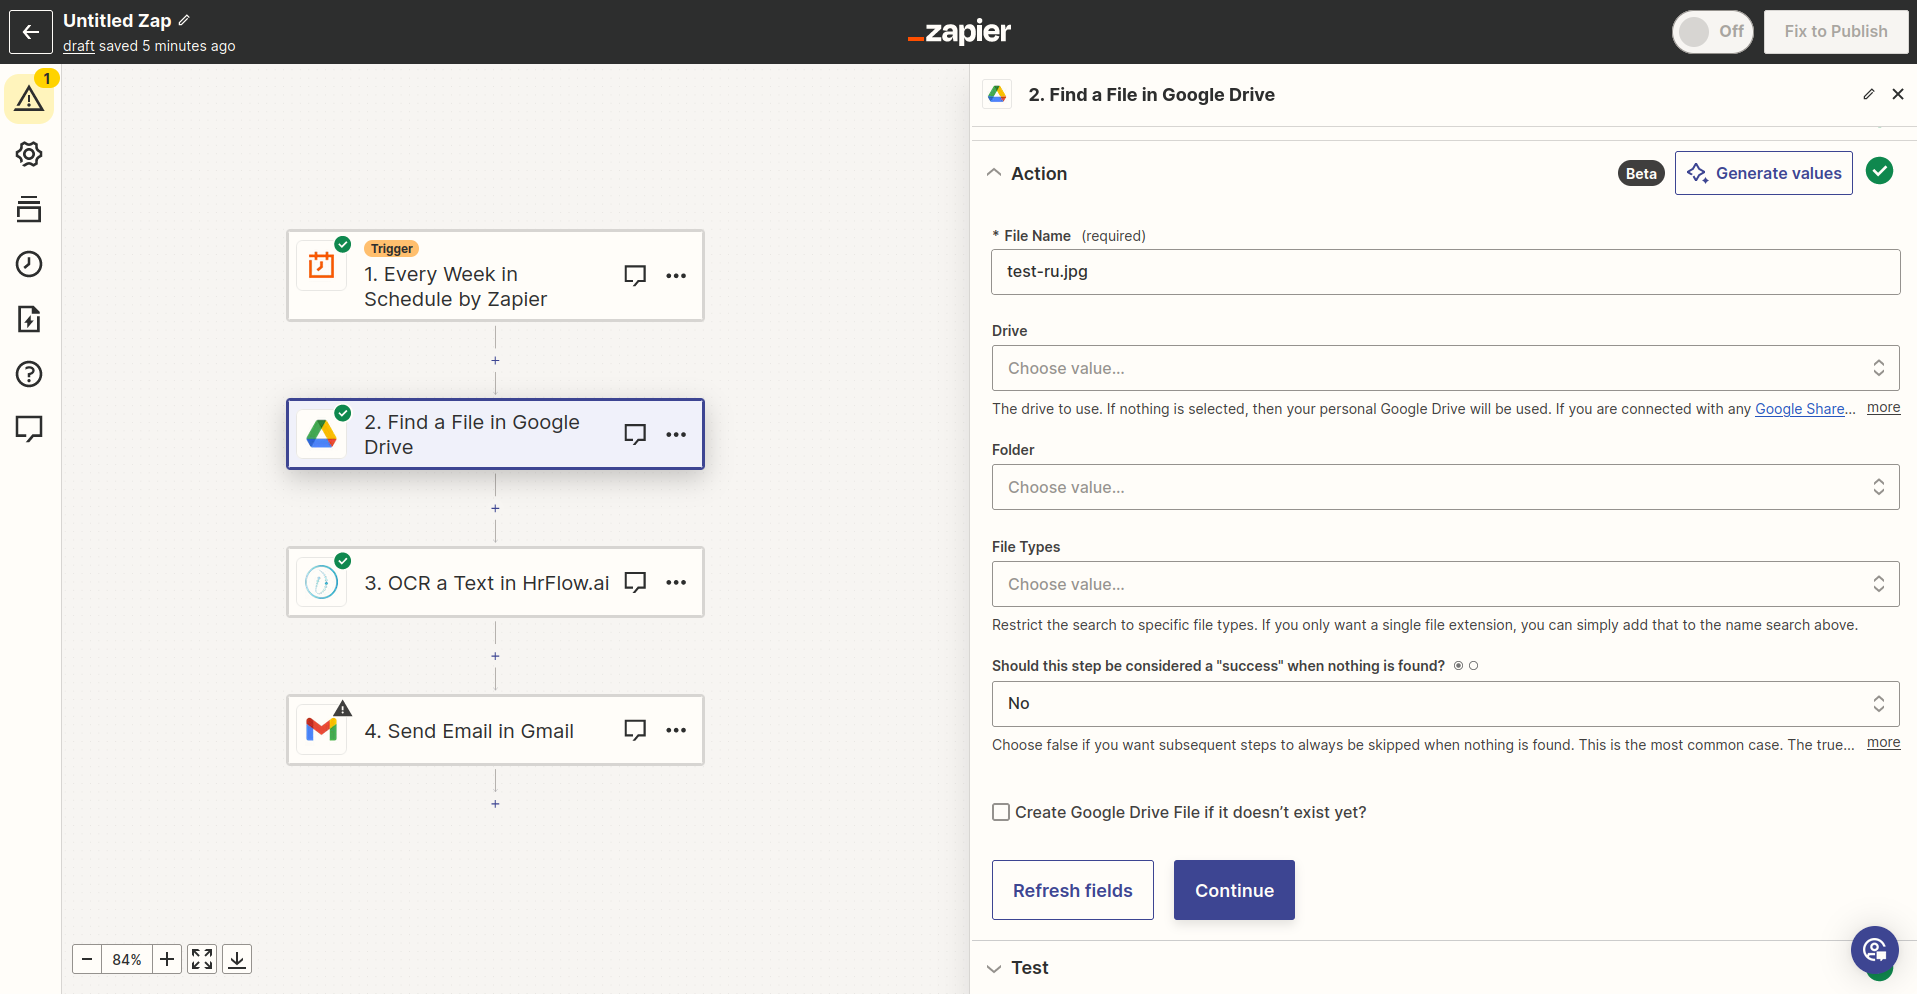
Google Drive TriggerFor the purpose of this demo, it was opted not to use the Google Drive Trigger, even though it holds significant value in real-life scenarios. In practical applications, this trigger can allow your Zap to execute when a file is uploaded to a specific folder in Google Drive, offering a powerful automation capability.
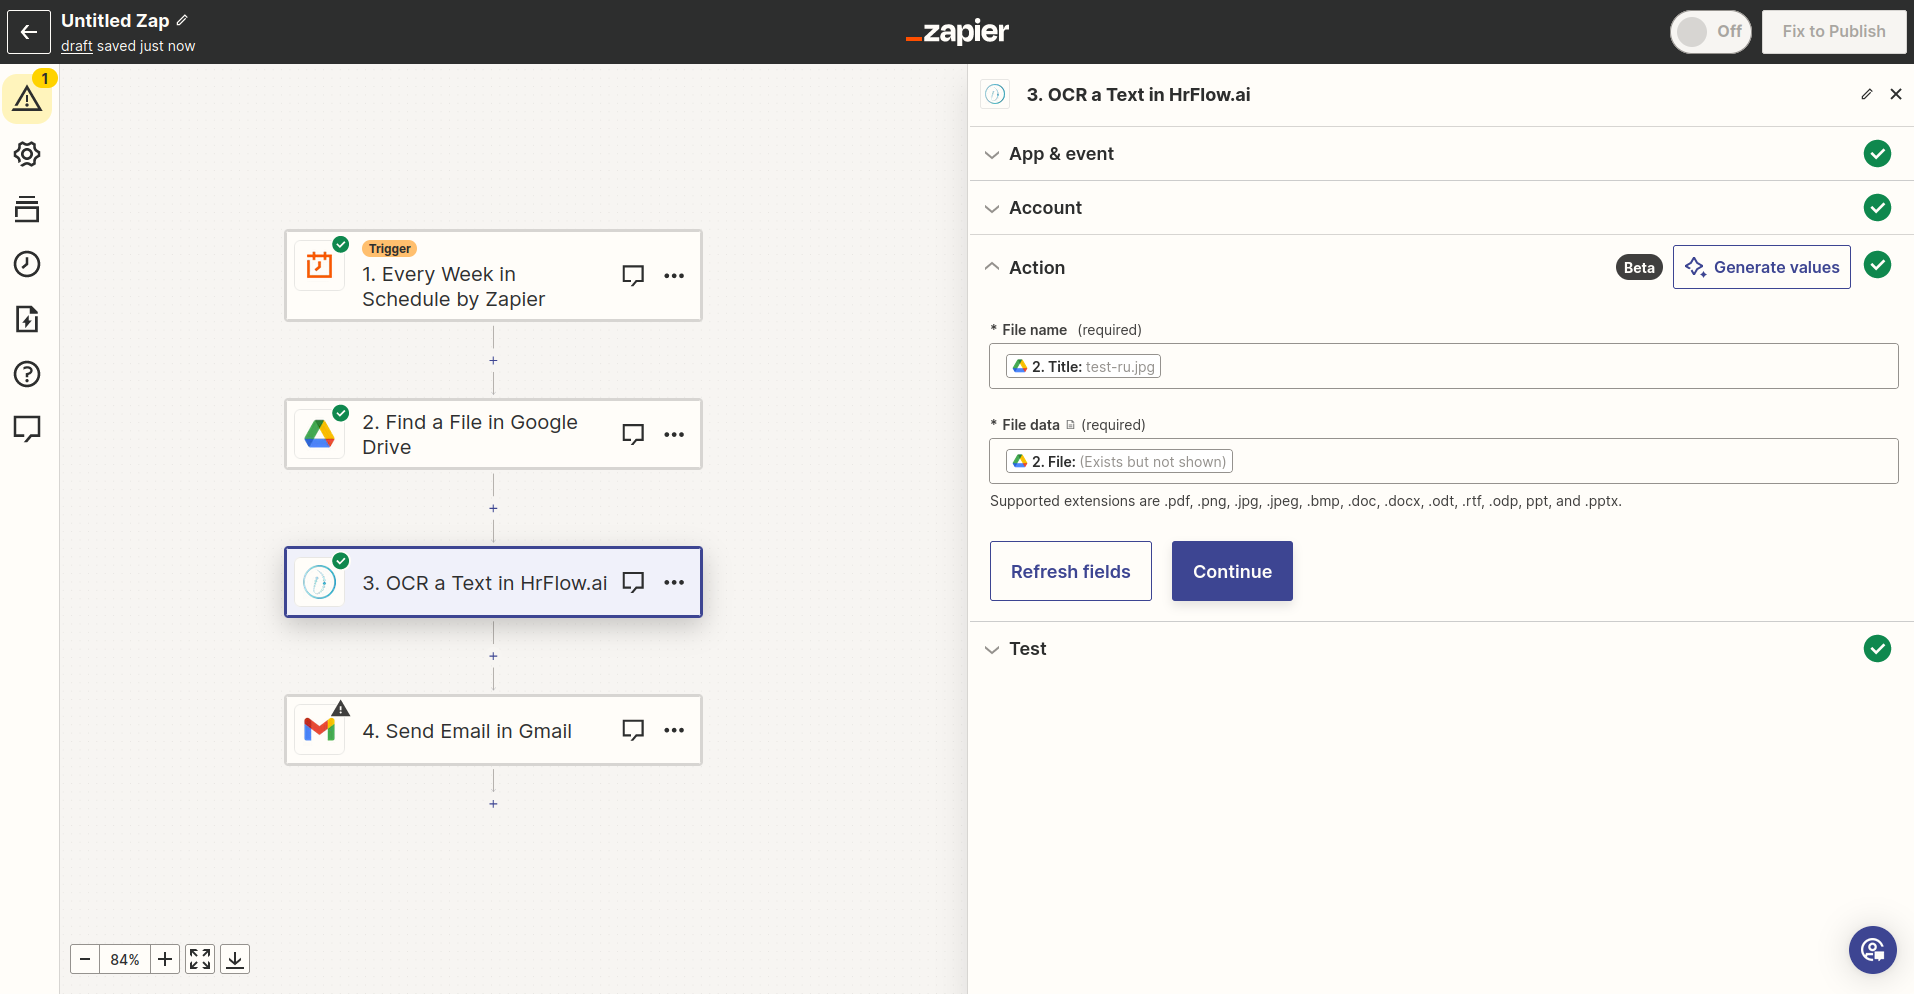
Step 3: Map the File name and the File data to the Text OCR endpoint
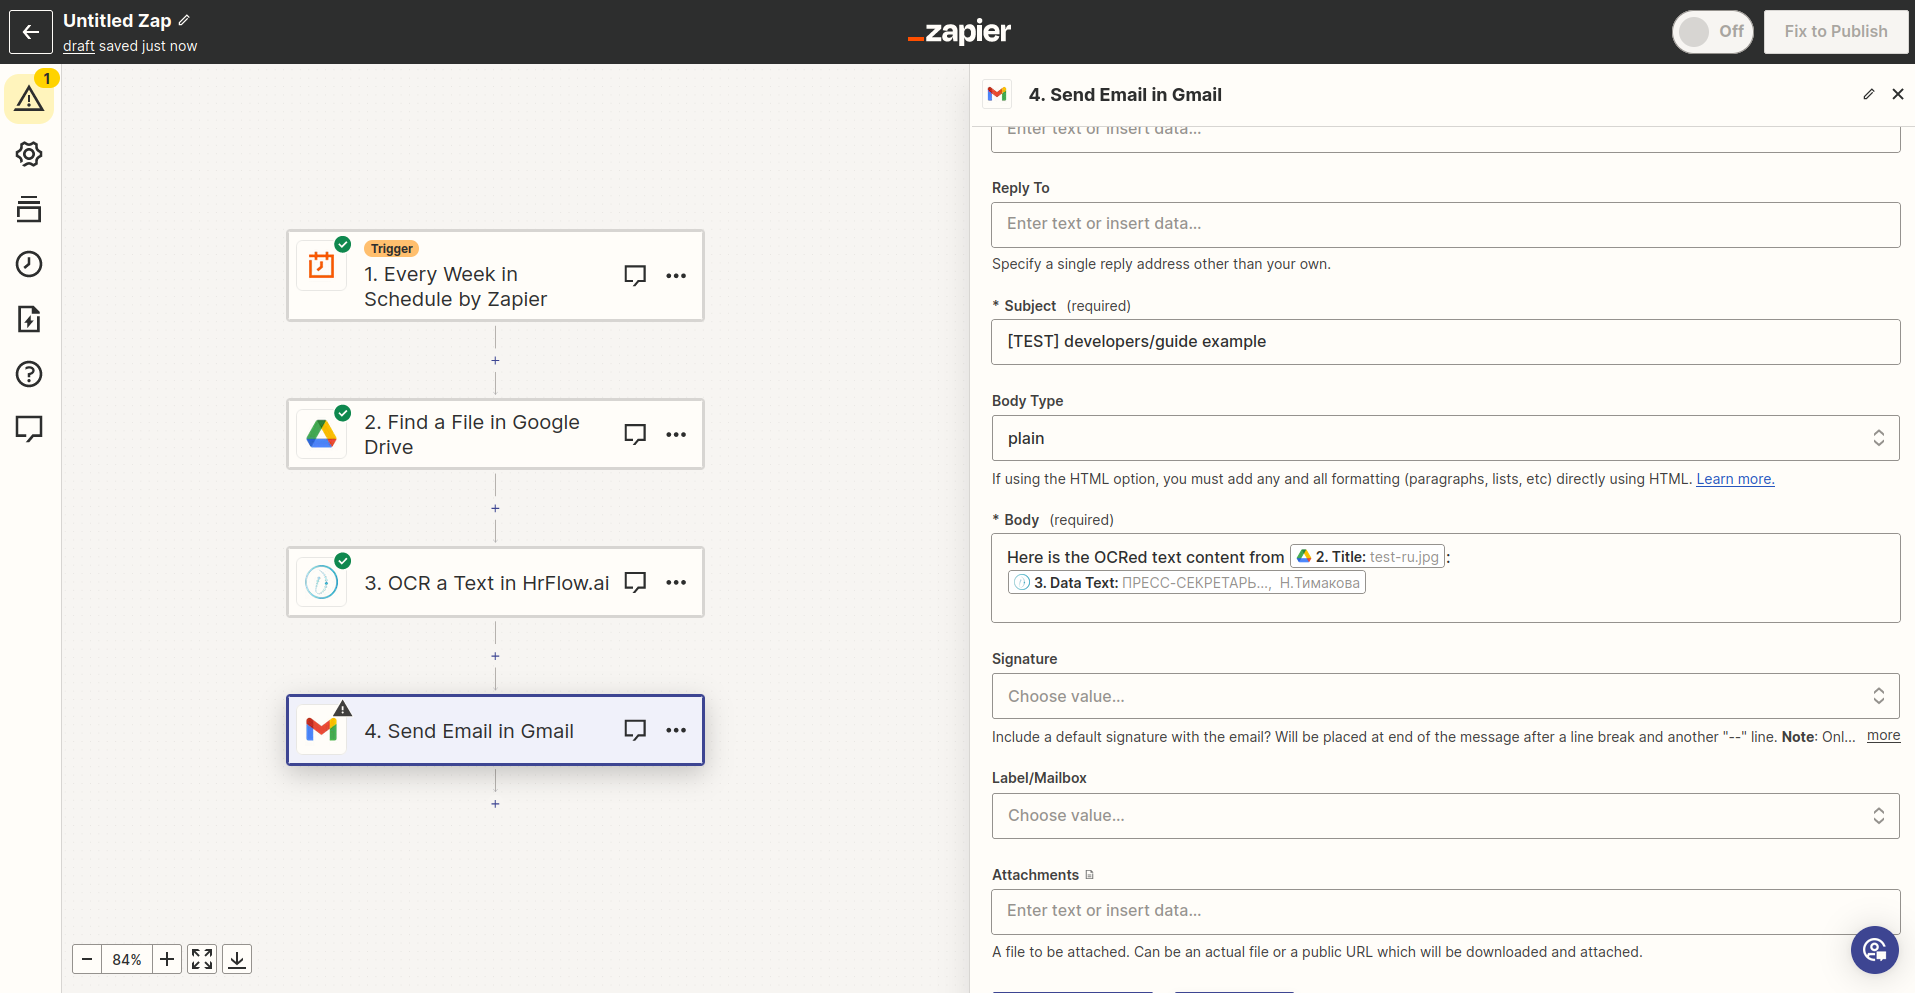
Step 4: Prepare the body and the destination for the e-mail
Step 5: Make sure no step has failed
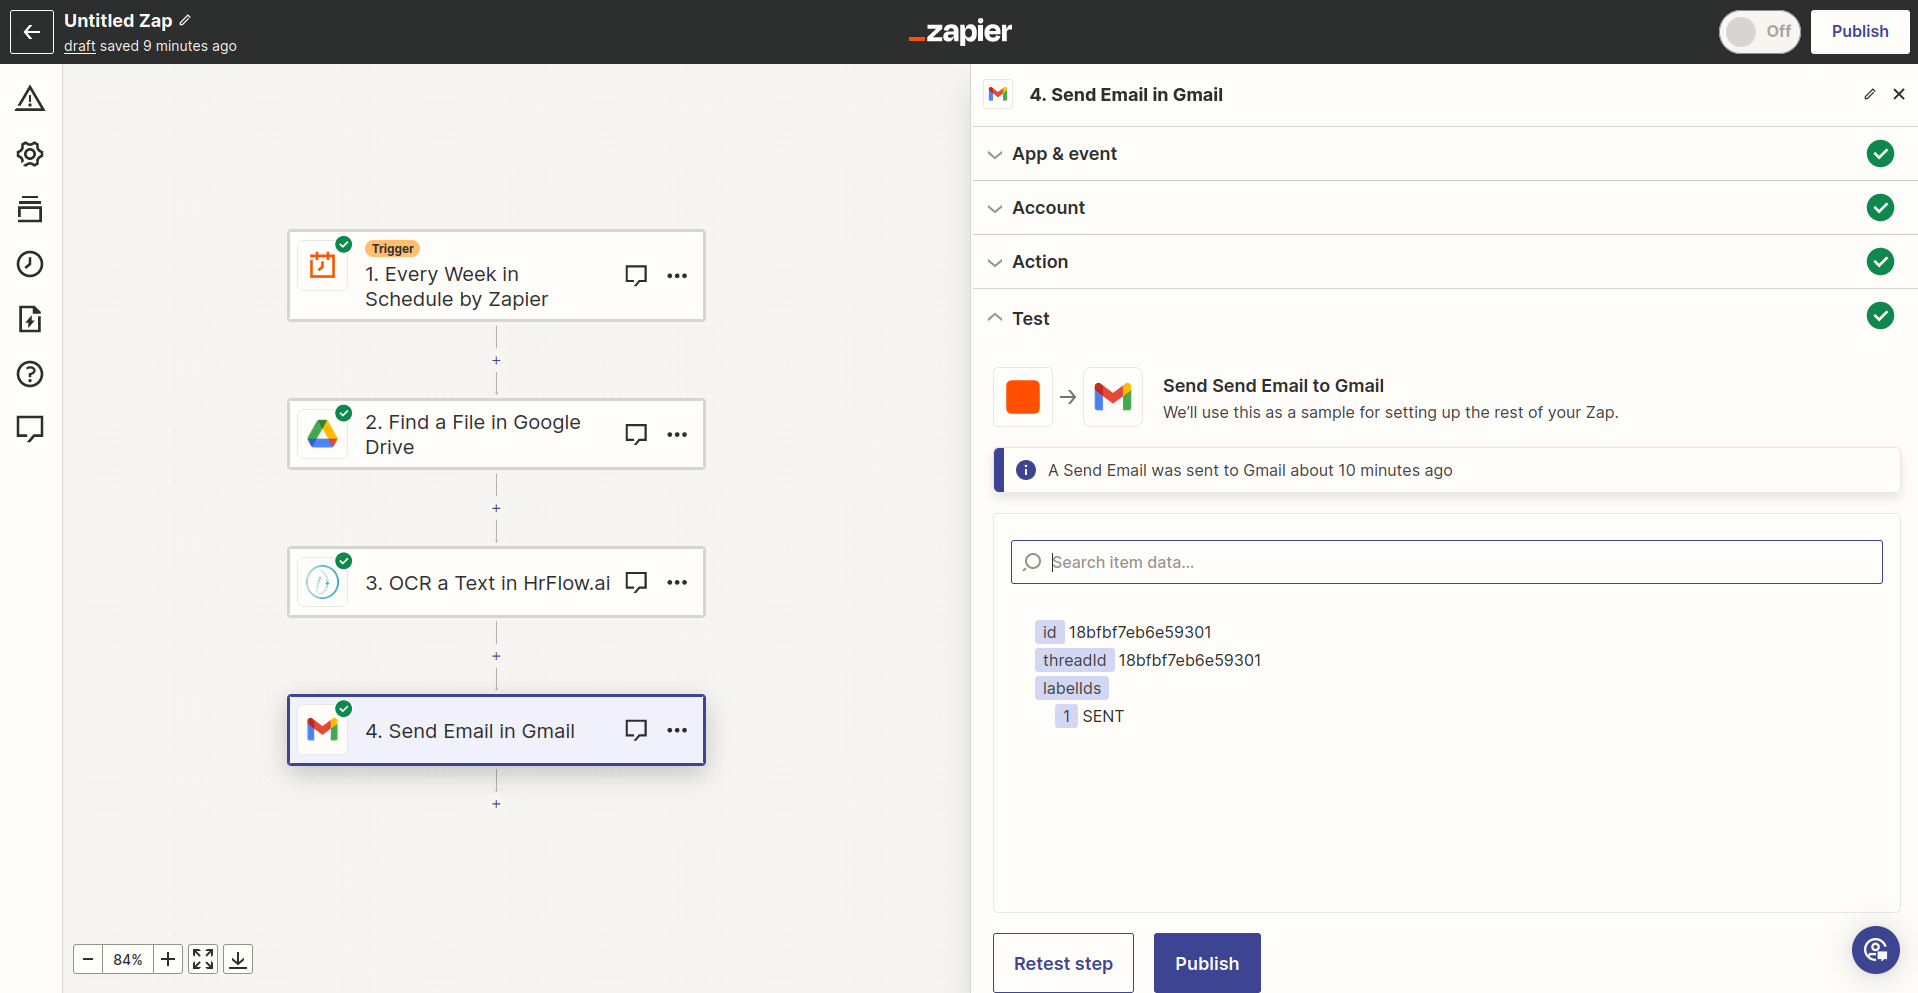
Step 6: Inspect the result
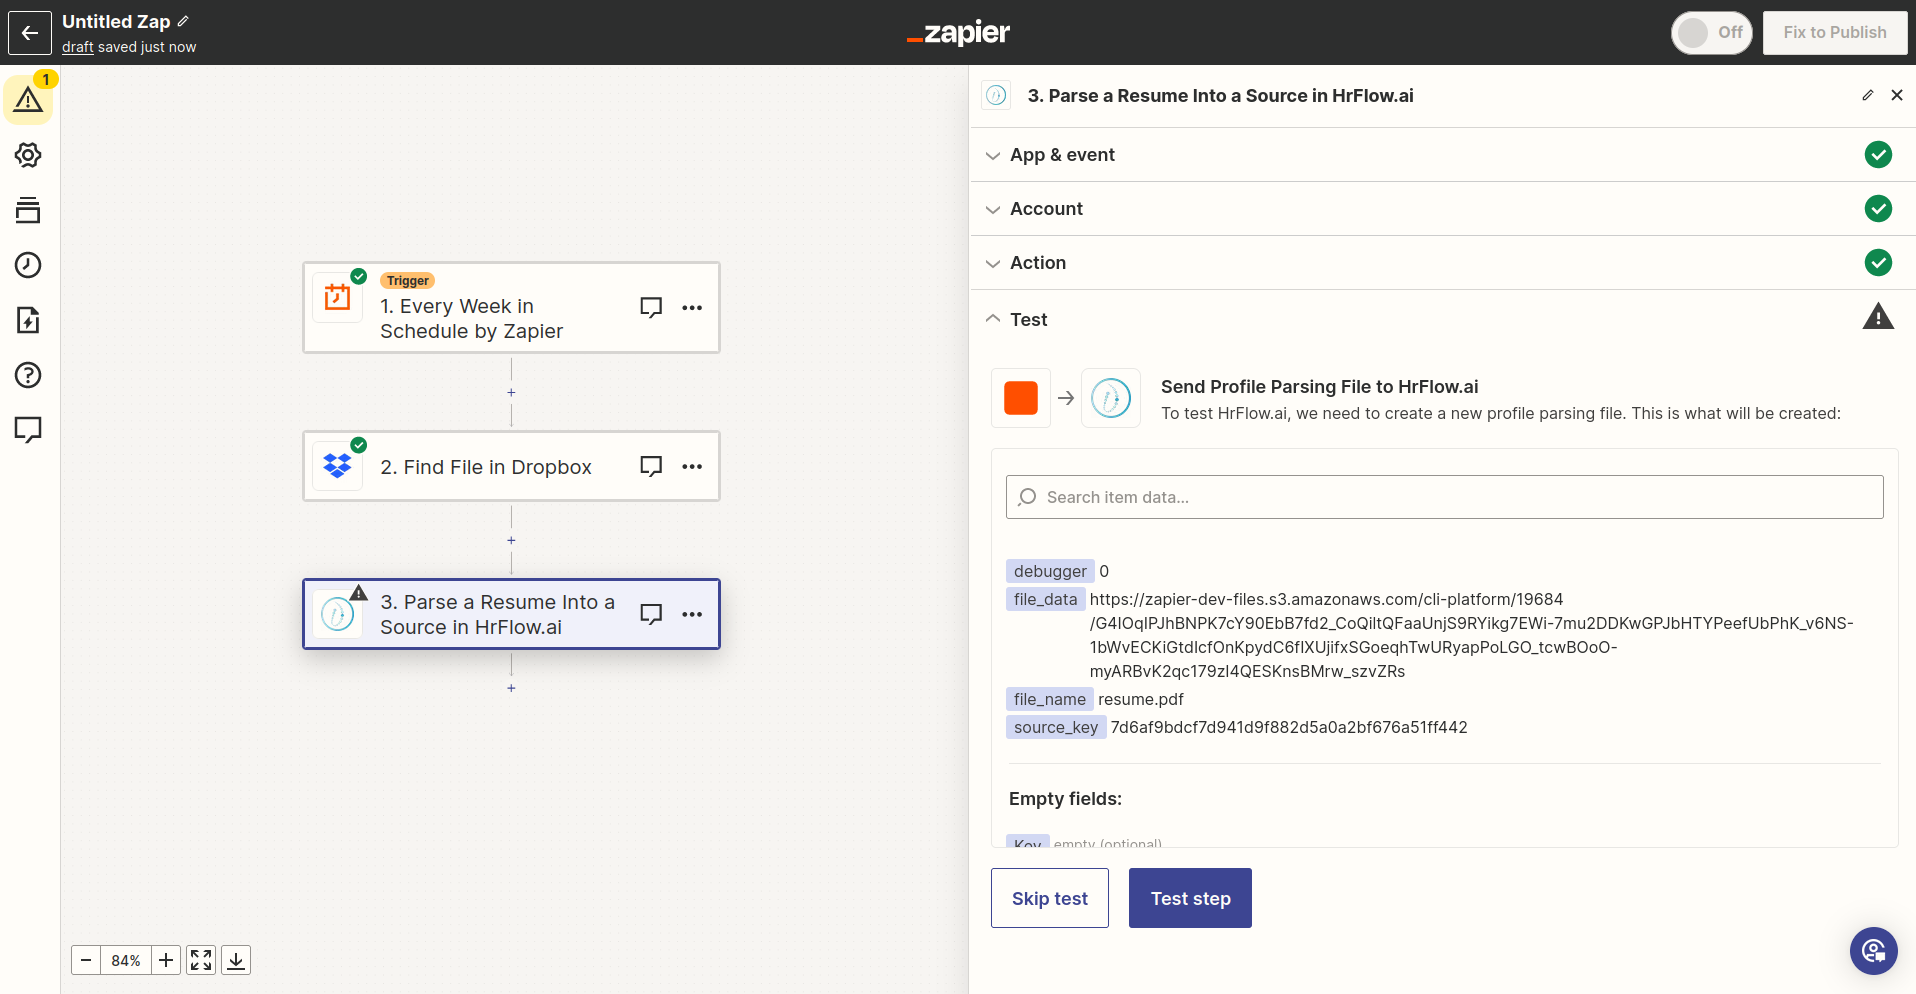
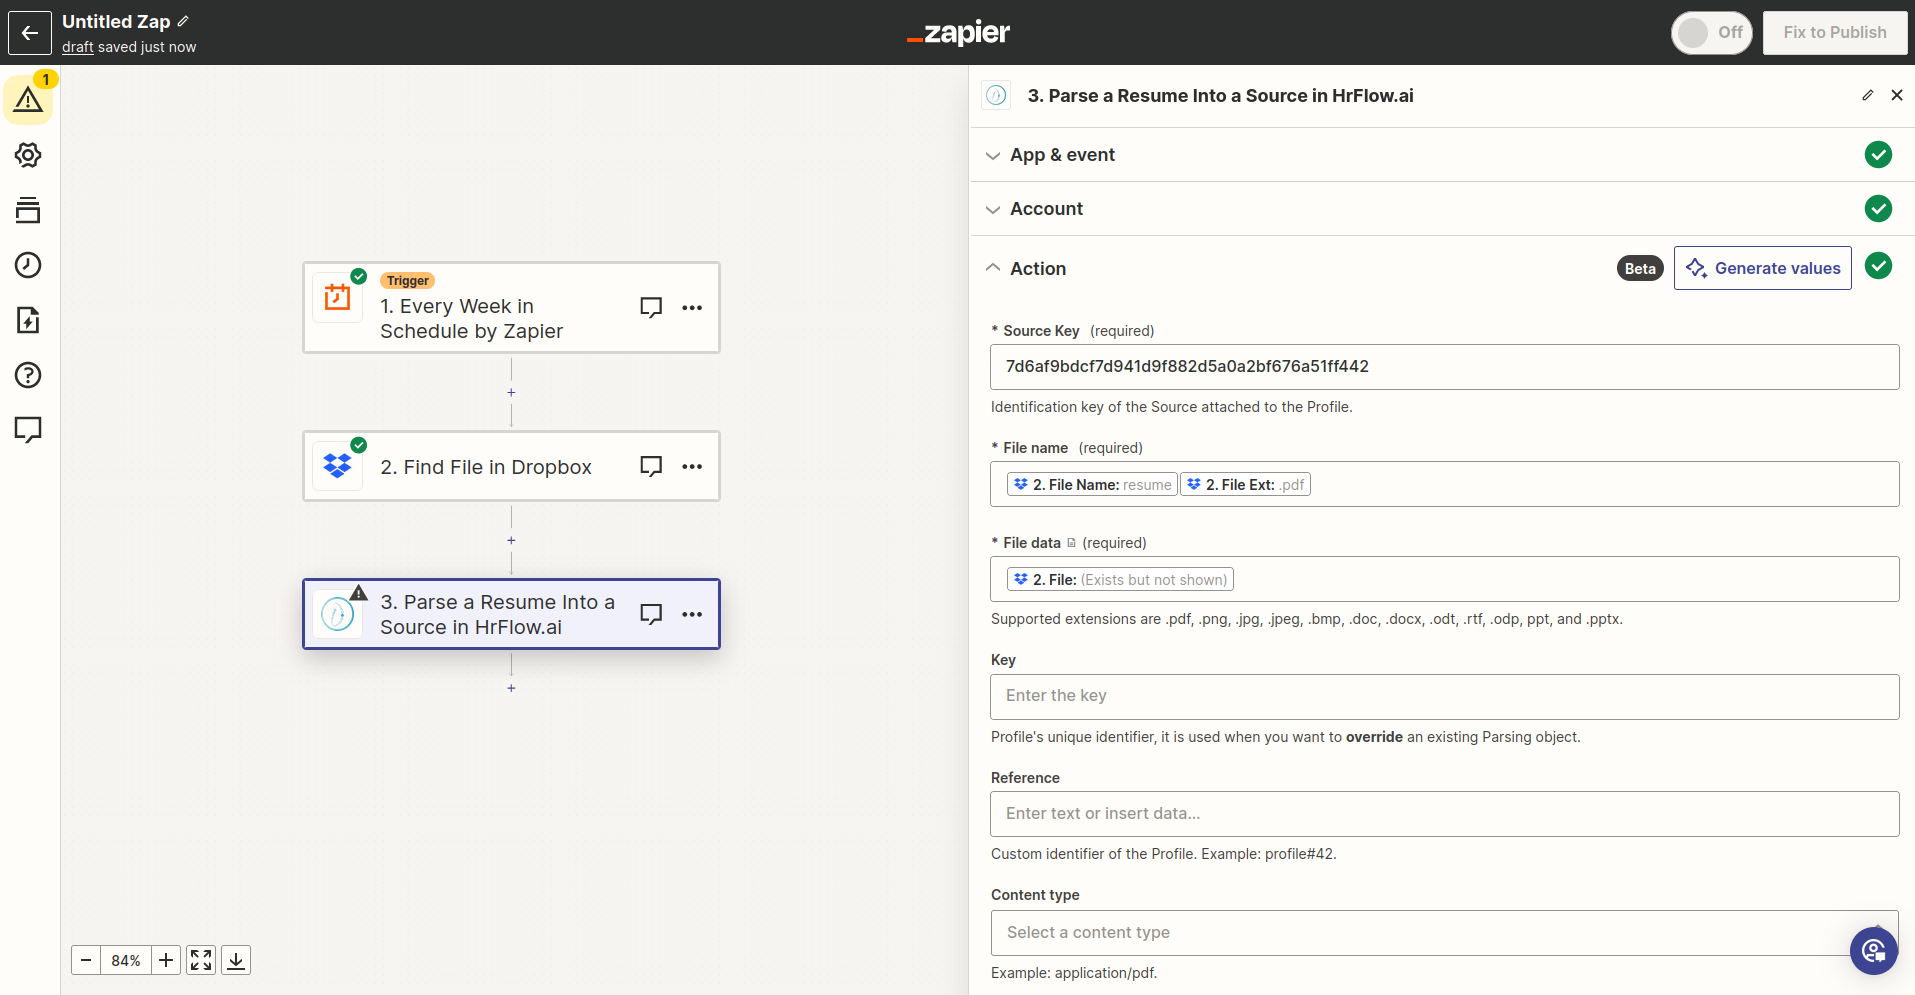
Create a Profile by parsing a Resume from Dropbox
Step 1: Define the flow (Dropbox -> HrFlow.ai)
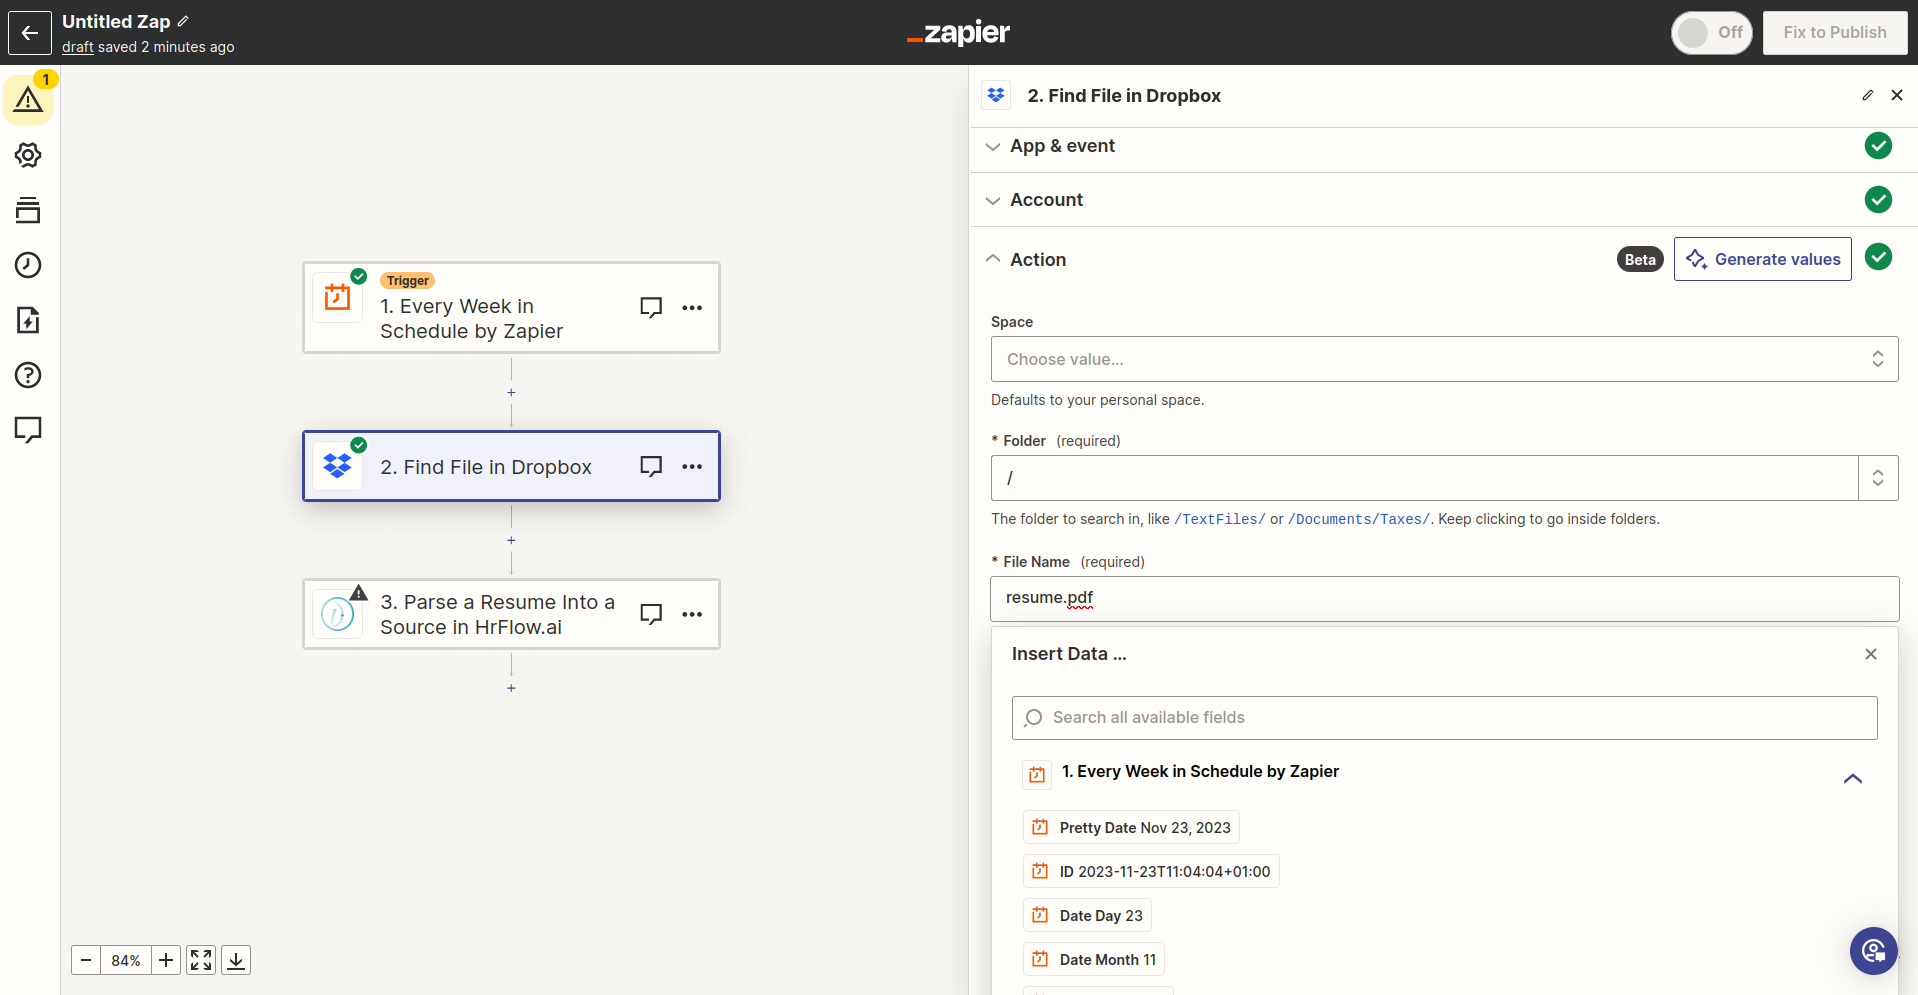
Step 2: Enter the name of the File to download from Dropbox
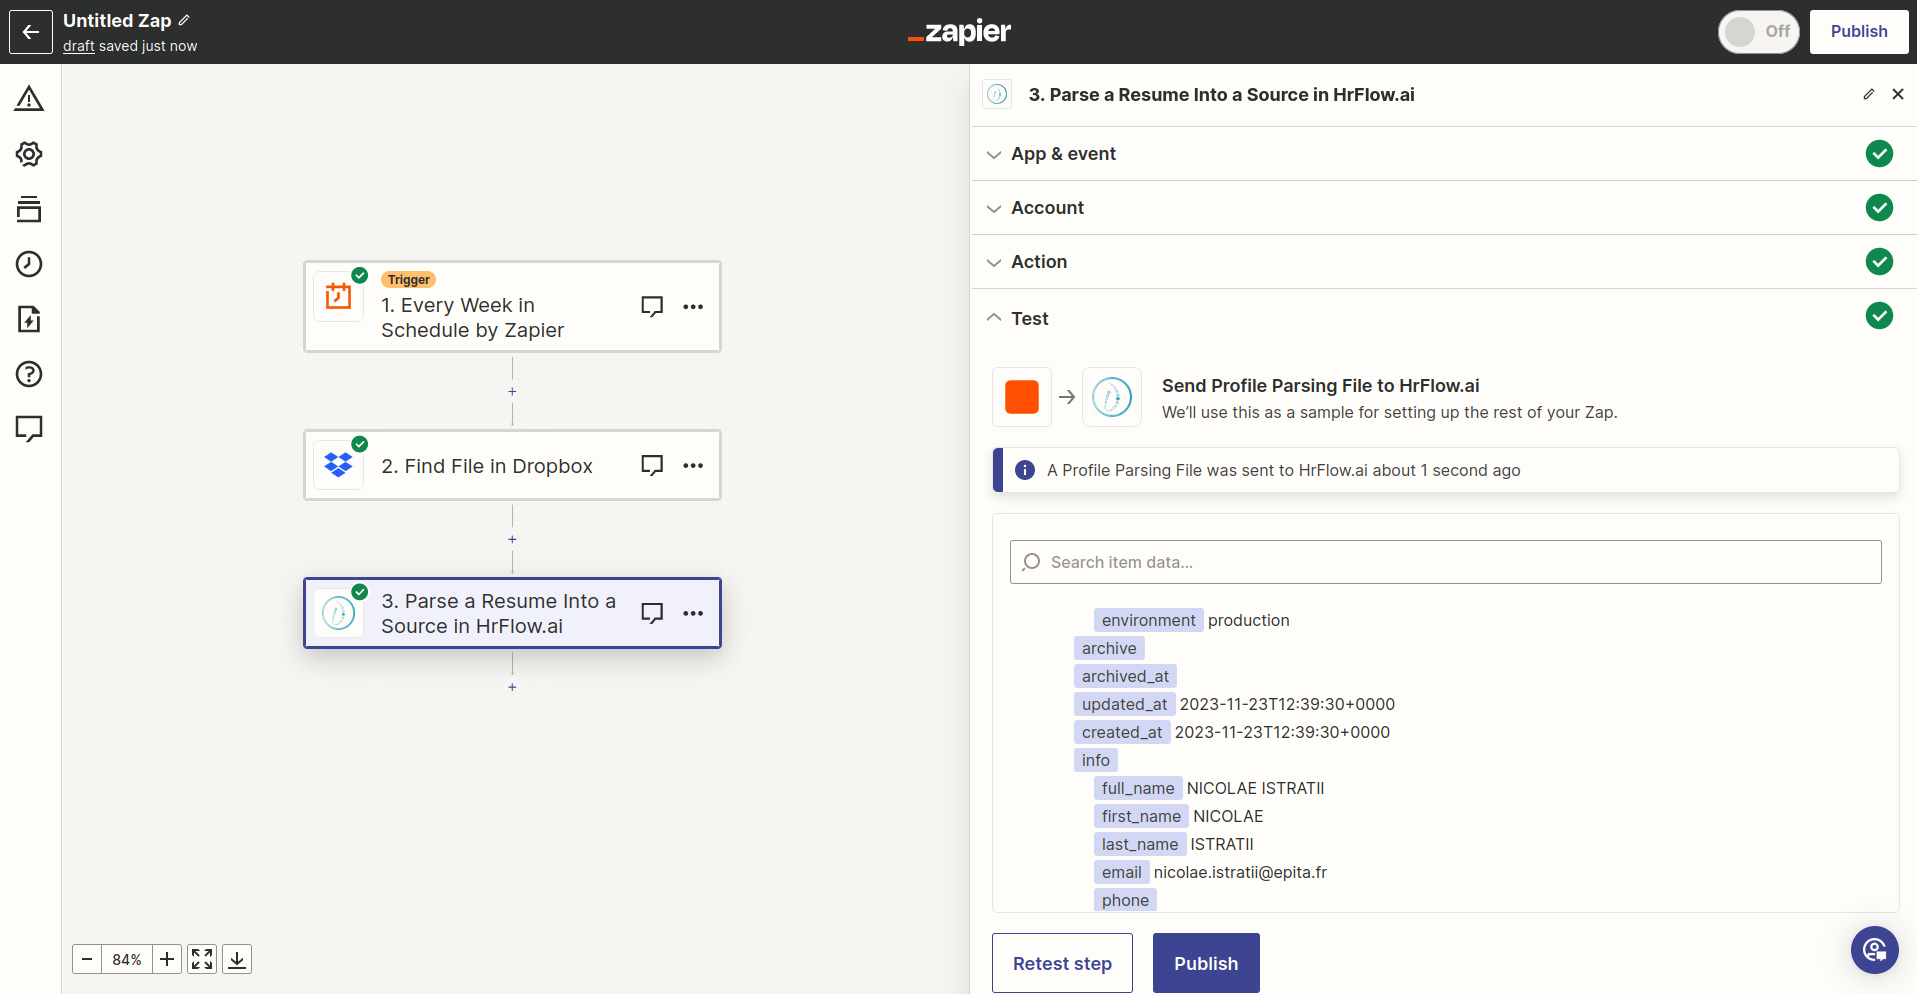
Step 3: Map the File name and the File data to Parse a Resume in a Source endpoint
Step 4: Make sure no module has failed
Advanced examples
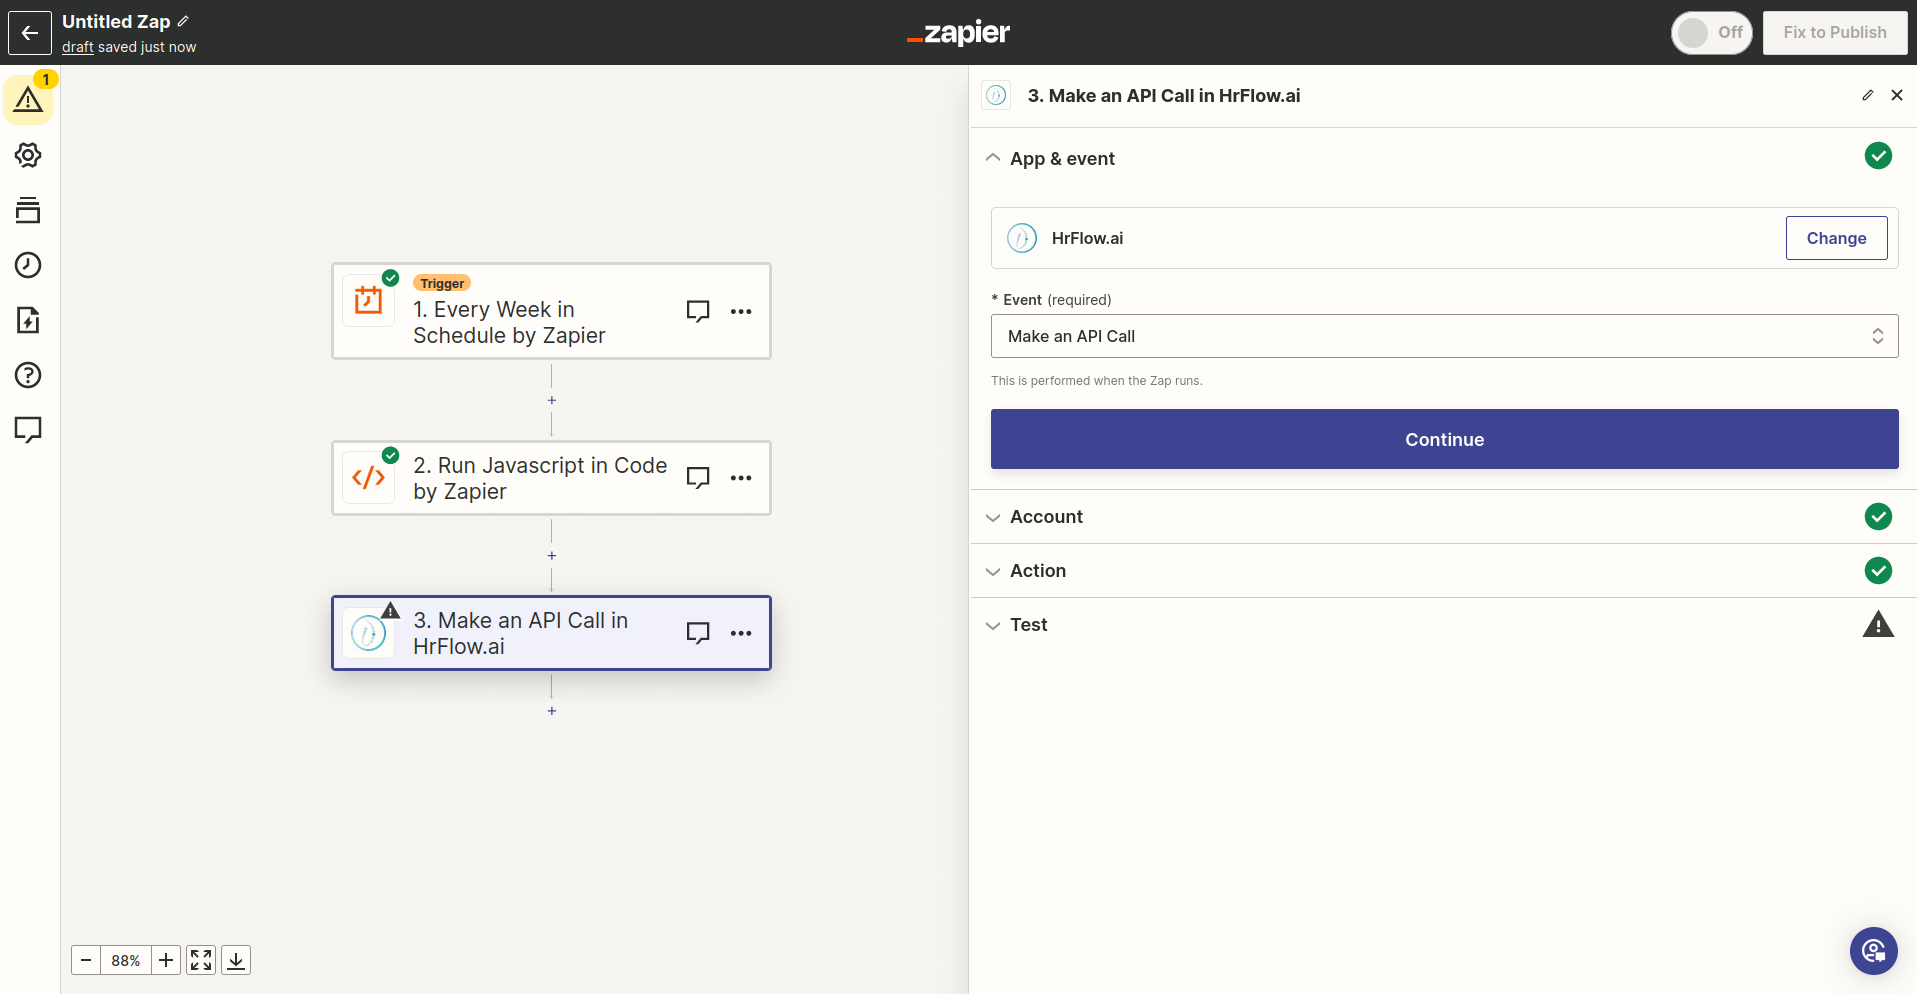
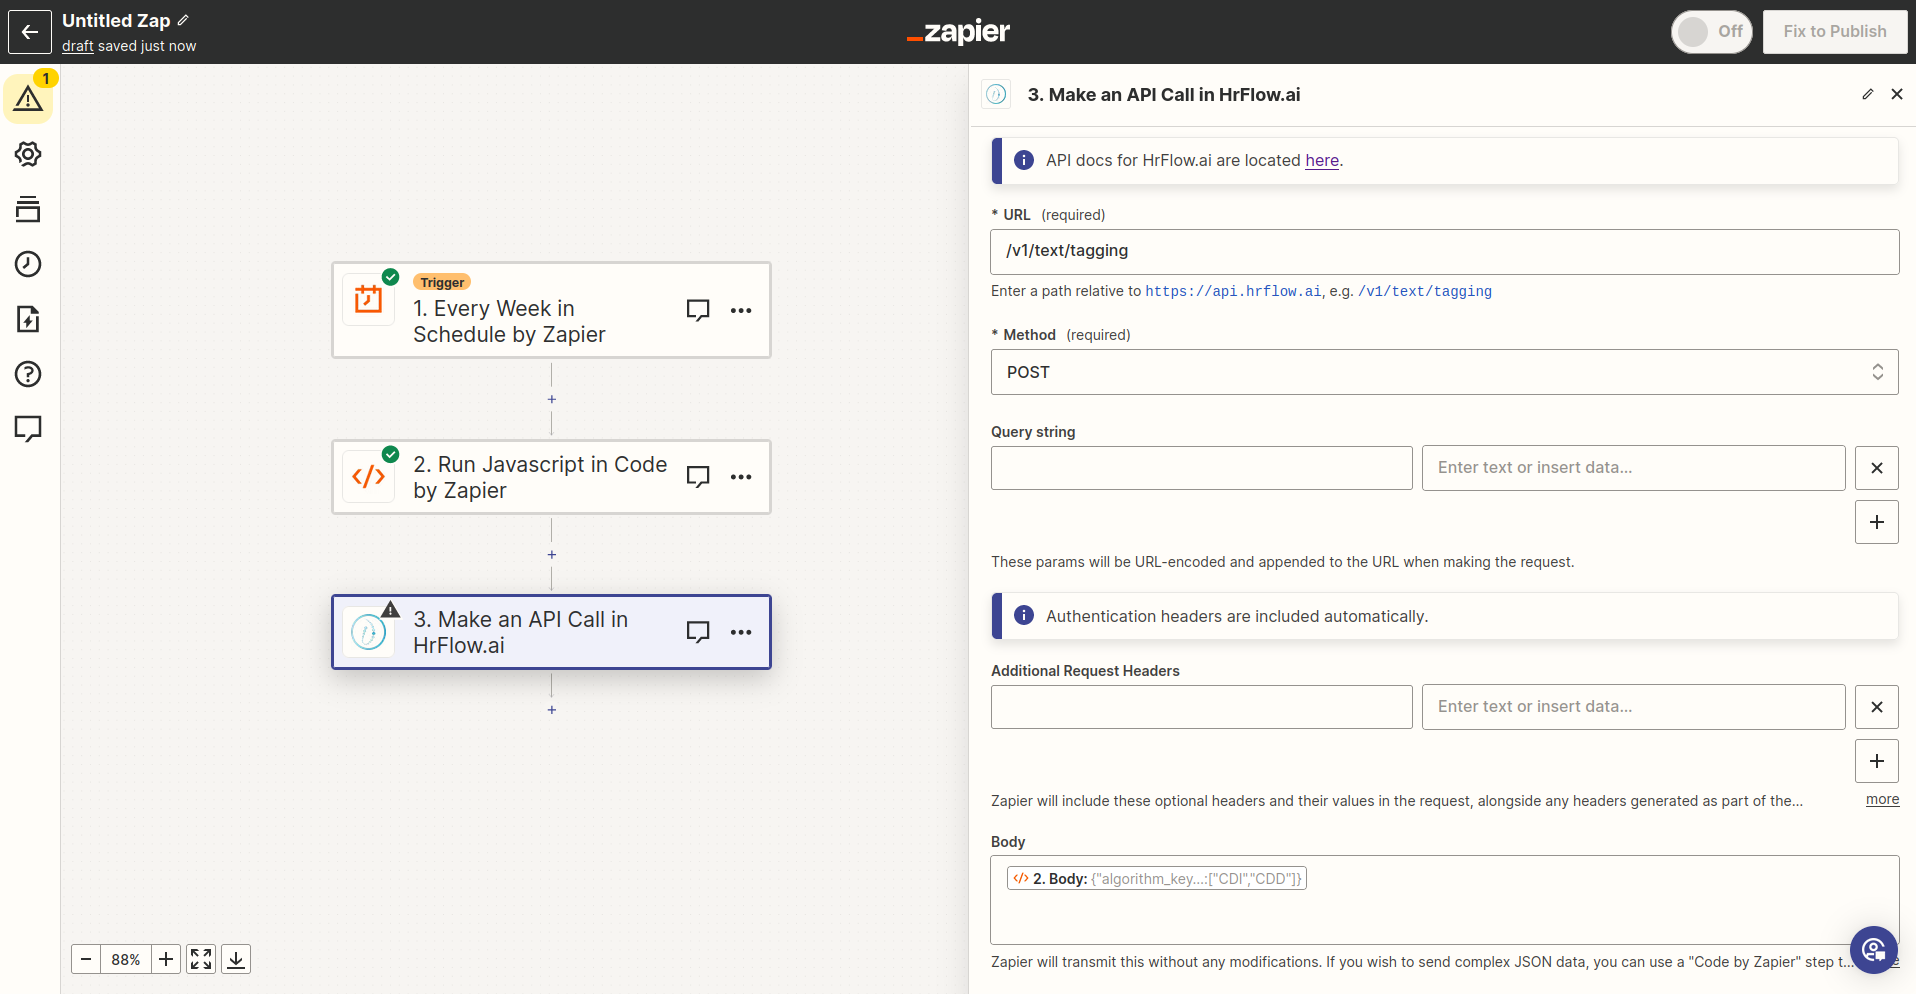
Make an API call to Text Tagging endpoint by the Universal Action
Step 1: Define the flow (Code by Zapier -> HrFlow.ai)
Code by Zapier: An optional but RECOMMENDED stepIn certain scenarios, you may find the need to dynamically format JSON objects under string formats using Code by Zapier. This step allows you to leverage the power of Python or Javascript code to perform custom actions within your Zaps. The flexibility of Code by Zapier is particularly beneficial for tasks such as complex lookup tables, iteration through line items, data cleanup (like XML), and advanced date-finding.
As an action, Code by Zapier can process information before sending it to later steps, enabling you to perform functions like combining adjustments, rearranging data, or fetching data from an API.
Zapier's implementation may not directly accept certain data structures, and Code by Zapier serves as a means to bypass such limitations. This approach is particularly useful when dealing with fields that prefer specific data formats. Embracing this method ensures a flexible and efficient customization process in your Zaps. For example, assign to a field an array of objects, under string format, which must be correctly interpreted in the backend of the respective application.
Step 2: Define the body
const body = {
  algorithm_key: "tagger-hrflow-labels",
  texts: [
    "Data Insights Corp. is seeking a Senior Data Scientist for a contract-to-direct position. You will be responsible for designing and implementing advanced machine learning algorithms and playing a key role in shaping our data science initiatives. The CDI arrangement offers a pathway to a full-time role",
    "DataTech Solutions is hiring a Data Scientist for a fixed-term contract of 12 months. You will work on various data analysis and modeling projects and assisting in short-term projects; with the possibility of extension or permanent roles"
  ],
  context: "The CDI is a Contrat à Durée Indeterminée - essentially an open-ended or permanent employment contract.  The CDD is a Contrat à Durée Determinée - a fixed-term or temporary employment contract.  These are the two most common types but by no means the only form of French employment contract. The contracts have to be drawn up by the employer, who must ensure that it's legally the correct type for the circumstances.",
  labels: ["CDI", "CDD"]
}

return {body: JSON.stringify(body)}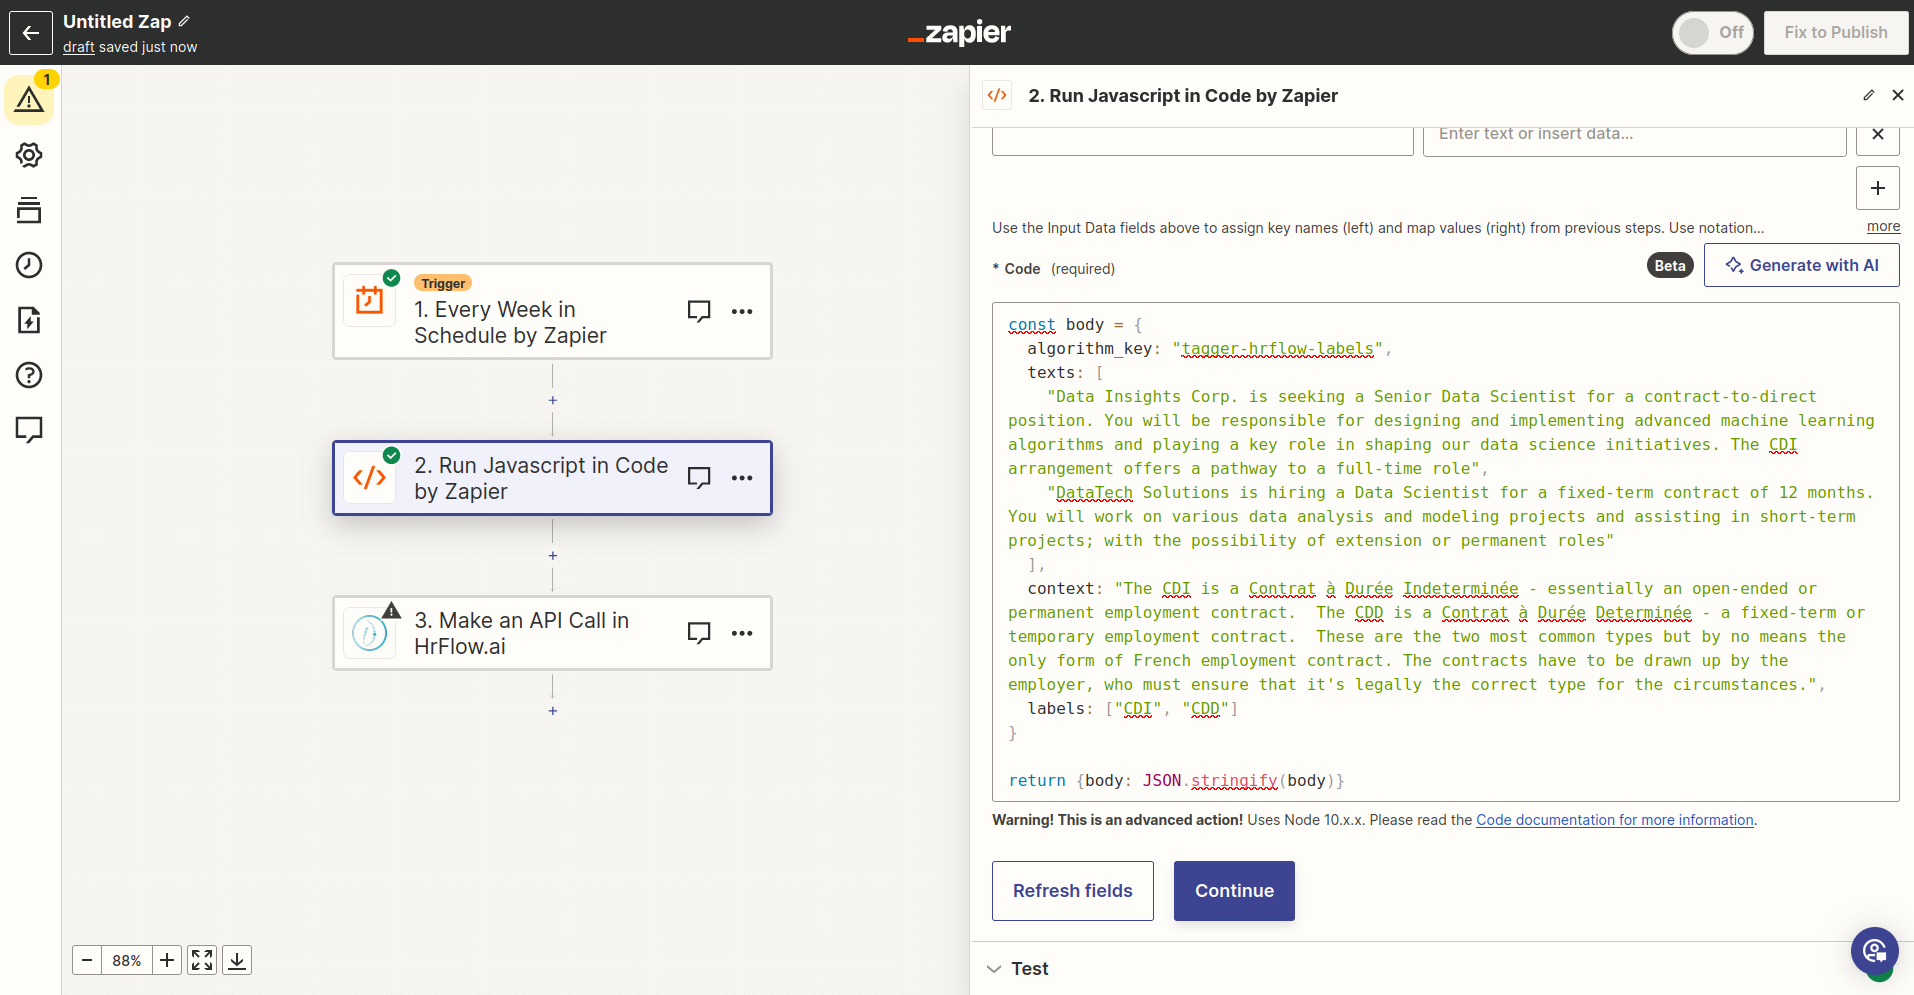
Step 3: Prepare the API call and Map the body parameter
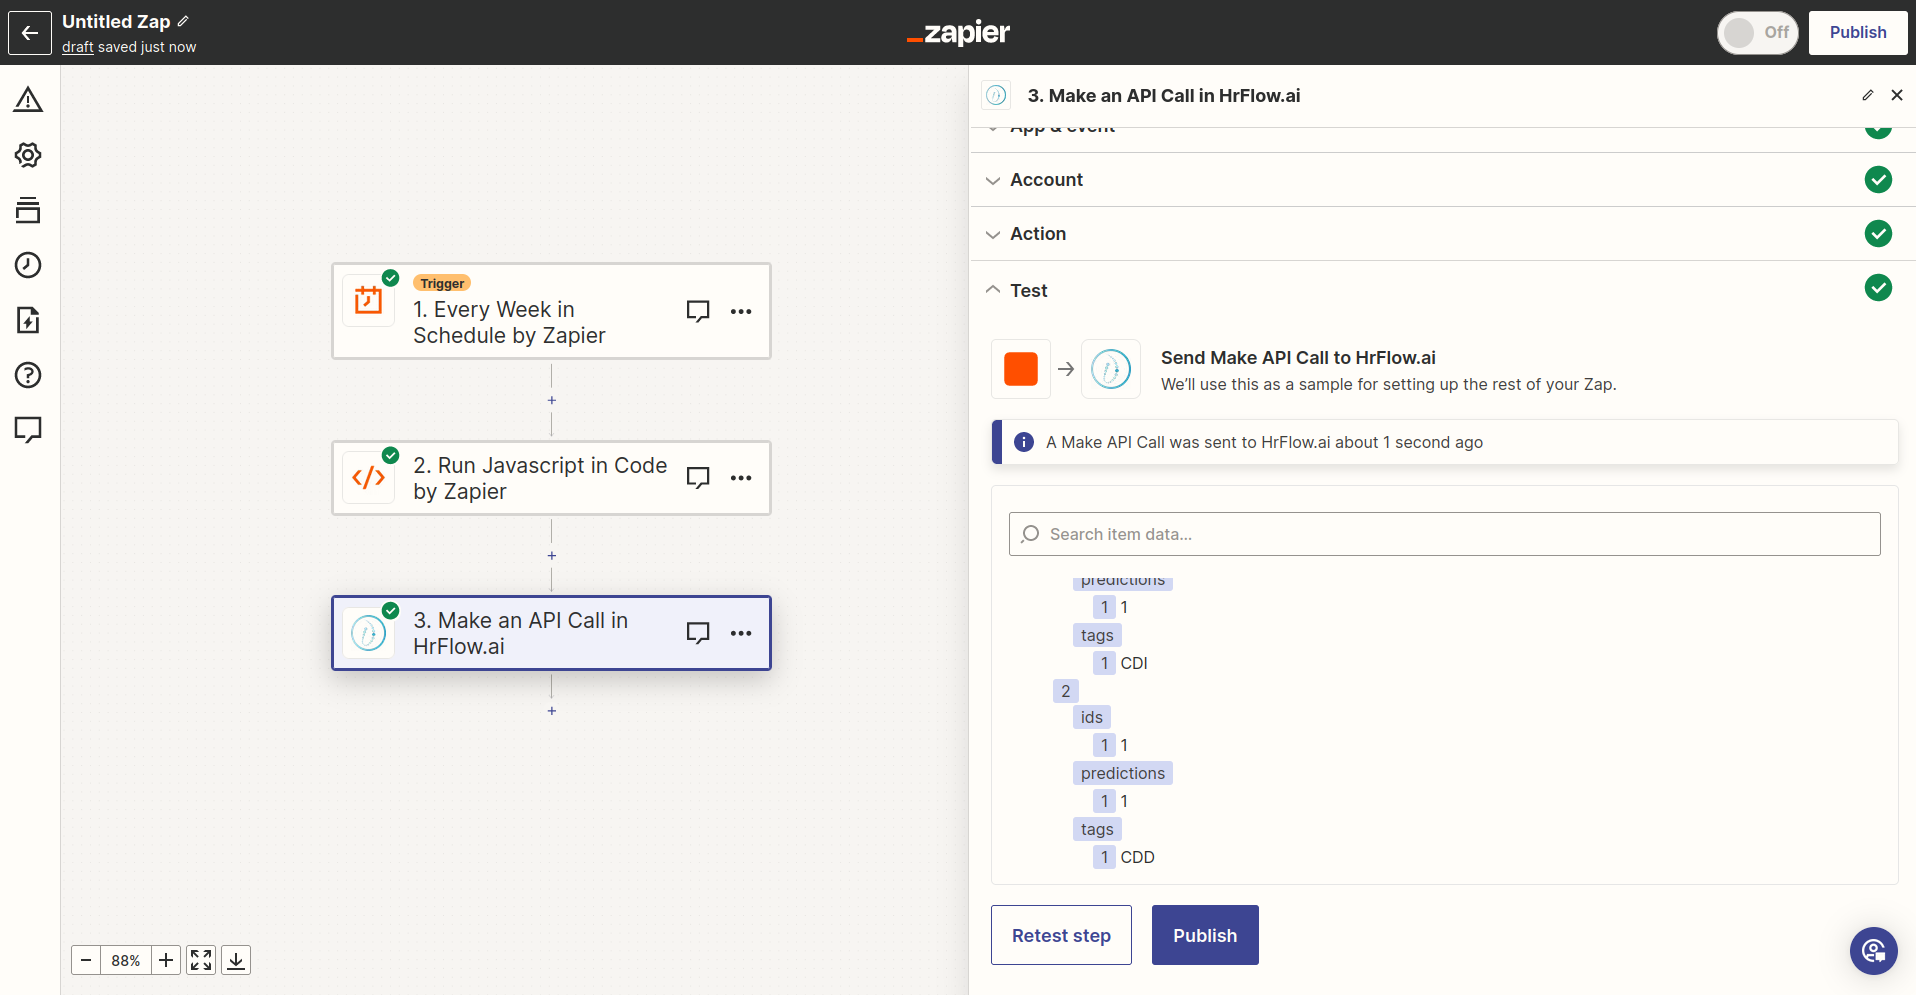
Step 4: Make sure no module has failed
Updated about 2 months ago