🔄 Introduction to Microsoft Power Automate ETL
Empower your organization with a low-code platform, seamlessly connecting applications, workflows, and AI-powered tools. Harness over 1000 Power Platform connectors for unified, efficient solutions.
Overview
: Unleash the Power of Automation with a Low-Code Platform for Seamless Workflow Integration.](https://files.readme.io/e5386b1-3-1.png)
Welcome to Microsoft Power Automate: Unleash the Power of Automation with a Low-Code Platform for Seamless Workflow Integration.
Mission
Empower every individual and organization to achieve more by providing a low-code automation platform that enables the seamless integration of applications, the automation of repetitive tasks, and the creation of intelligent workflows, fostering innovation and efficiency across diverse business processes.
Key Features
- Low-Code Development: Leverage Microsoft Flow's low-code tools to develop solutions without extensive coding efforts. Enable users across your organization to contribute to the development process.
- Data Connectivity: Connect data seamlessly across applications using the HrFlow.ai API through the Power Platform. Unlock the potential of your data for creating comprehensive workflows and applications.
- Enterprise-Grade Compliance: Ensure compliance and governance with enterprise-grade security features. Monitor and manage low-code investments easily to meet organizational standards.
- Unified Solutions: Utilize over 1000 Power Platform connectors to integrate HrFlow.ai with various applications. Create unified solutions that streamline processes and enhance collaboration.
Prerequisites
Before you begin using the Microsoft Power Automate app and connecting to our API, ensure you have the following:
-
API Key: Obtain your API key by following the instructions at API Authentication Documentation.
-
Email Address: Ensure you have a valid email address associated with your account.
These credentials are essential for establishing a secure and effective connection between the Microsoft Power Automate app and our API.
App Functionality
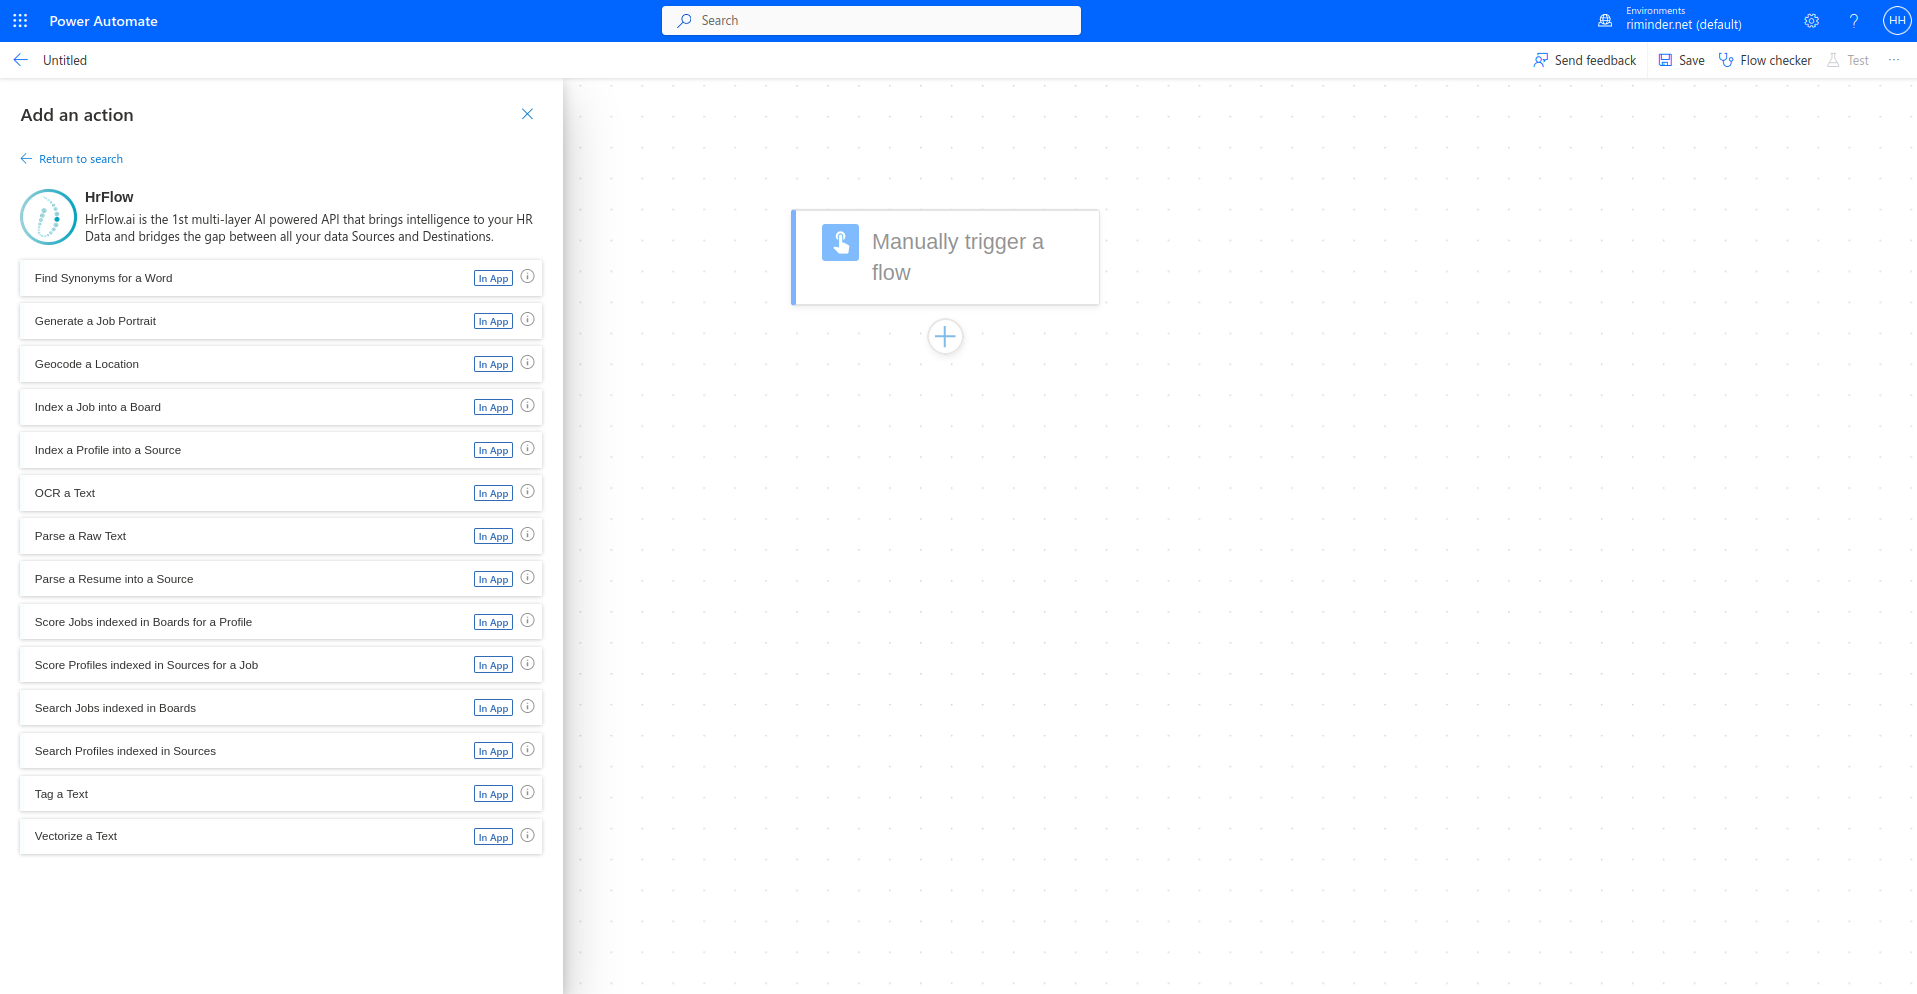
Explore the robust capabilities of the HrFlow.ai integration within Microsoft Power Automate. This section unveils a spectrum of functionalities driven by 14 meticulously implemented endpoints from the HrFlow.ai API. From automating repetitive tasks to leveraging AI-powered tools, discover how these endpoints empower users to seamlessly connect, automate, and innovate within your organization.
What is an Action ?Actions determine the operations that users can perform. Actions can be used to read, create, update or delete resources in the underlying connector.
Implemented Endpoints
Profile API
- Profile Indexing – Index a Profile into a Source
- Profile Parsing File – Parse a Resume into a Source
- Profile Scoring – Score Profiles for a Job
- Profile Searching – Search Profiles in Sources
Job API
- Job Indexing – Index a Job into a Board
- Jobs Scoring – Score Jobs for a Profile
- Jobs Searching – Search Jobs in Boards
Text API
- Text Embedding – Vectorize a Text
- Text Geocoding – Geocode a Location
- Text Imaging – Generate a Job Portrait
- Text Linking – Find Synonyms for a Word
- Text OCR – OCR a Text
- Text Parsing – Parse a Raw Text
- Text Tagging – Tag a Text
Useful Guides
Explore these informative guides to enhance your understanding and make the most out of our platform. Whether you're a beginner looking to get started or an experienced user seeking advanced tips, these guides cover a range of topics to support you on your journey.
- Getting started with cloud flows
- Introduction to desktop flows
- Bussiness process flows overview
- Process mining overview
- Connectors overview
- AI Builder
- Plan a Power Automate project
- [HrFlow.ai x Microsoft Power Automate]
Basic Actions
In Power Automate, actions define what operations your flows can perform. They encompass reading, creating, updating, or deleting resources through connector operations. Flows, composed of connections and actions, are the building blocks for orchestrating seamless workflows, allowing you to automate tasks efficiently. This section explores the essential concepts of crafting impactful flows through connector actions.
FlowsIn Microsoft Power Automate, you have the flexibility to create various types of flows, each tailored to specific automation needs. Here's a breakdown of the three main flow types:
Cloud FlowsCreate a cloud flow when you want your automation to be triggered either automatically, instantly, or via a schedule. Choose the type of cloud flow based on your use case:
- Automated Flows
- Use Case: Triggered by specific events such as emails or social media mentions.
- Automation Target: Connectors for cloud or on-premises services facilitating seamless communication.
- Instant Flows
- Use Case: Initiate automation with a click of a button from Desktop or Mobile devices.
- Automation Target: Wide range of tasks, from requesting approvals to actions in Teams or SharePoint.
- Scheduled Flows
- Use Case: Schedule routine automations like daily data uploads to SharePoint or databases.
- Automation Target: Tasks that need to be automated on a predefined schedule.
Business Process FlowsBusiness process flows act as guides for individuals to navigate work processes efficiently. They offer a streamlined user experience, leading users through defined organizational processes. Tailor these flows to different security roles for a customized user experience.
Desktop FlowsUtilize desktop flows to automate tasks on the Web or the desktop, enhancing efficiency and reducing manual effort.
Sensible dataPersonal details and any kind of authentication or identification details are mock.
Landing Page
Create
Choose type of Flow
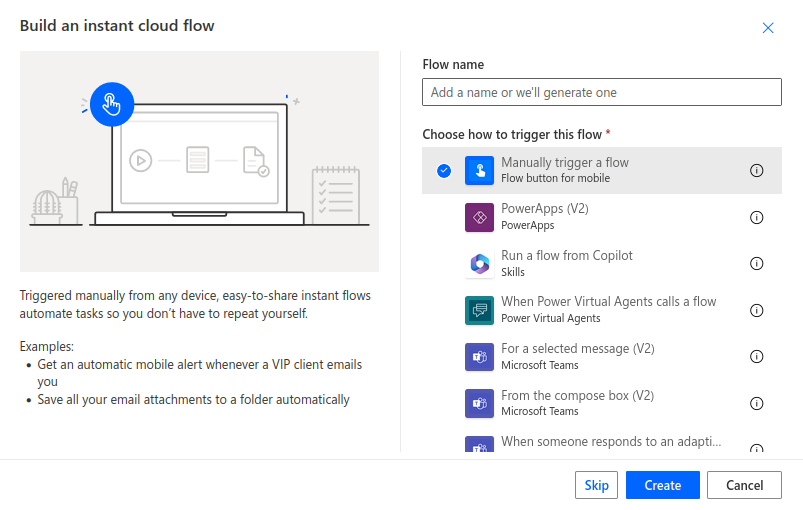
Instant Cloud FlowIn this guide, we'll be using an Instant Cloud Flow with the trigger Manually trigger a flow for testing simplicity. This allows you to initiate the flow at your convenience, making it ideal for testing and understanding the flow creation process.
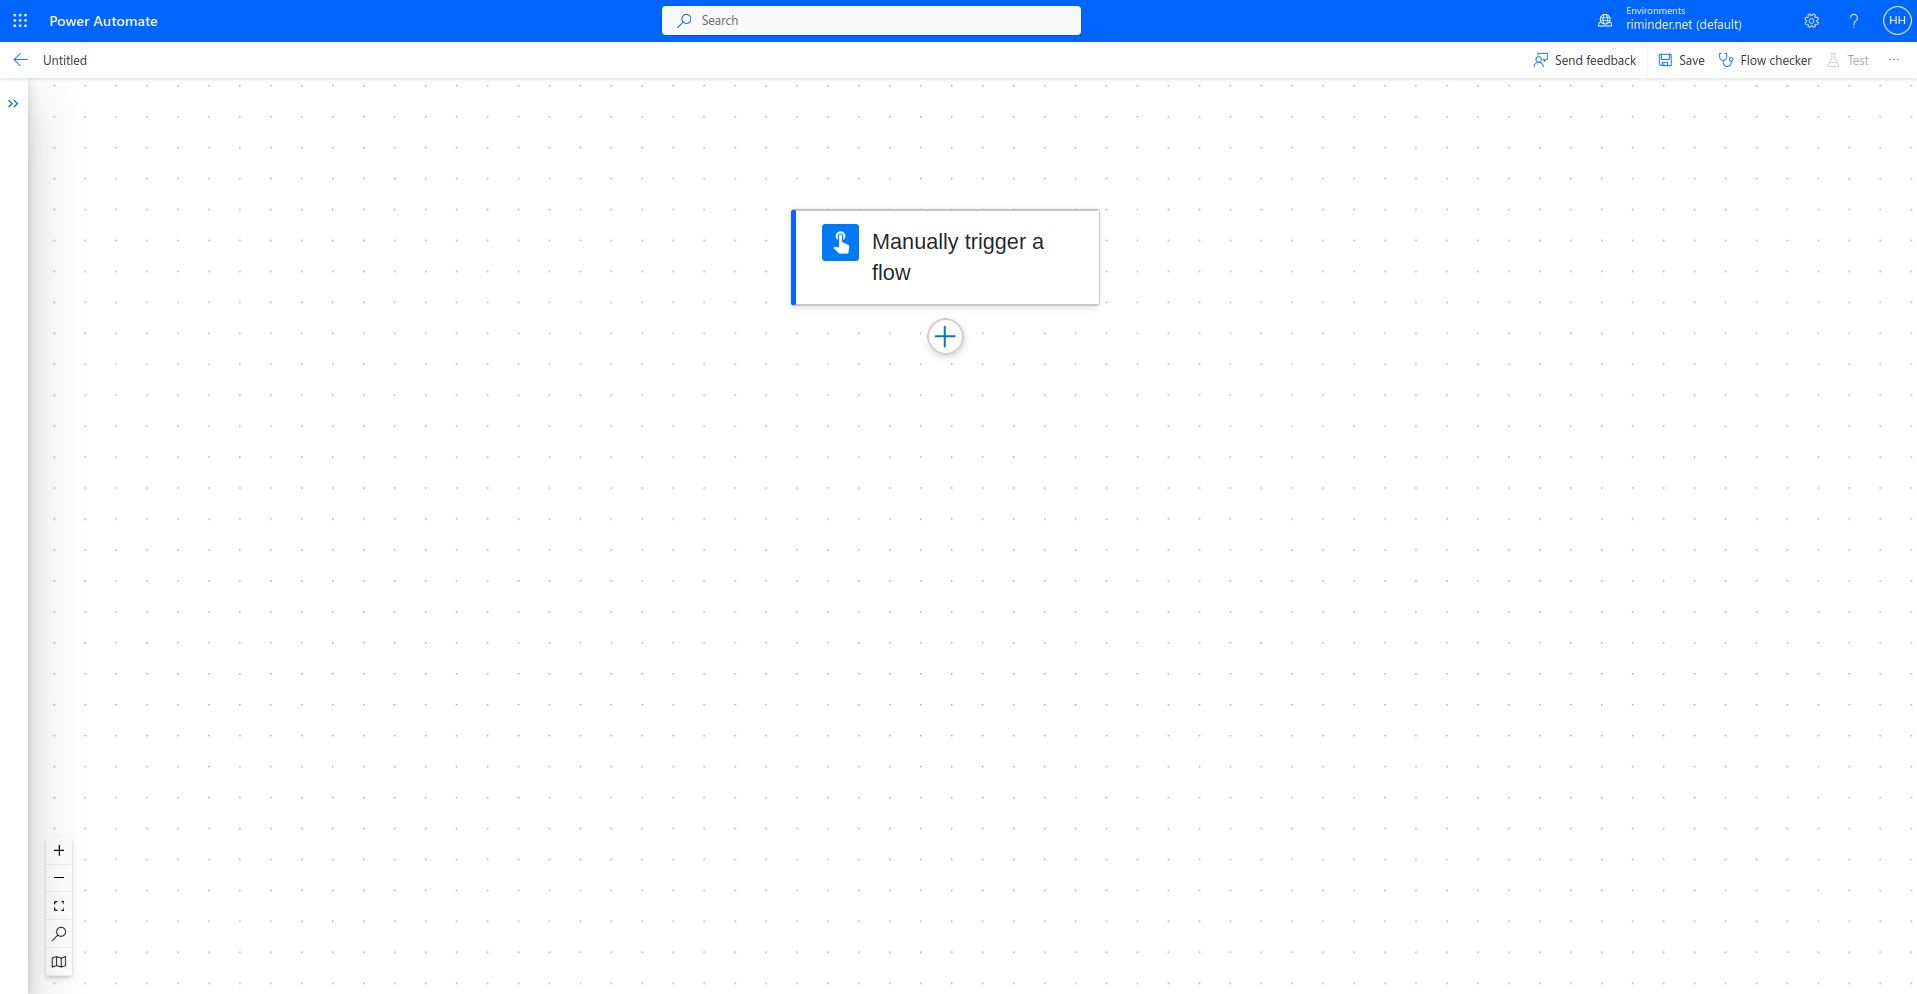
Initiating an Instant Cloud Flow with the Manual Trigger
Initial look of a brand new Flow
Add action
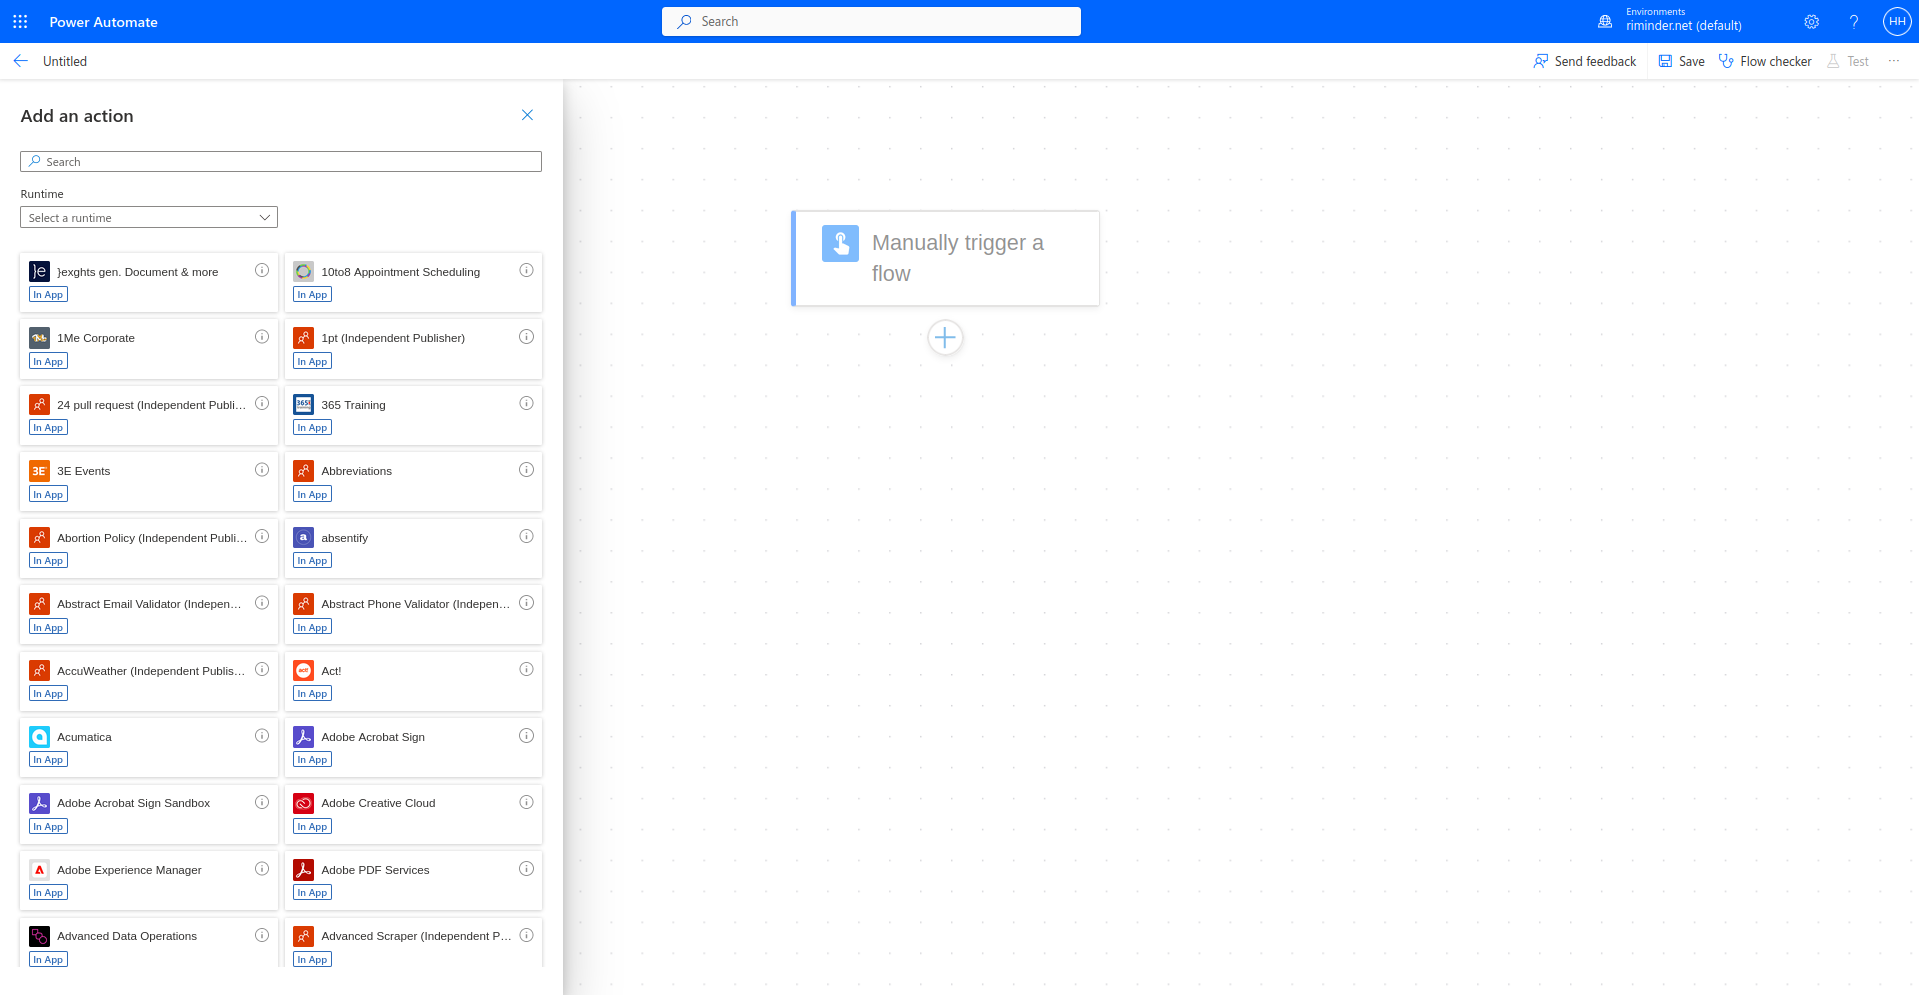
Find the HrFlow.ai app by using the search bar
Create a connection
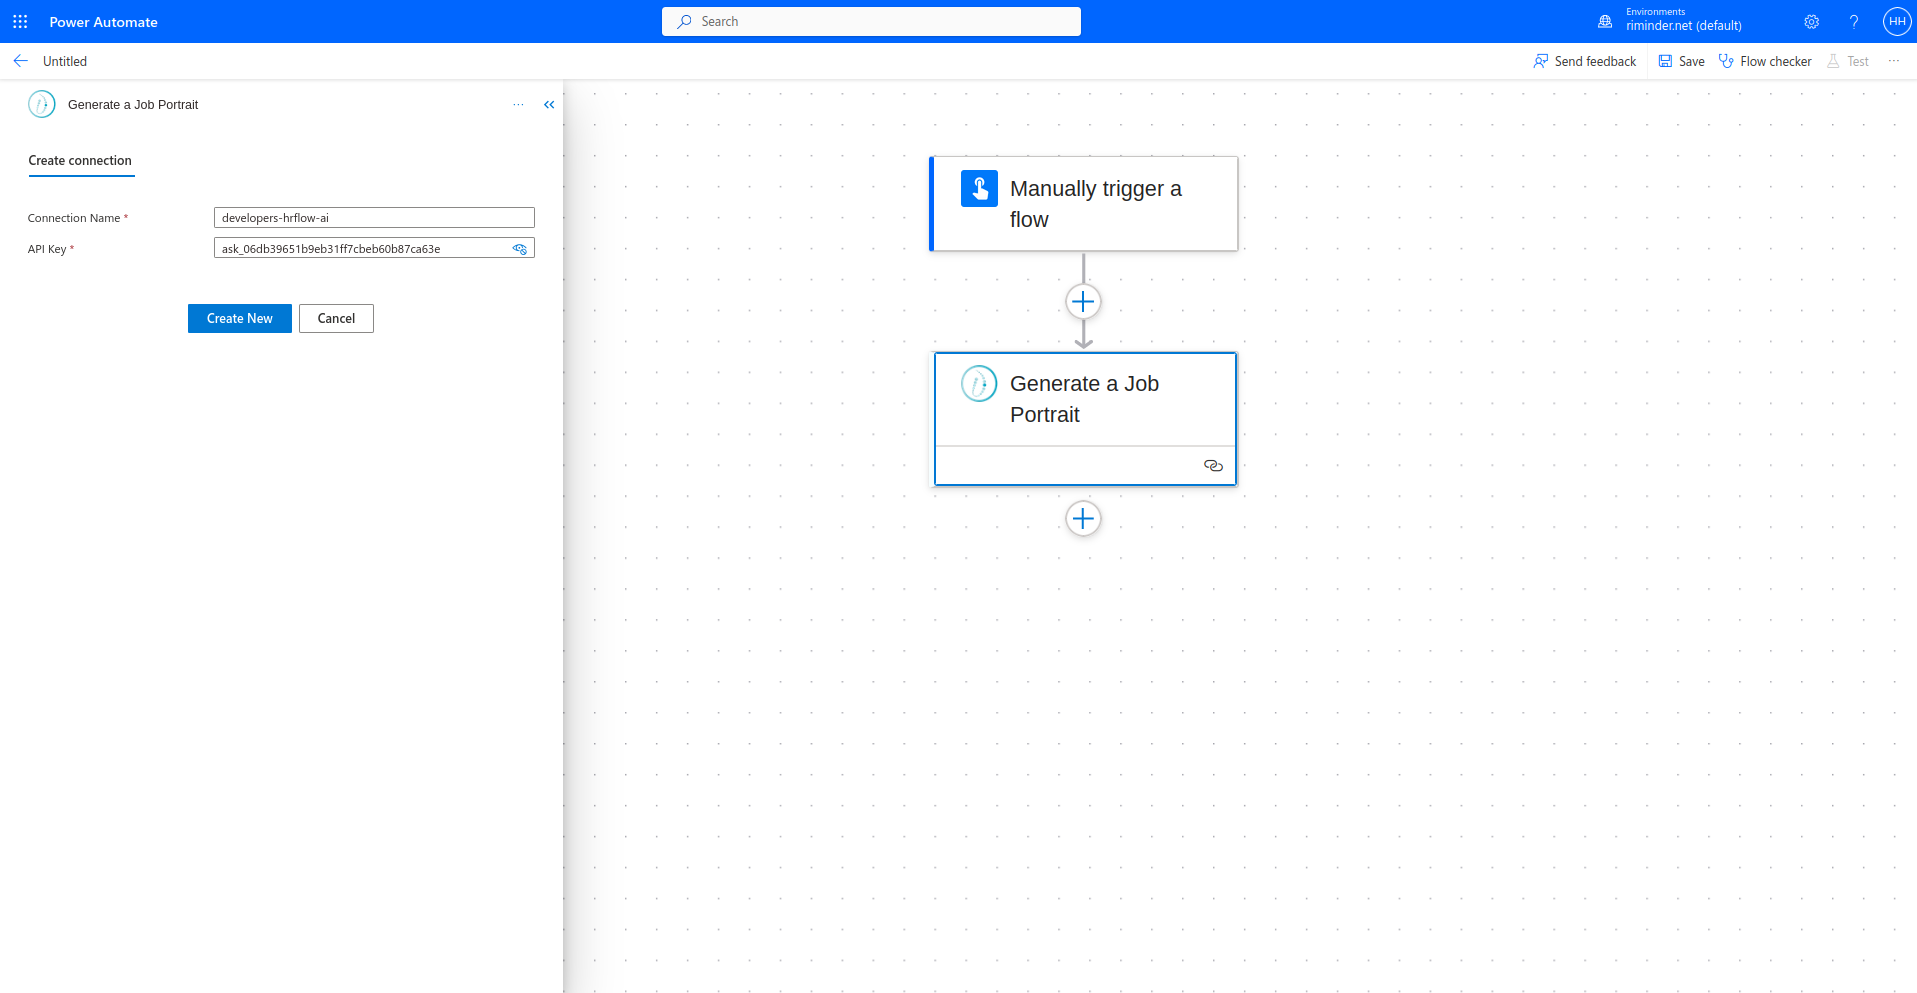
The Connection NameWhen creating a connection, note that the connection name is not crucially significant; it serves as a label to differentiate this particular connection from others. Feel free to choose a name that helps you easily identify and manage your connections within Microsoft Power Automate.
AuthenticationAfter creating the connection, ensure that the associated API key's email is consistently specified for every request to guarantee successful interactions. This email association is crucial for authenticating and authorizing requests within Microsoft Power Automate.
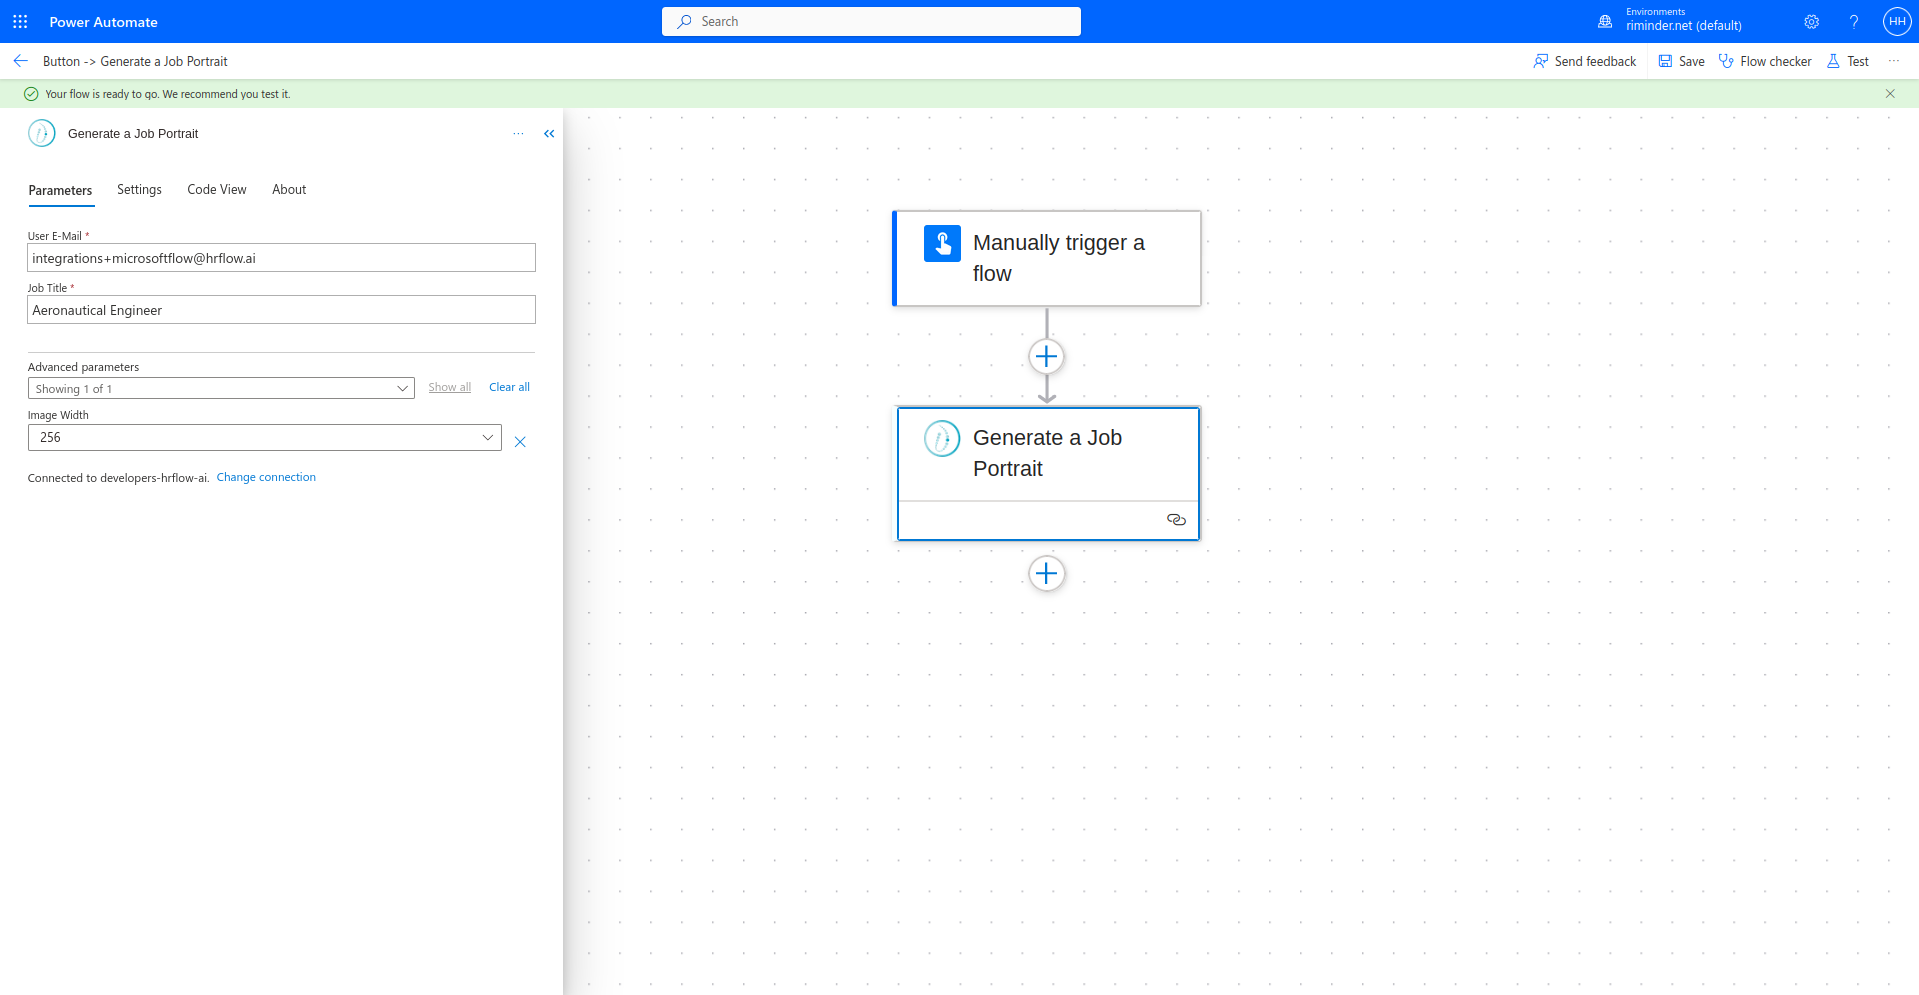
Fill the request fields
 endpoint](https://files.readme.io/67335b8-3-10.png)
Preparing an API call to the Text Imaging endpoint
ConnectionPlease be cautious and attentive to the chosen connection when configuring your flows. Ensure that the correct connection, with the associated API key's email, is selected to avoid any unexpected issues or disruptions in your workflow within Microsoft Power Automate.
Execute Flow
How to test a Flow ?To execute your Flow, follow these steps:
- Save your Flow: Initiate the process by saving your flow using the Save button situated at the top right. This might take a moment to complete.
- Testing Initiation: Click the Test button situated at the top right.
- Select execution mode: Deliberate on the choice between manual or automatic flow execution, aligning with the specific requirements of your workflow.
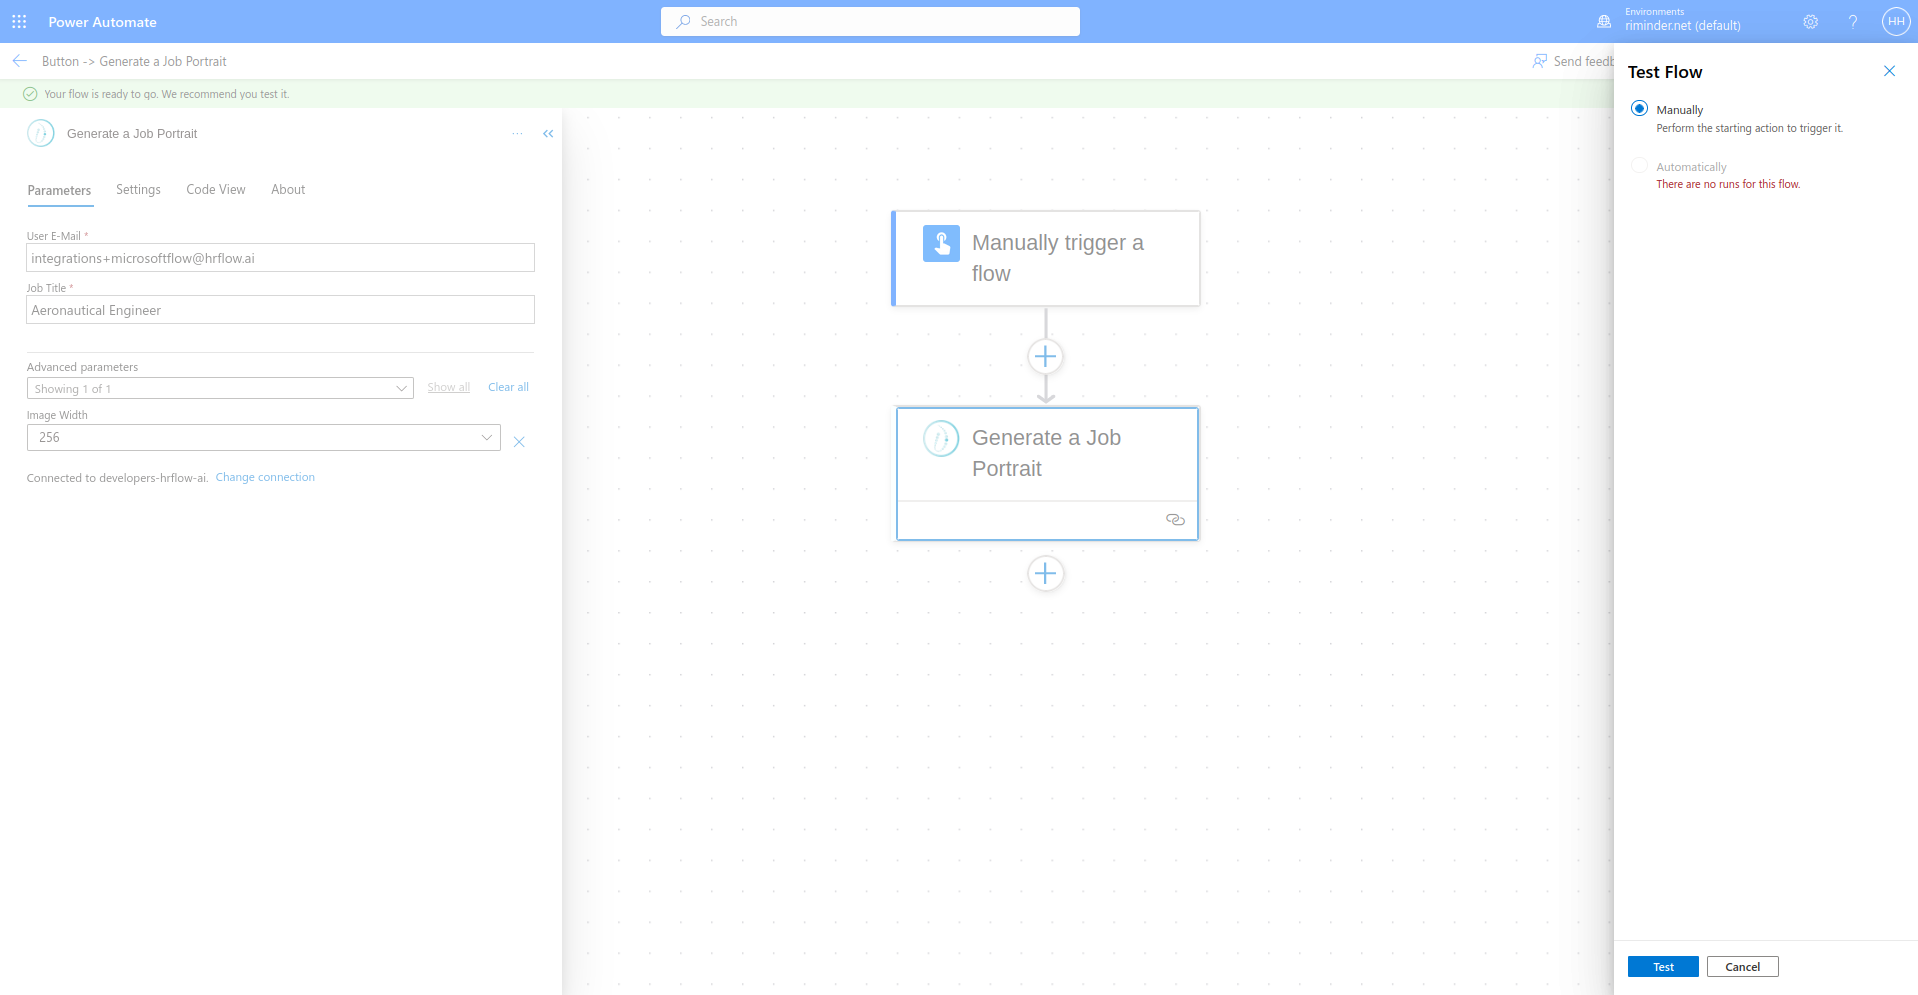
- Confirm the Flow execution
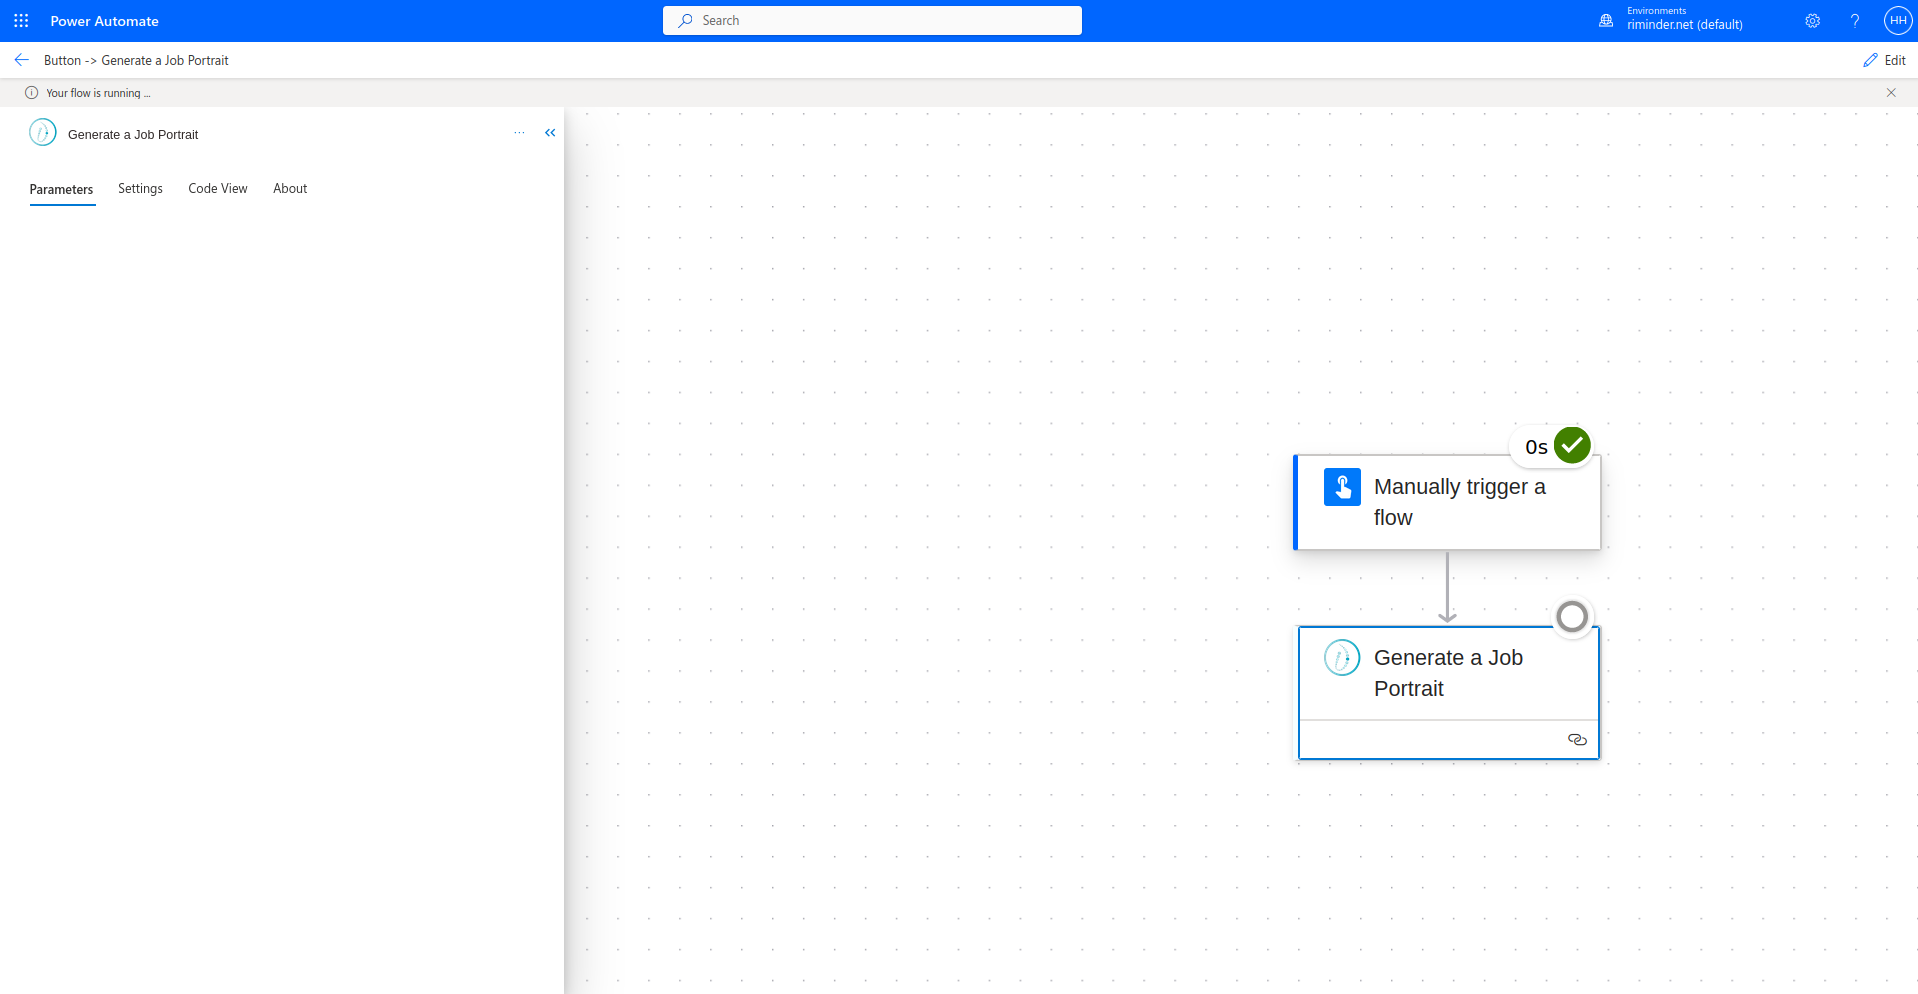
- Run Flow: Click the Run Flow button at the bottom right.
- Inspect Execution: Click the Done button at the bottom right.
Save your Flow
Testing Initiation
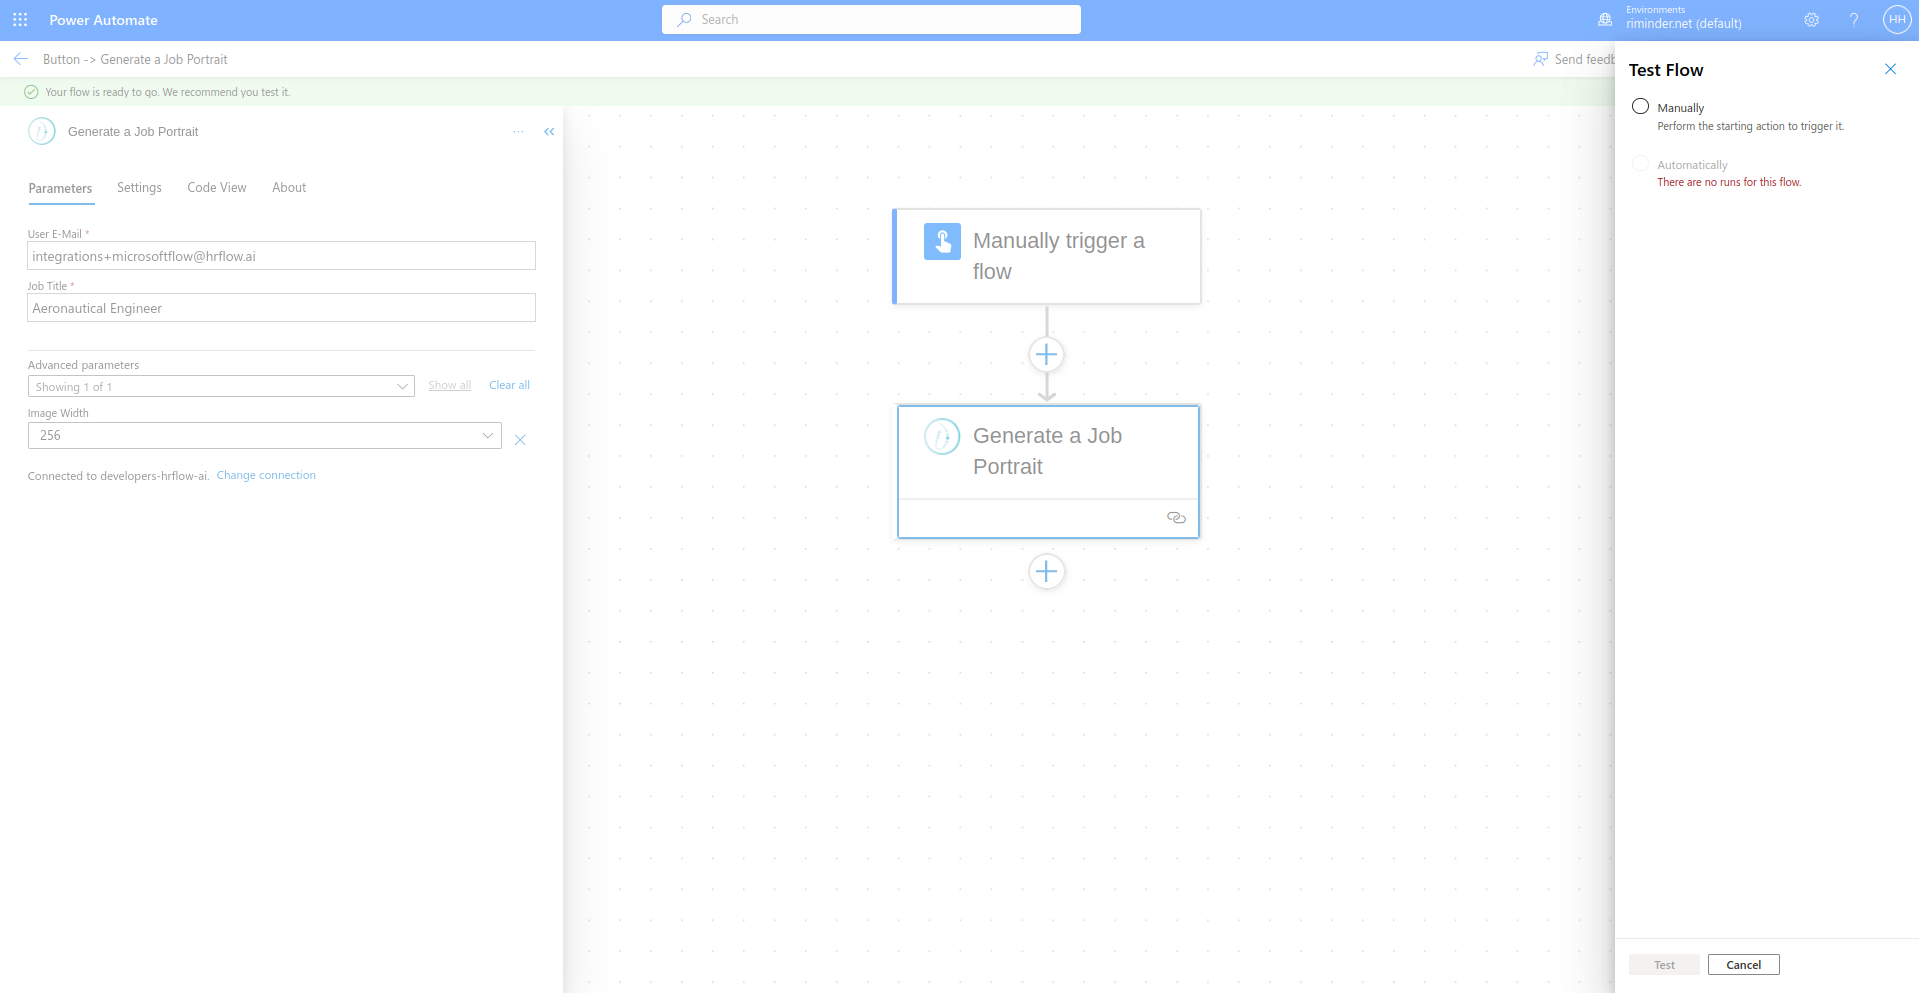
Select execution mode
Confirmation of Flow execution start

Execution
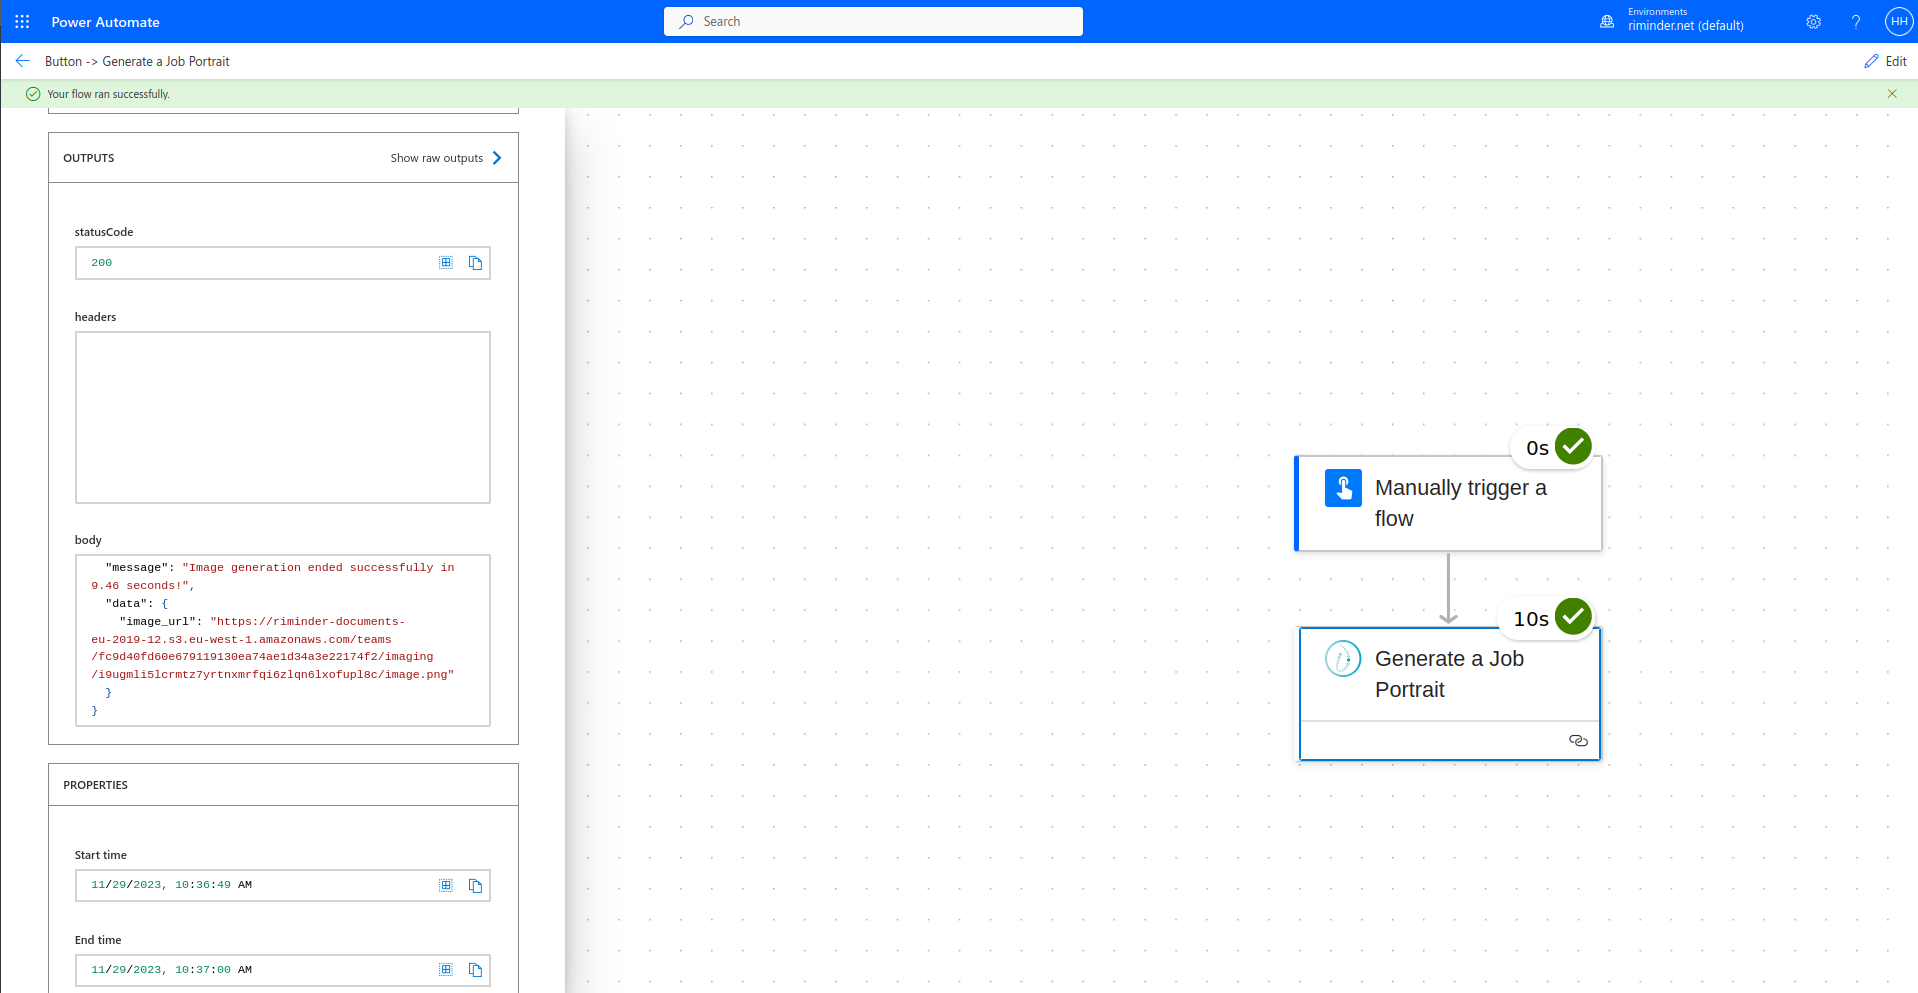
Inspect executionAfter initiating flow execution, click the Done button upon receiving the confirmation. To understand the state of a specific action, observe the circle at the top-right corner of the corresponding action's rectangle. This visual cue provides insights into the progress and completion status of individual actions within your Microsoft Power Automate workflow.
Waiting for the Text Imaging endpoint response
Inspect response
Response inspectionTo inspect the response, scroll down on the left-side dialog and locate the Outputs section. Within this section, you'll find valuable details, including execution time and status, providing comprehensive insights into the outcome of your Microsoft Power Automate workflow.
Explore the left-side dialog for a wealth of information pertaining to the execution details of your flow.
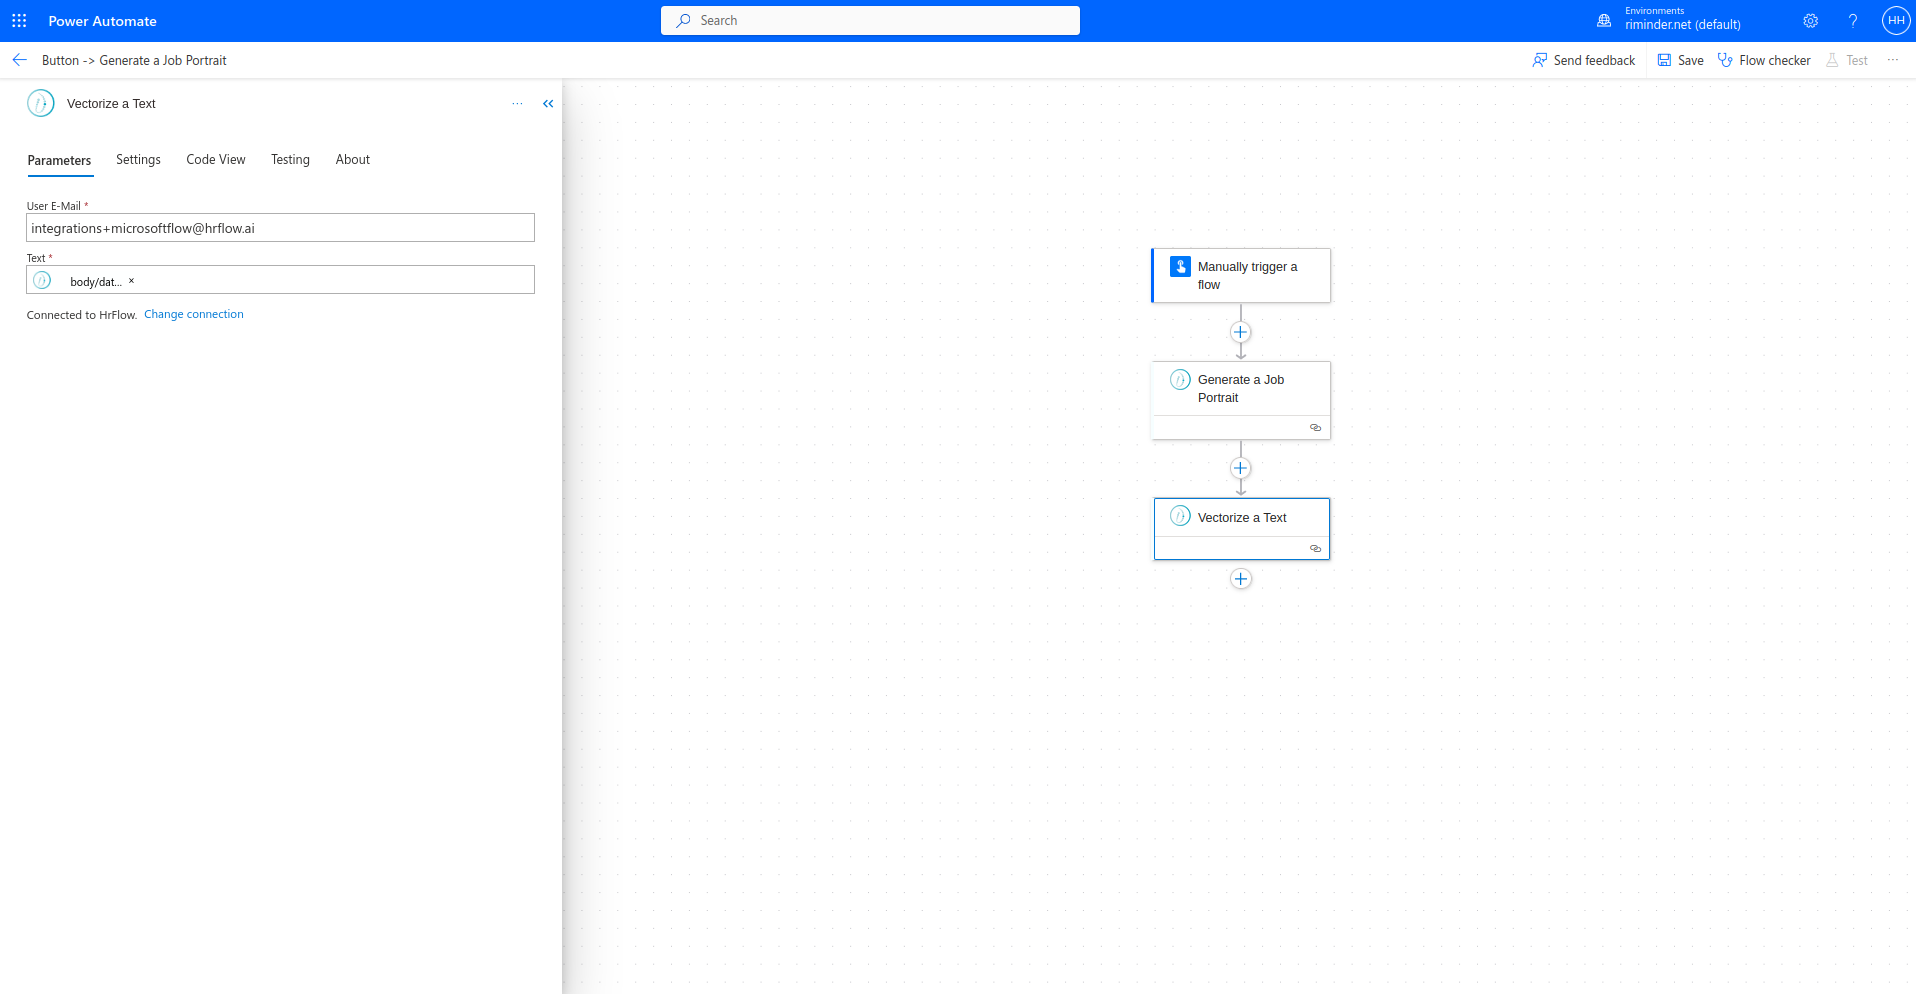
Map previous execution steps parameters
Mapping parametersWhen mapping a parameter, click on the text zone of the corresponding field. This action will reveal two icons: a lightning bolt and an fx. Utilize the lightning bolt icon to map parameters from previous execution steps, establishing dynamic connections between actions. Alternatively, leverage the fx icon to employ expressions for customizing text or dynamically mapping content, providing flexibility and customization within your Microsoft Power Automate workflow.
Open mapping parameter dialog window
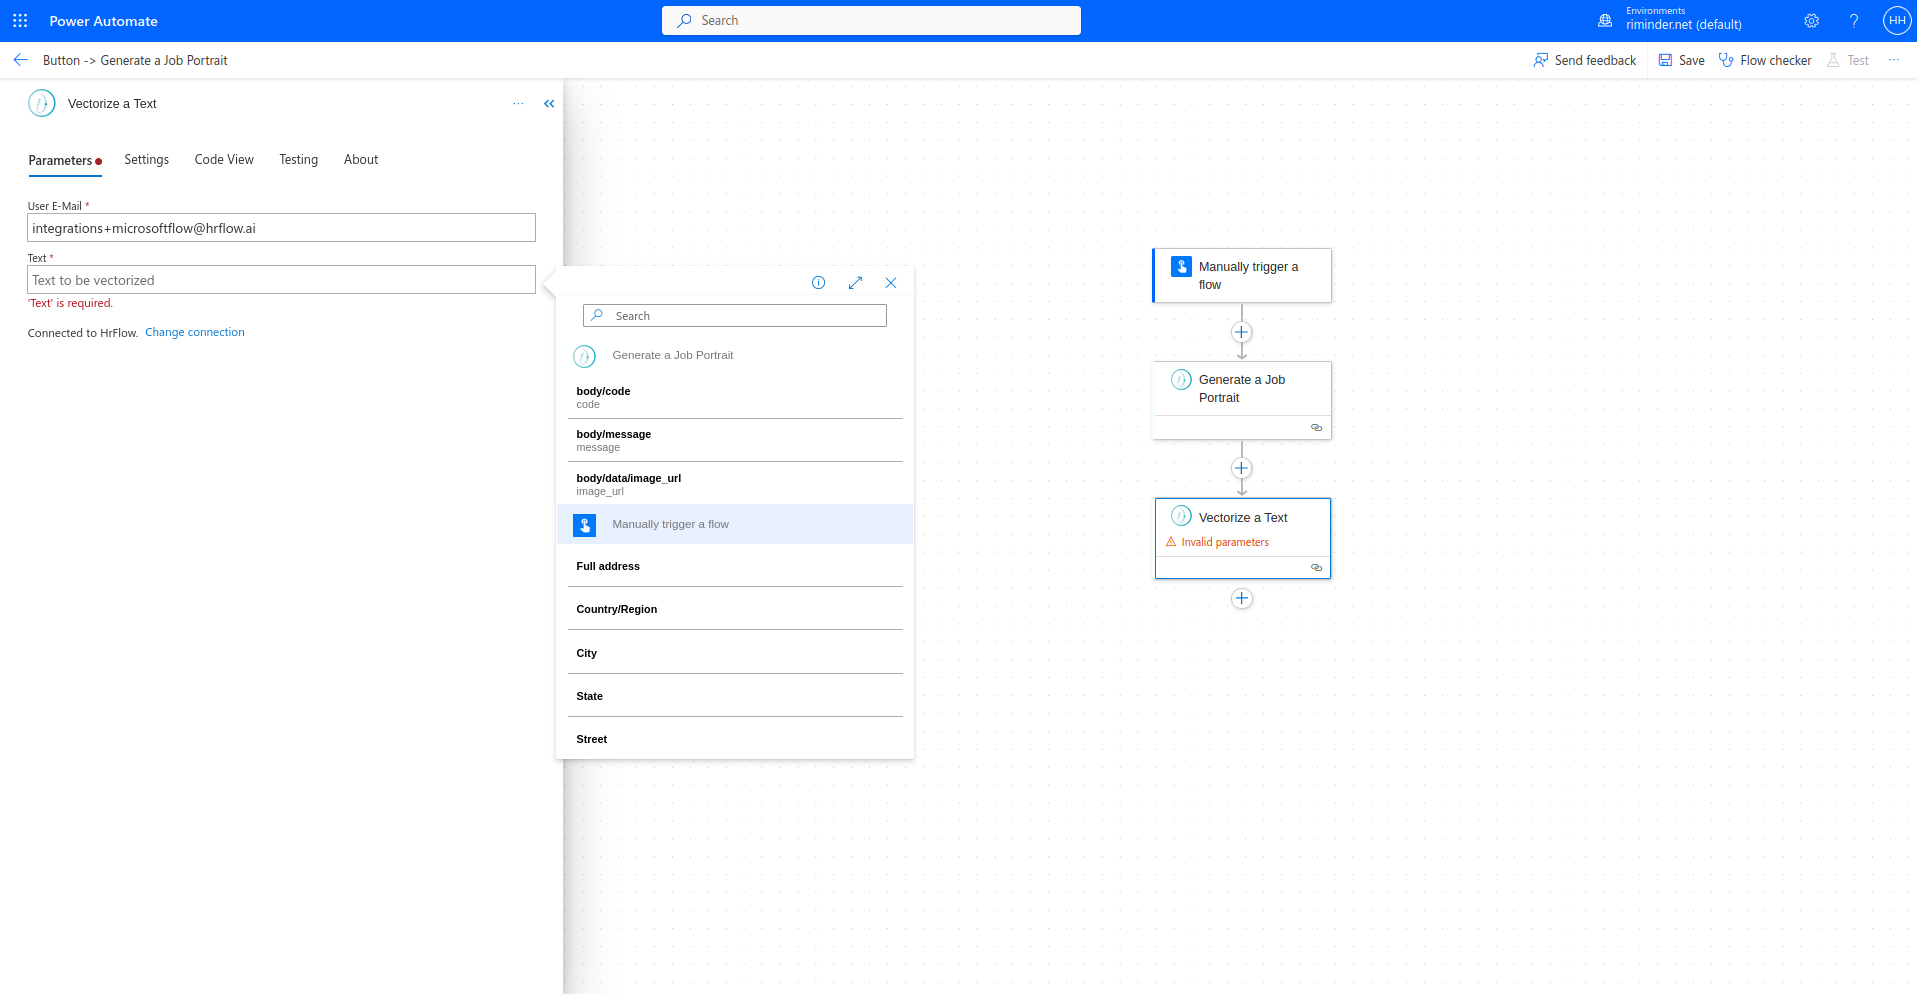
Select a parameter from previous steps as an input parameter
Quick Start examples
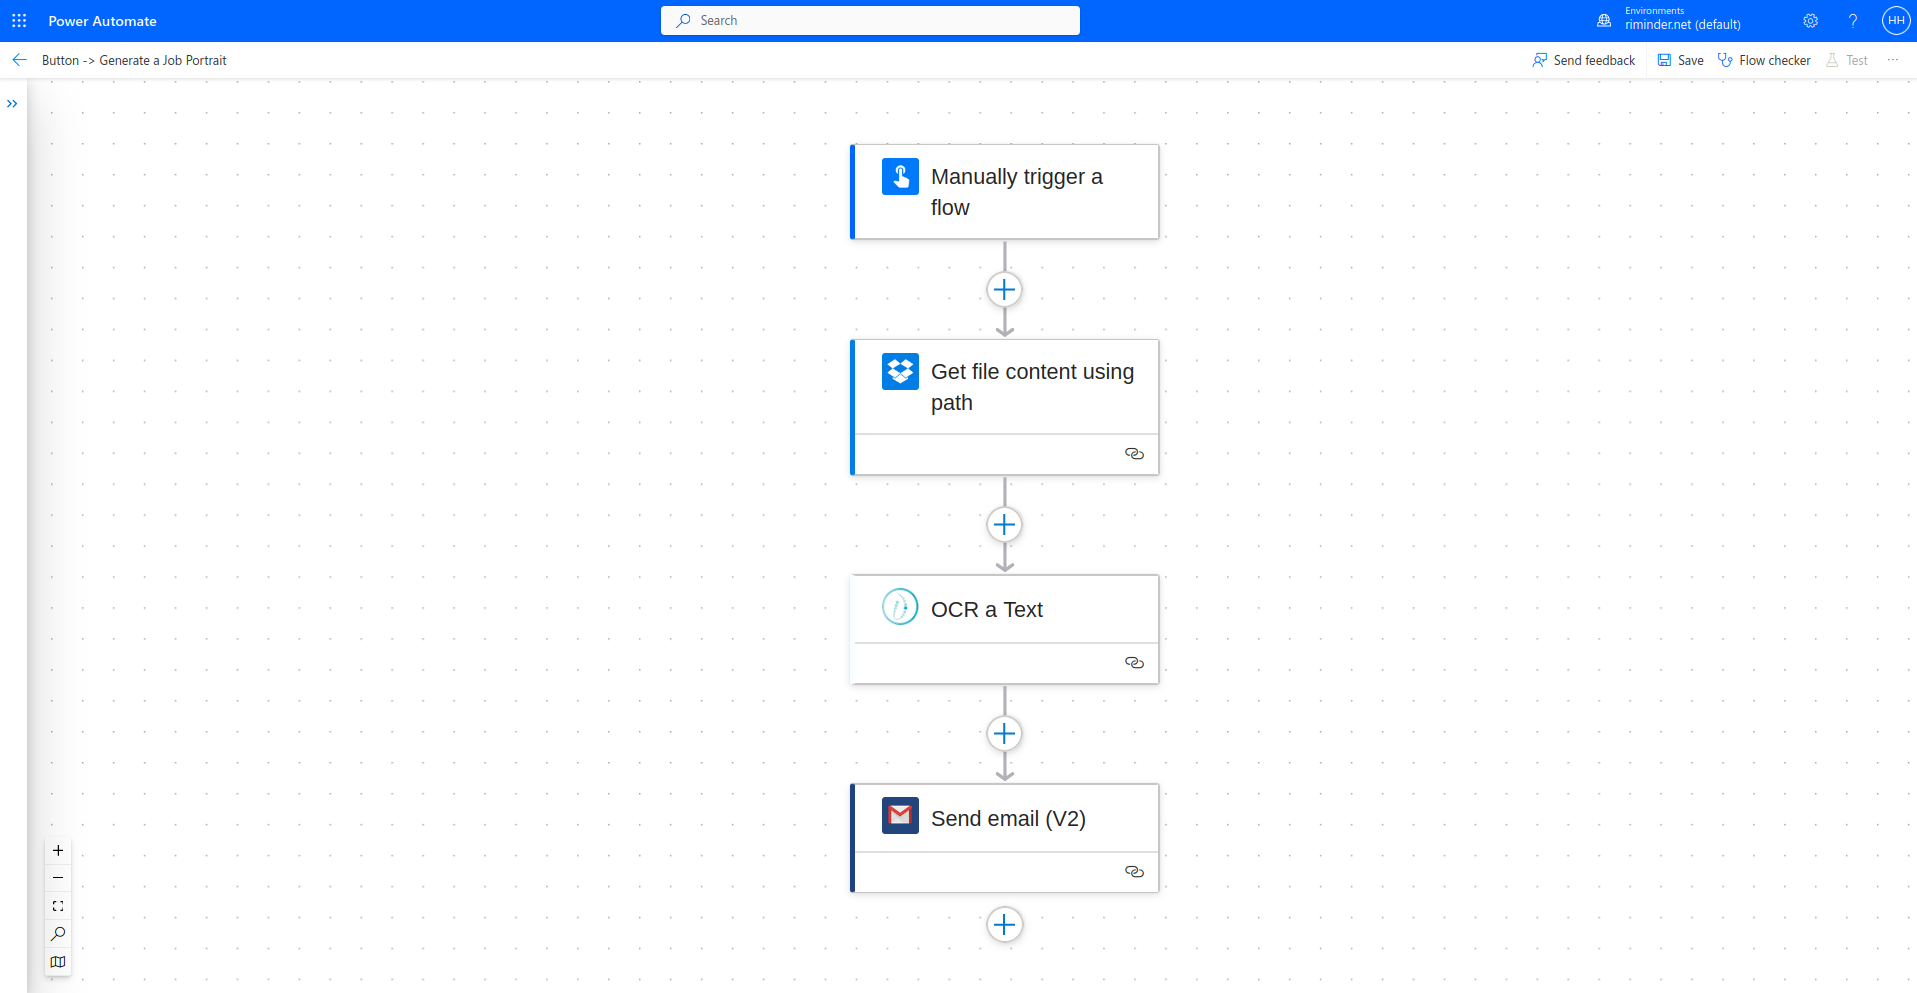
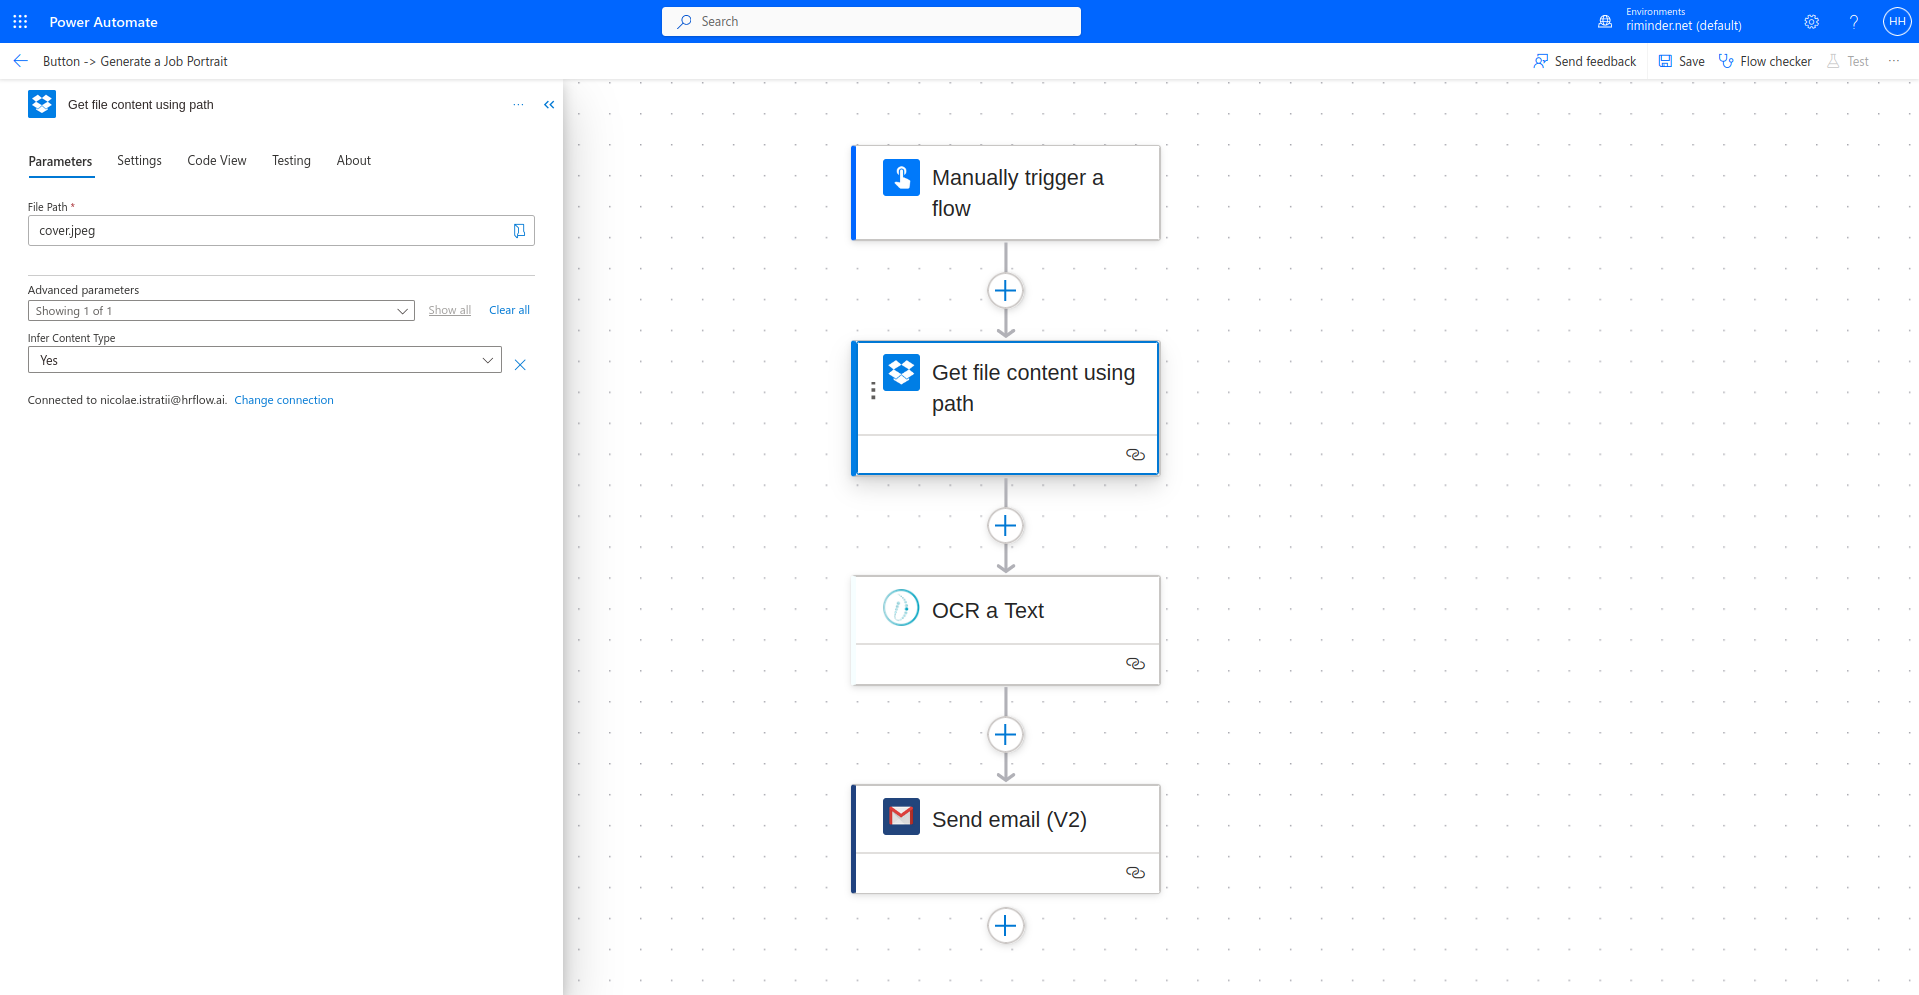
OCR a File from Dropbox and sent its text content by E-mail
Step 1: Define the Flow (Dropbox -> HrFlow.ai -> Gmail)
Step 2: Enter the path of the File to download from Dropbox
Step 3: Map the File data to the File field of the Text OCR endpoint

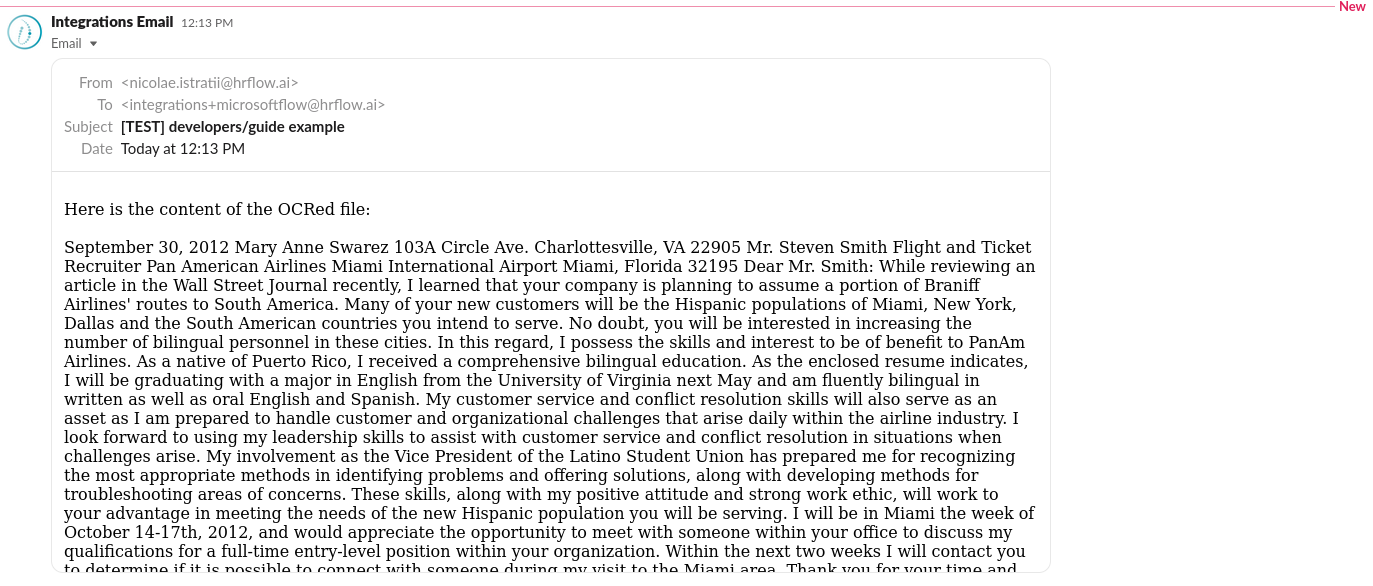
Step 4: Customize the e-mail to be sent and map the content of the File to the e-mail body
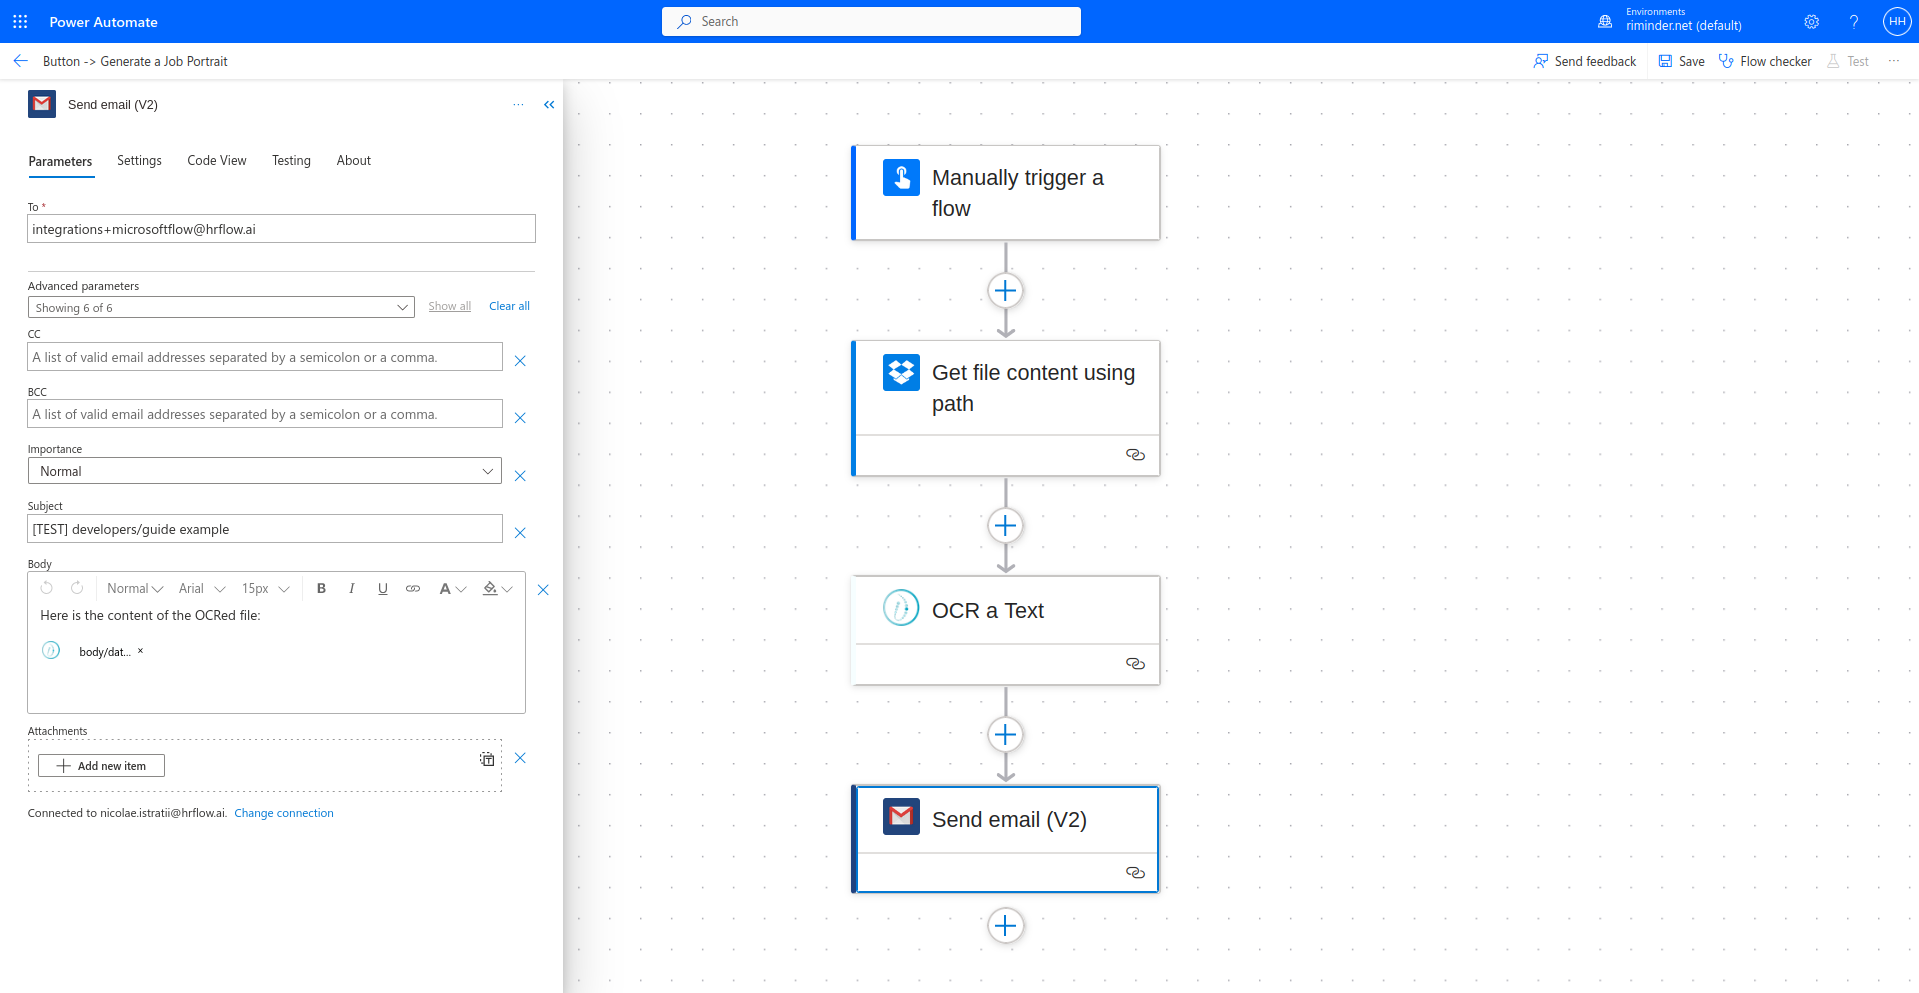
Step 5: Make sure no action has failed
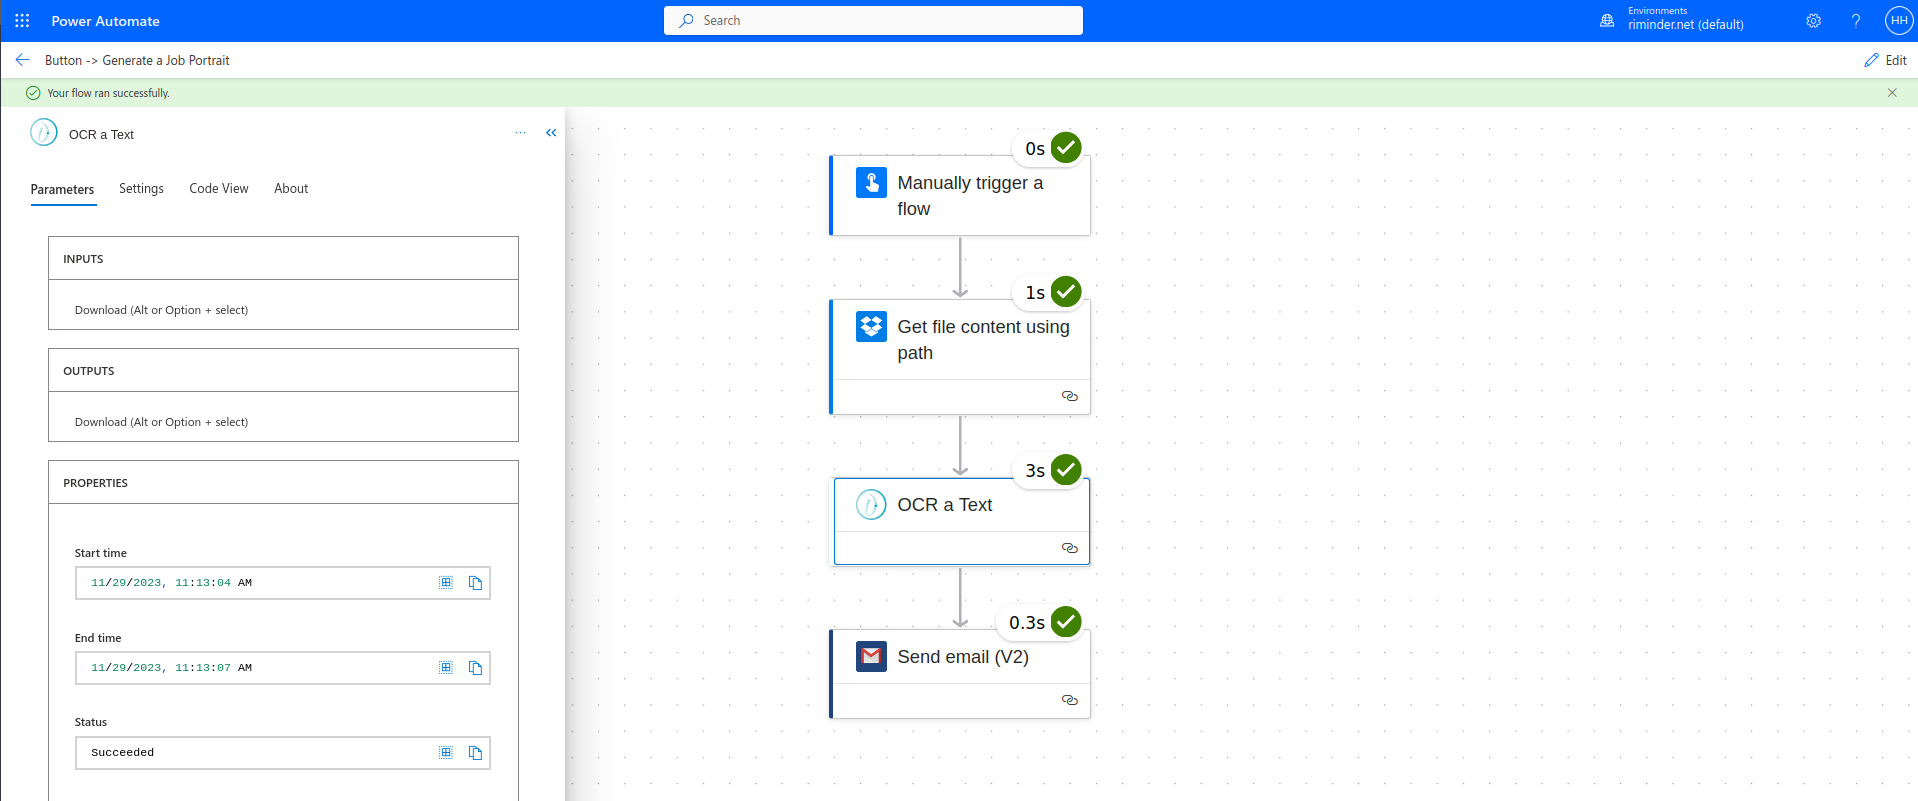
Step 6: Inspect the results
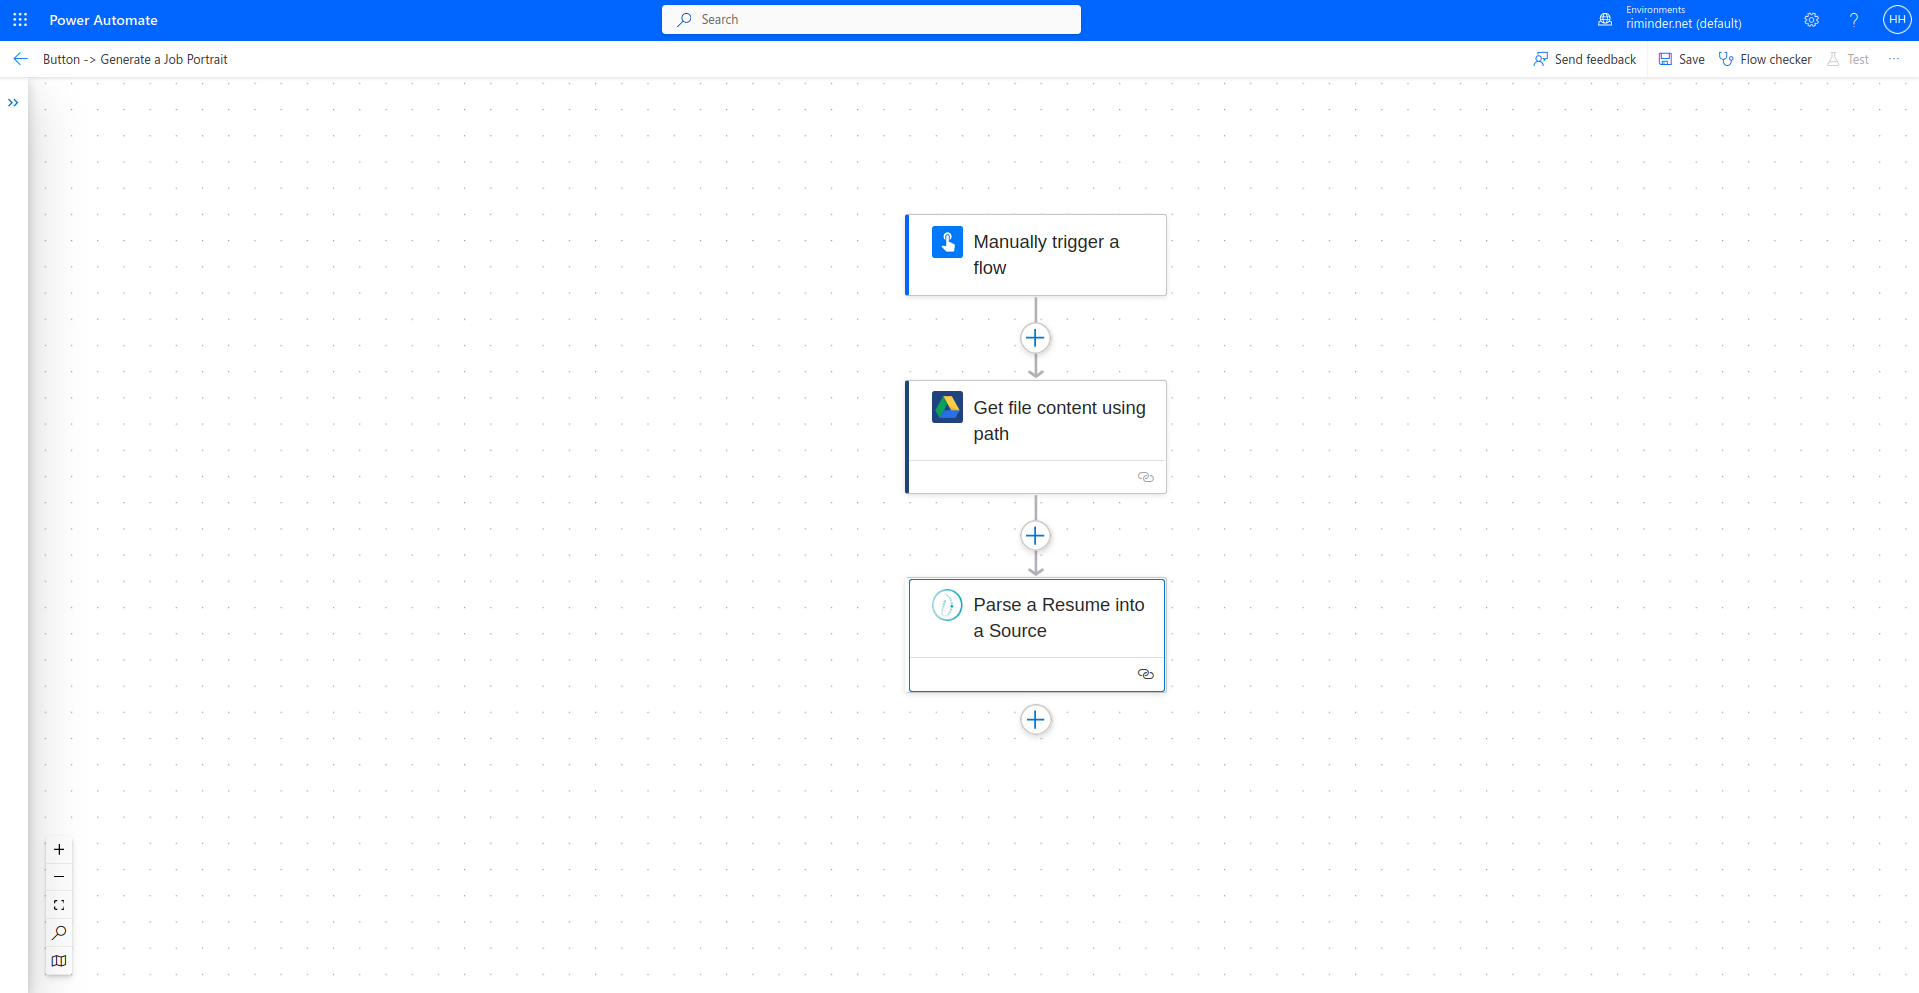
Create a Profile by parsing a Resume from Google Drive
Step 1: Define the Flow (Google Drive -> HrFlow.ai)
Step 2: Enter the path of the File to download from Google Drive
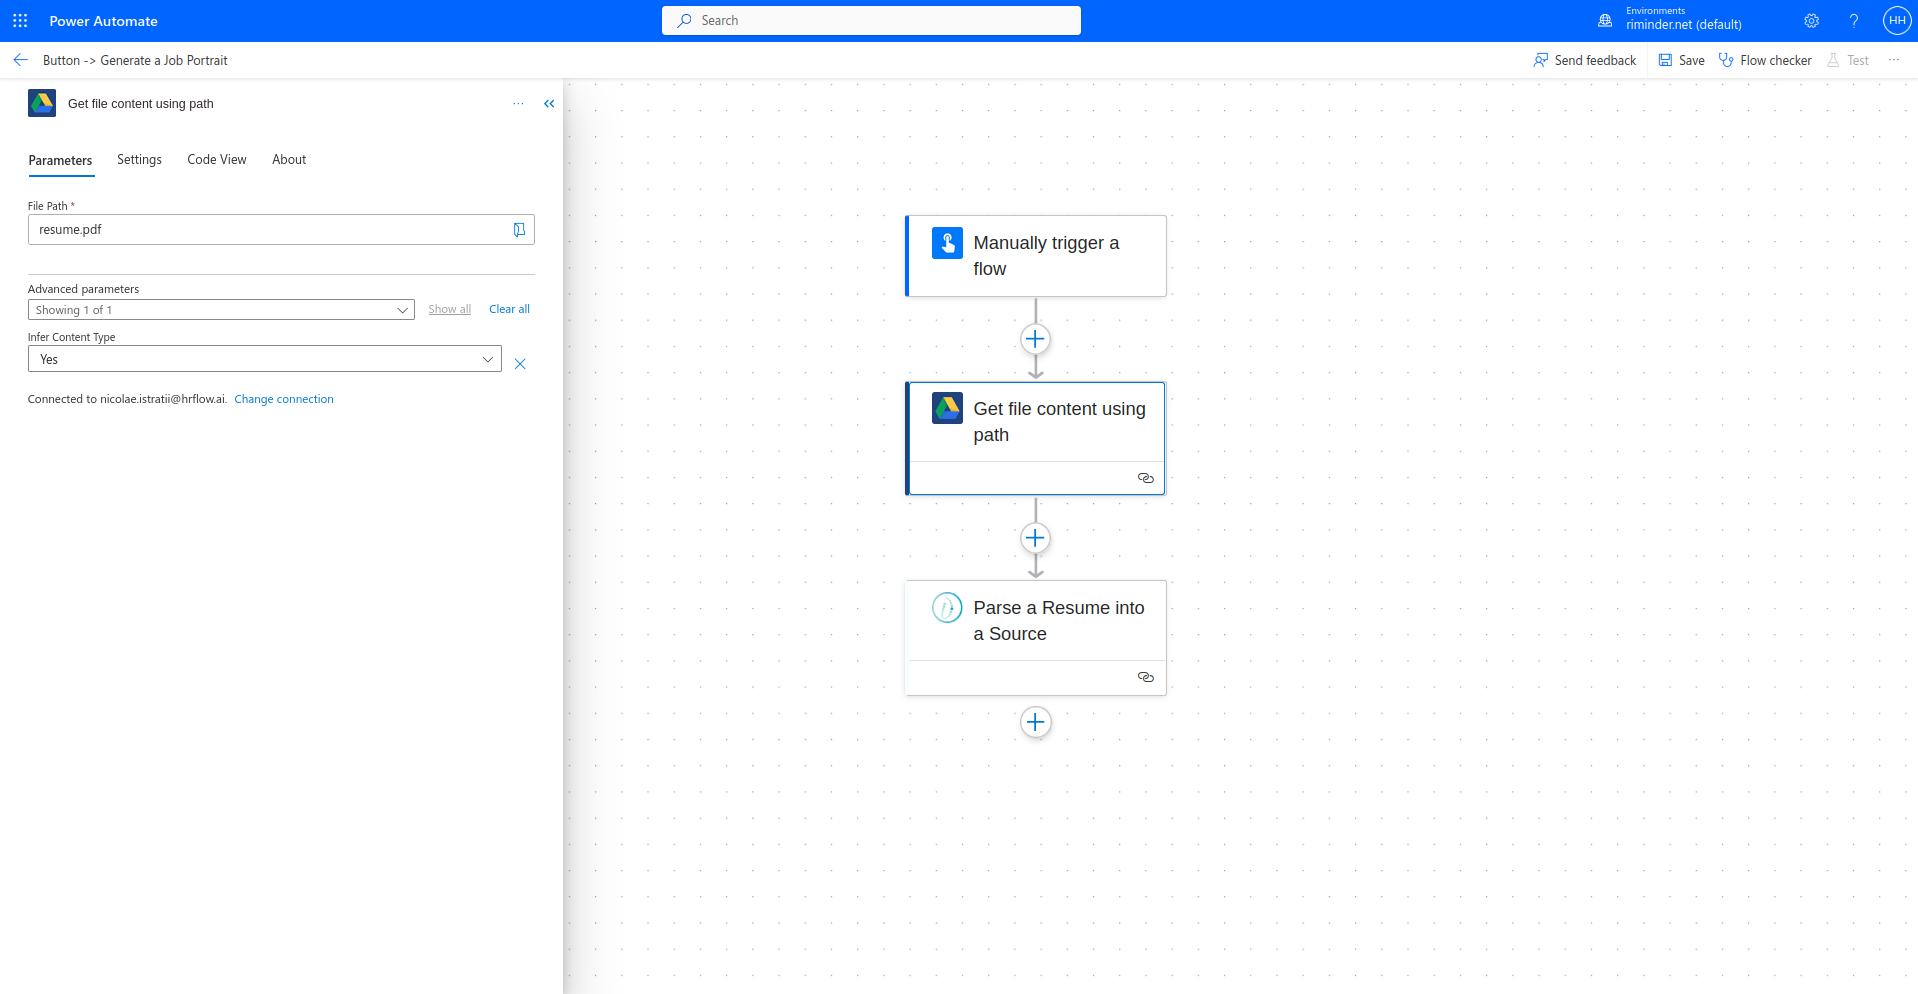
Step 3: Map the File name and the File data to the Parse a Resume in a Source endpoint
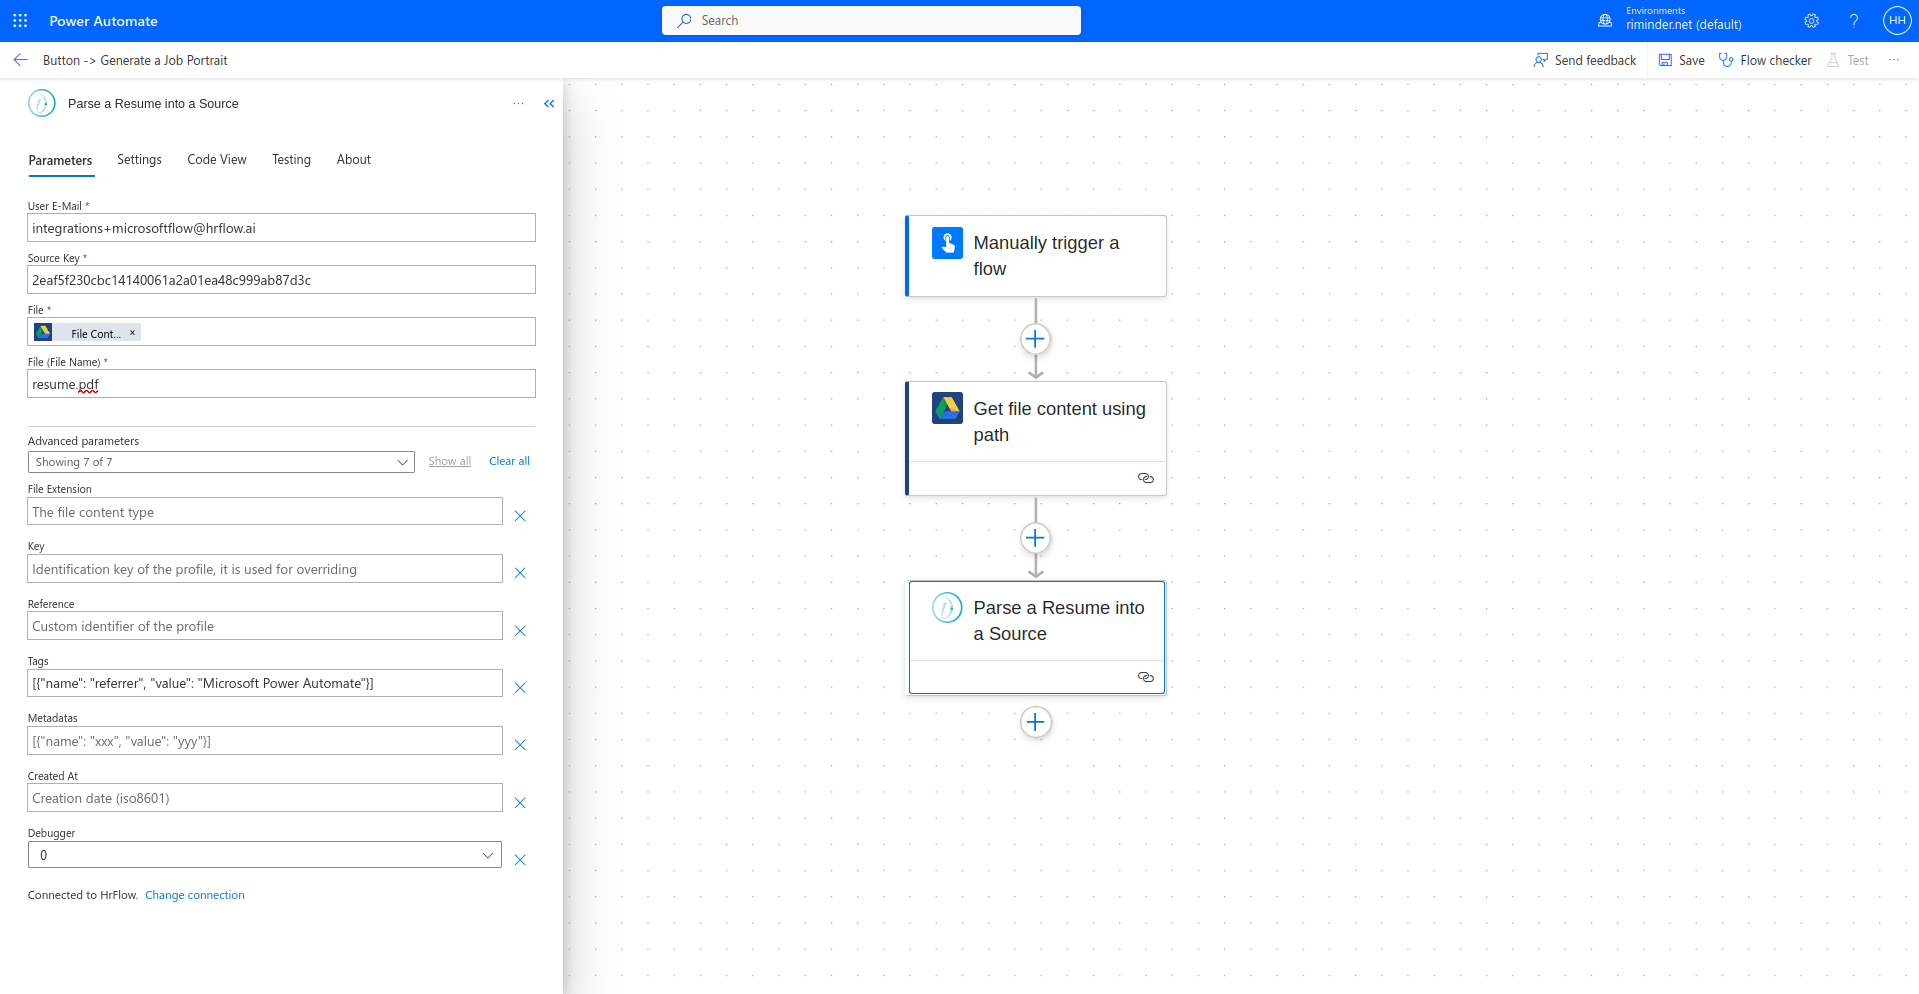
Step 4: Make sure no action has failed

Updated about 2 months ago